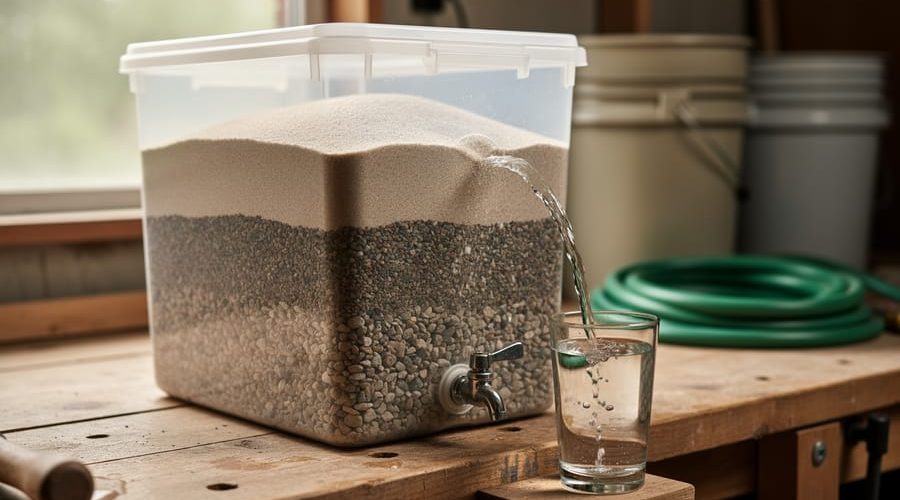
A slow sand filter can transform unsafe water into drinkable water through a natural biological process that takes between 24 to 48 hours, using nothing more than layers of sand, gravel, and a simple container. This low-tech purification method removes up to 99% of bacteria, viruses, and parasites by harnessing beneficial microorganisms that form a living biological layer at the sand surface, making it one of the most reliable DIY water treatment options for homeowners seeking sustainable, off-grid solutions.
Unlike commercial filters that require frequent cartridge replacements and ongoing costs, a properly constructed sand filter can operate for years with minimal maintenance. The system works through both mechanical and biological filtration: larger particles get trapped in the sand matrix while a biofilm layer that develops over two to three weeks consumes harmful pathogens. This makes it particularly valuable for households relying on well water, rainwater harvesting, or anyone preparing emergency water security systems.
Building your own sand filter requires basic materials available at hardware stores and about four to six hours of assembly time, even for beginners. The process demands attention to specific sand grain sizes and flow rates, but nothing that requires specialized plumbing or construction skills. While the concept dates back over 200 years, slow sand filtration remains cutting-edge in sustainable water treatment because it operates without electricity, chemicals, or complex parts that can fail.
This guide walks you through each construction step, from selecting the right container and filter media to establishing the biological layer and verifying your water quality meets safety standards.
Understanding How Slow Sand Filtration Works
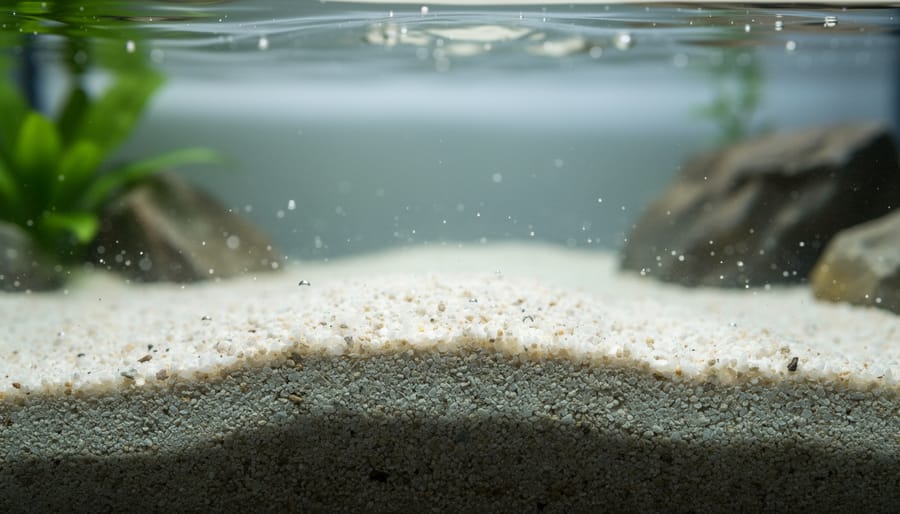
Slow sand filtration relies on nature’s cleanup crew rather than chemicals or electricity. Water moves downward through layers of sand at a crawl, typically 0.1 to 0.4 meters per hour, giving beneficial microorganisms time to do their work. This gentle pace is what makes the system effective.
The magic happens in the top few centimeters of sand, where a living biological layer called the schmutzdecke develops over two to three weeks. This brownish-grey film consists of algae, protozoa, beneficial bacteria, and trapped organic matter. As raw water passes through this biofilm, microorganisms consume pathogens, break down organic compounds, and trap fine particles. The biofilm-driven bacterial removal process can eliminate 98-99% of bacteria and significantly reduce viruses and parasites.
Below the biofilm, the sand bed continues the purification through mechanical filtration. Water squeezes through tiny spaces between sand grains, trapping sediment, algae, and remaining microorganisms. The sand also provides surface area for additional beneficial bacteria to colonize, extending the biological treatment deeper into the filter.
What slow sand filters handle well: bacteria (including E. coli and cholera), protozoan cysts (like Giardia and Cryptosporidium), suspended solids, turbidity, some viruses, and organic matter that causes taste and odor issues.
What they cannot remove: dissolved chemicals (pesticides, herbicides), heavy metals (lead, arsenic, mercury), salts, nitrates, pharmaceutical residues, or industrial pollutants. The filter works through biological and physical processes, not chemical reactions. If your water source contains these contaminants, you’ll need additional treatment methods like activated carbon filters or reverse osmosis systems alongside your sand filter.
What You’ll Need: Materials and Tools
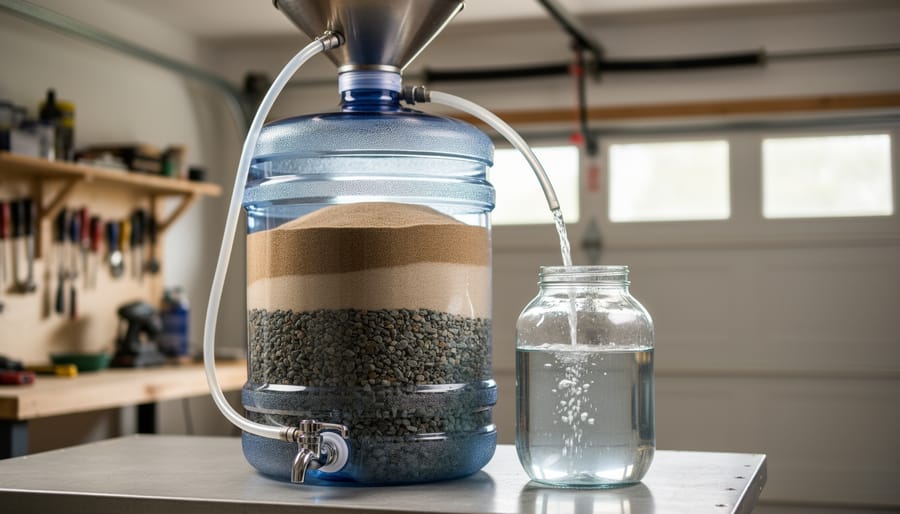
Building an effective slow sand filter requires careful selection of materials that are safe for drinking water and won’t introduce contaminants into your filtered water. The good news is that most components are readily available at hardware stores, aquarium suppliers, or online retailers, and you can construct a functional system for under $100 depending on the size you choose.
Your most critical component is a food-grade container that will serve as the filter housing. A 5-gallon food-grade bucket with a lid works well for small households, while a 20-30 gallon food-safe drum or barrel provides greater capacity. The container must be opaque to prevent algae growth, and it should never have held chemicals, petroleum products, or toxic substances. Look for the recycling code 2 (HDPE) or 4 (LDPE) on the bottom, or source new food-grade containers from restaurant supply stores where they’re often sold for bulk food storage.
Here’s what you’ll need to gather before starting construction:
Materials:
- Food-grade container (5-30 gallon capacity, opaque, with lid)
- Fine sand: 18-24 inches depth, grain size 0.15-0.35mm (avoid construction sand)
- Coarse gravel: 2-3 inches depth, pea-sized stones washed clean
- Fine gravel: 2-3 inches depth, aquarium gravel works well
- Spigot or ball valve (food-safe plastic or stainless steel)
- PVC pipe sections (½-inch diameter) for outlet system
- Rubber gaskets and washers for watertight seal at valve
- Landscape fabric or fine mesh screen (optional, to protect sand layer)
Basic Tools:
- Drill with appropriate bit size for valve installation
- Adjustable wrench
- Silicone sealant (food-grade, aquarium-safe)
- Measuring tape and permanent marker
- Large buckets for washing gravel and sand
The most challenging material to source correctly is the filtration sand itself. You need fine sand with a specific effective size between 0.15mm and 0.35mm, which is finer than playground or construction sand. Pool filter sand often meets these specifications and is widely available at pool supply stores. Alternatively, aquarium sand labeled for freshwater tanks typically has the right grain size. Avoid beach sand due to salt content and unknown contaminants, and never use sandbox sand, which is too coarse and may contain additives.
When purchasing gravel layers, stick with natural, washed stone. Aquarium gravel is ideal because it’s already cleaned and sized appropriately, though it costs more than bulk landscape gravel. If using landscape materials, choose rounded river rock rather than crushed stone, as sharp edges can create channels that allow water to bypass the filtration media.
Safety Precautions and Important Warnings
Before you begin filtering water for drinking, understand what slow sand filtration can and cannot do. This natural method excels at removing bacteria, protozoa, and sediment, but it has critical limitations that could put your health at risk if ignored.
Your water source matters enormously. Rainwater, spring water, and surface water from lakes or streams can work well with slow sand filtration, though each carries different risks. If you plan to turn rain into drinking water the filter handles biological contamination effectively once the biofilm matures. However, urban rainwater may contain roof pollutants or airborne chemicals the filter won’t catch.
Never use water from sources near industrial sites, agricultural runoff areas, or known contamination zones. Understanding why water can make you sick helps you assess whether your source is appropriate for this filtration method.
Test your filtered water regularly, especially during the first three months. A simple bacteria test kit costs less than twenty dollars and confirms whether your biofilm is working properly. For comprehensive safety, consider combining slow sand filtration with other methods. While this system provides excellent emergency water purification adding a final stage like UV treatment or boiling gives you multiple barriers against contamination.
If you’re immunocompromised, pregnant, or filtering water for infants, consult a water quality professional before relying on any DIY system. Some situations demand certified treatment rather than homemade solutions.
Step-by-Step Construction Process
Preparing Your Filter Container
Select a food-grade plastic barrel or bucket with a 20-50 gallon capacity, look for recycling codes 1, 2, 4, or 5 and confirm it never held chemicals. A translucent container helps you monitor water levels, but opaque works fine if stored in a shaded area to prevent algae growth.
Start by scrubbing the entire interior with hot water and unscented dish soap. Rinse thoroughly multiple times until no soap residue remains. Never use bleach or harsh cleaners that could contaminate your drinking water.
Mark your outlet hole location 4-6 inches from the bottom, this height keeps the drainage point below your sand layer while leaving space for gravel underneath. Use a hole saw or stepped drill bit sized to match your valve fitting, typically ¾ inch. Drill slowly to avoid cracking the plastic, supporting the container wall from inside with a block of wood.
Deburr the hole edges with sandpaper, then test-fit your spigot or valve assembly. Apply plumber’s tape to the threads before inserting, and tighten by hand plus a quarter turn with a wrench. Check for leaks by filling the container with clean water and letting it sit for an hour.
Layering the Filtration Media
Start by thoroughly washing each filtration material separately before placing it in your container. Rinse the coarse gravel in batches using a bucket, agitating it with your hands while running clean water through until the runoff is clear. Repeat this process with the fine gravel, then with the sand. The sand requires the most attention, it may need ten to fifteen rinses to remove silt and dust that would otherwise cloud your filtered water.
Once your materials are clean, begin layering from the bottom up. Pour the coarse gravel first, spreading it gently to create an even 4-inch base layer. This layer supports the finer materials above and prevents sand from clogging your outlet valve. Use a flat piece of cardboard or your hand to distribute the gravel smoothly across the container bottom.
Next, add 2 to 3 inches of fine gravel on top of the coarse layer. Pour slowly from a low height to avoid disturbing the layer beneath. You can place a plate or plastic sheet on the coarse gravel temporarily while pouring, then carefully remove it to protect the boundary between layers.
The sand layer forms the heart of your filter and should be 18 to 24 inches deep for effective filtration. Add it gradually in small batches, again using a barrier method or pouring over your hand to diffuse the force. Level the sand surface carefully, an uneven bed creates channels where water flows faster, bypassing proper filtration.
Finally, add 2 to 4 inches of standing water above the sand surface before starting the ripening period. This water layer protects the biofilm that will develop and maintains consistent filtration conditions.
Installing the Outlet and Water Flow System
The outlet valve must sit at least 5 centimeters above the top of your sand layer to maintain constant water submersion, this standing water protects the biofilm that does the actual filtration work. Mark this height on your container’s exterior before drilling.
Install a ball valve or spigot through a hole drilled near your marked line. Use food-grade silicone sealant around both sides of the fitting to prevent leaks. The valve should protrude inside just enough to draw from the gravel layer beneath the sand, not from the sand itself.
Control flow rate through this outlet valve, aim for roughly 0.1 to 0.4 meters per hour through the sand bed. For a typical home filter, this translates to about one liter every 30 to 60 minutes. Too fast destroys filtration effectiveness; too slow risks stagnation. Adjust the valve opening until you achieve a steady drip or thin stream.
After filling your filter with water, verify that the sand surface stays covered by at least 5 centimeters of standing water even when the outlet runs continuously. This water layer prevents air channels from forming in the sand, which would bypass the biofilm and compromise purification.
Initial Ripening Period
After you’ve assembled your sand filter, resist the urge to drink the water immediately. The filter needs a crucial maturation period of 2-4 weeks before it becomes fully effective at removing pathogens.
During this ripening phase, beneficial microorganisms colonize the top few inches of sand, forming a biological layer called the schmutzdecke. This biofilm is what transforms your sand bed from a simple strainer into an active purification system. The microscopic community consumes bacteria, viruses, and organic matter that physical filtration alone would miss.
Run water through your filter continuously during ripening, about 0.1 to 0.4 meters per hour is ideal. The water doesn’t need to go to waste; use it for gardens or non-drinking purposes. You’ll notice the filtered water gradually becoming clearer as the biofilm matures.
Temperature affects ripening speed. Warmer conditions (20-25°C) accelerate bacterial colonization, while cold water slows the process. In winter, expect the upper end of the 4-week timeline.
Don’t clean or disturb the sand surface during this period. You’re cultivating a living filter, and patience here determines its effectiveness for months to come.
Operating and Maintaining Your Sand Filter
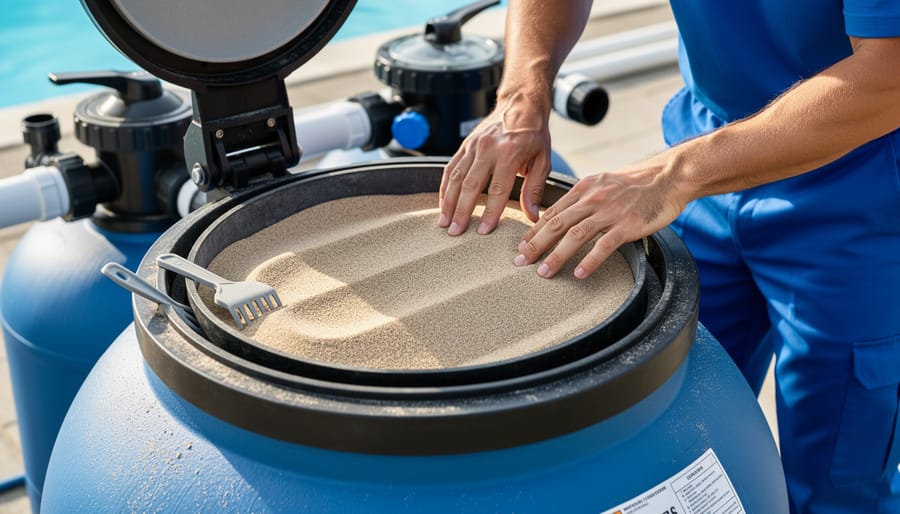
Once your filter completes its initial ripening period, maintaining it is straightforward if you establish a simple routine. The key to long-term performance is maintaining steady water flow and monitoring the sand bed’s condition.
Your filter works best with a continuous, slow flow rate of about 0.1 to 0.4 meters per hour through the sand bed. In practical terms, this means the water level should drop very slowly, taking several hours to filter through completely. If you notice the flow rate slowing significantly over time, it usually means the biofilm layer at the top has become too thick and needs cleaning.
Watch for visual cues that indicate when maintenance is needed. The water above the sand should remain relatively clear. If it turns noticeably murky or develops an odor, or if the flow rate drops to less than half its normal speed, it’s time to clean the top layer. Most home systems need this cleaning every four to eight weeks, depending on your source water quality and usage volume.
To clean the surface, carefully scrape off the top half-inch to one inch of sand along with the biofilm layer. Use a clean plastic scoop or spatula, working gently to avoid disturbing the sand below. Remove this material and discard it. After cleaning, you’ll notice the flow rate increases immediately. The biofilm will rebuild itself within a few days to two weeks, though the filter continues working during this recovery period.
Keep these maintenance tasks on a regular schedule:
- Check flow rate weekly by timing how long it takes to filter a known volume
- Inspect water clarity daily during the first month, then weekly once established
- Clean the top sand layer when flow drops below 50% of normal rate
- Add replacement sand after three to four cleanings to maintain proper bed depth
- Test filtered water quality monthly, or after any maintenance work
If your filter clogs frequently, your source water likely contains too much sediment. Consider pre-filtering through cloth or letting water settle in a separate container before adding it to the sand filter. Never let the sand bed dry out completely, as this kills the beneficial bacteria and requires starting the ripening process over. Keep at least two inches of water above the sand surface at all times, even when not actively filtering.
Testing and Verifying Water Safety
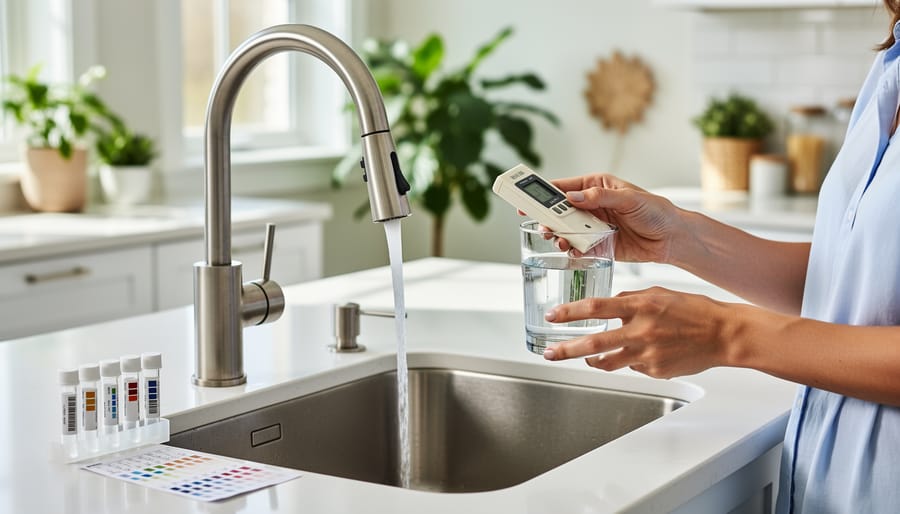
Testing your filtered water is essential before drinking it. Even a properly built slow sand filter needs verification to confirm the biological layer has matured and the system is removing contaminants effectively.
Start with visual inspection during the first month of operation. Clear, colorless water emerging from your outlet is a positive sign, but cloudiness doesn’t always indicate failure, it may mean the biofilm hasn’t fully developed yet. Check the top surface of your sand bed weekly; a thin, brownish layer (the schmutzdecke) should appear within two to four weeks, signaling active biological filtration.
Monitor your flow rate as an operational indicator. A healthy slow sand filter produces between 0.1 to 0.4 meters per hour, or roughly one to four liters per square meter of surface area per hour. If flow drops significantly, the top layer may need scraping. Conversely, water rushing through too quickly means insufficient contact time for proper filtration.
For drinking water safety, perform bacterial testing after the ripening period and monthly thereafter. Total coliform tests are widely available and indicate whether harmful bacteria are present. Your filtered water should show zero coliform colonies. Turbidity should measure below 1 NTU (nephelometric turbidity unit) for safe drinking water.
If any test shows contamination, do not drink the water. Re-check your construction for leaks, verify the sand bed depth meets specifications, and allow additional ripening time. Consider sending samples to a certified laboratory for comprehensive analysis if problems persist, especially testing for specific pathogens like E. coli and giardia.
Frequently Asked Questions
How long does a slow sand filter last before needing replacement?
The sand itself can last 5-10 years or longer with proper maintenance. You’ll only need to scrape and clean the top layer periodically (every few weeks to months depending on water quality), removing about half an inch of sand each time until the bed becomes too shallow.
How much water can a DIY slow sand filter produce daily?
A typical household-sized filter with a 2-foot diameter surface can produce 10-20 gallons per day. The flow rate should stay around 0.1-0.4 meters per hour to allow proper biological filtration.
Can slow sand filtration remove chemicals like chlorine or pesticides?
No, slow sand filters primarily remove bacteria, protozoa, and sediment through biological action. They don’t effectively remove dissolved chemicals, heavy metals, or synthetic pollutants, so they work best with naturally clean source water or when combined with other treatment methods like activated carbon.
Can I use rainwater with a slow sand filter?
Yes, rainwater works well with slow sand filtration. Many people combine collection systems that turn roof to safe drinking water with slow sand filters for a complete sustainable water solution, though you should still test the filtered water regularly.
These answers reflect real-world experiences with DIY filtration systems. Beyond these common questions, remember that each filter behaves slightly differently based on your water source quality, ambient temperature, and how consistently you maintain the system. If you notice declining performance or unusual odors, it’s time to check your biofilm layer and ensure proper flow rates. Most problems trace back to either inadequate ripening time or inconsistent water flow disrupting the biological processes.
Building your own slow sand filter puts sustainable, cost-effective water purification directly in your hands. Once constructed, this natural filtration system requires minimal energy, just gravity, and can operate for years with basic maintenance that costs almost nothing. You’re not buying replacement cartridges or relying on electricity, which makes it an ideal solution for anyone seeking greater water independence.
Remember that success starts with choosing an appropriate water source. Rainwater, stream water, or well water free from chemical contamination works best. Municipal water that’s already treated doesn’t need sand filtration, and heavily polluted sources require professional treatment systems instead.
Regular testing remains your safety net. Even a well-functioning filter needs periodic verification to confirm it’s protecting your household effectively. Make water quality checks part of your routine, just like cleaning the top sand layer.
This project represents more than clean water, it’s a practical step toward self-sufficiency and reduced environmental impact. You’re working with natural processes rather than against them, creating a filtration system that improves over time as the biological layer matures. Whether you’re enhancing your emergency preparedness or simply reducing your ecological footprint, a DIY slow sand filter demonstrates that sustainable living solutions can be both accessible and genuinely effective.
