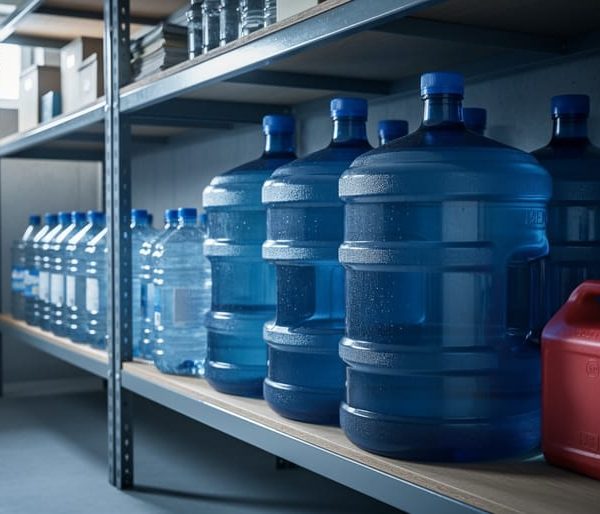
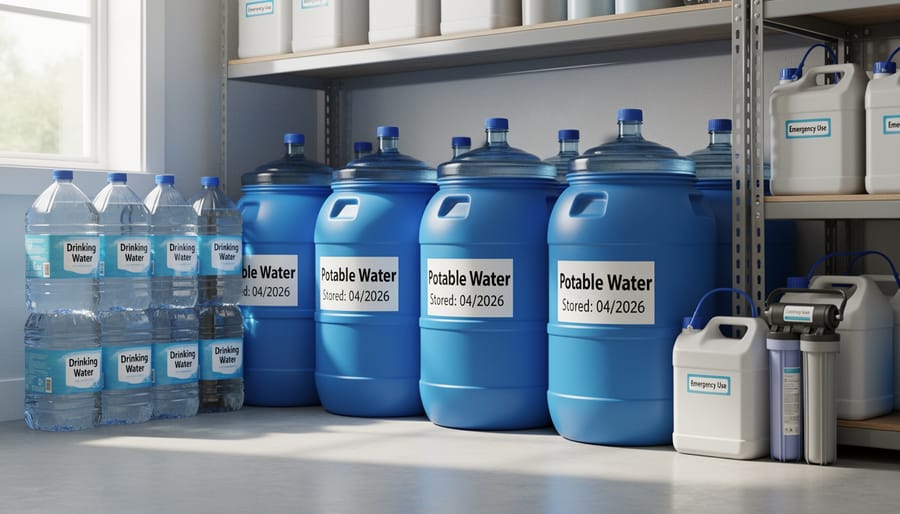
Store one gallon of water per person per day for at least three days in food-grade containers kept in cool, dark locations away from direct sunlight and chemicals. Replace stored water every six months to maintain freshness, and keep containers sealed until needed to prevent contamination.
Identify emergency water sources in your home before disaster strikes. Your water heater holds 30-50 gallons of drinkable water accessible through the drain valve at the bottom. Toilet tanks—not bowls—contain clean water if no chemical cleaners are present. Ice cubes, water from canned fruits and vegetables, and liquid from unopened beverage containers all provide safe hydration options when infrastructure fails.
Map outdoor water sources within walking distance of your property. Swimming pools, hot tubs, and rainwater collection barrels offer large quantities for non-drinking purposes like sanitation and washing. Natural sources including streams, rivers, ponds, and lakes require treatment before consumption but remain valuable during extended emergencies when stored supplies run dry.
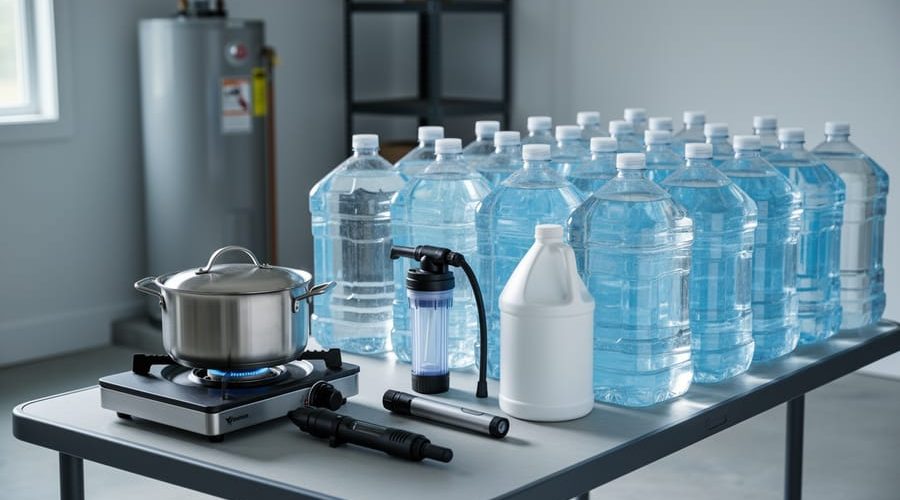
Equip your household with multiple purification methods since no single system works in every scenario. Boiling water for one full minute kills most pathogens but requires fuel and time. Water filtration devices remove bacteria and parasites while improving taste. Chemical treatments using bleach or purification tablets work when heat sources aren’t available. Ultraviolet purifiers offer cutting-edge solutions for those seeking sustainable, reusable technology.
Understanding these water sourcing and collection fundamentals transforms anxiety about emergency scenarios into confident preparedness. The following comprehensive guide walks you through building a complete emergency water plan tailored to your household’s specific needs and circumstances.
Understanding Your Emergency Water Needs
Daily Water Requirements Per Person
Understanding how much water you actually need during an emergency is the foundation of any preparedness plan. The standard recommendation is one gallon per person per day, which covers both drinking and basic sanitation needs. This baseline assumes moderate temperatures and minimal physical exertion.
However, your actual requirements may be significantly higher depending on your circumstances. If you live in a hot climate or face emergency situations during summer months, plan for at least two gallons per person daily. The body loses more water through perspiration in warm conditions, making hydration even more critical.
Physical activity also dramatically increases water needs. If you’re clearing debris, hiking to safety, or performing other strenuous tasks, your consumption could double or triple. Children, pregnant women, and nursing mothers require additional water beyond the baseline amount. Anyone with medical conditions or taking certain medications may also need extra hydration.
For a realistic emergency supply, calculate based on your household’s specific needs rather than generic recommendations. A family of four in a temperate climate should store a minimum of 28 gallons for a week-long emergency, though 56 gallons provides a safer margin. Remember that stored water serves multiple purposes beyond drinking, including food preparation, hygiene, and potential medical needs, making generous calculations the wisest approach to emergency preparedness.
How Long to Prepare For
The amount of water you should store depends on the types of emergencies common in your area and your household’s unique needs. At minimum, every home should maintain a 3-day supply, which equals one gallon per person per day for drinking and basic sanitation. This baseline covers short-term disruptions like power outages or temporary water main breaks that affect most communities.
For regions prone to hurricanes, earthquakes, or severe winter storms, a 2-week supply provides crucial security. These disasters often damage infrastructure extensively, delaying restoration efforts. Calculate 14 gallons per person, plus additional amounts for pets and special medical needs like dialysis or wound care.
Consider extended preparedness if you live in wildfire zones, areas with aging water systems, or locations vulnerable to prolonged droughts. A one-month supply offers peace of mind and genuine self-sufficiency during complex recovery periods.
Regional risks matter significantly. Coastal residents should prepare for hurricane season disruptions, while those in earthquake-prone areas need supplies that can withstand structural damage. Households relying on well water should account for power outages affecting pumps. Start with your 3-day foundation, then gradually build toward longer-term goals as budget and storage space allow, prioritizing the most likely scenarios for your specific location.
Emergency Water Sources Inside Your Home
Water Heater Reservoir
Your standard water heater holds 30-50 gallons of potable water, making it an excellent emergency resource. However, accessing this supply requires careful attention to safety procedures.
Before beginning, turn off the water heater’s power supply at the circuit breaker for electric models or switch the gas valve to “pilot” for gas units. This prevents damage to the heating elements when the tank empties. Next, shut off the cold water inlet valve at the top of the tank to prevent contaminated water from entering your clean supply.
Locate the drain valve near the bottom of the tank. Attach a garden hose to this valve and position the other end in a bucket, bathtub, or outside area lower than the valve. Gravity will facilitate drainage. Open the drain valve slowly, then open a hot water tap somewhere in your home to allow air into the system, which helps water flow smoothly.
The initial water may contain sediment that has settled at the tank’s bottom. Let this flow into your bucket first, then switch to clean containers once the water runs clear. This stored water is already treated and safe to drink, though you may want to filter it for taste and additional sediment removal.
Remember to drain only what you need immediately, as the remaining water stays protected inside the sealed tank until required.
Pipes and Plumbing System
When municipal water stops flowing, your home’s plumbing system still contains several gallons of usable water. To access this hidden reserve, start by turning off your main water valve to prevent contamination from outside sources. Open the highest faucet in your home first to let air into the system, then open the lowest faucet to allow gravity to drain water from the pipes. Your hot water heater holds 30-50 gallons and serves as an excellent emergency source. Locate the drain valve at the bottom of the tank, attach a garden hose, and direct it into clean containers. Remember to turn off the power or gas supply to your water heater before draining to prevent damage. Don’t forget about your toilet tank, which typically contains 2-3 gallons of clean water behind the bowl. This water hasn’t contacted waste and remains safe for drinking after proper treatment. These simple techniques can provide your household with crucial water supplies during the critical first hours of an emergency.
Toilet Tanks and Other Sources
Your home contains several overlooked water sources that can be lifesavers during emergencies. The toilet tank (not the bowl) holds clean water that’s typically safe to drink, provided you haven’t used chemical cleaners or toilet tank tablets. Simply lift the lid and access this reserve, which can provide several gallons per household toilet. Remember, this only applies to the upper tank where fresh water enters—never use water from the toilet bowl itself.
Ice cubes from your freezer offer another safe option. As they melt, they provide purified water that’s already been filtered through your home system. Your water heater can also yield 30-50 gallons of emergency water—locate the drain valve at the bottom and collect what flows out after turning off the power and inlet valve.
Exercise caution with water from dehumidifiers, hot tubs, or fish tanks. While these sources shouldn’t be your first choice, they can be purified for emergency use through proper filtration and boiling. Always treat water from questionable sources as contaminated until properly purified, prioritizing safer household sources first.
Pre-Stored Water Supplies
Storing water before an emergency strikes is your most reliable safeguard. The general rule is one gallon per person per day, covering drinking and basic hygiene for at least three days, though two weeks is ideal. Choose food-grade containers specifically designed for water storage—never reuse milk jugs, as protein residue promotes bacterial growth. High-density polyethylene containers with tight-sealing lids work best and should be stored in cool, dark locations away from direct sunlight and chemicals like gasoline or pesticides.
Commercial bottled water requires no treatment and displays expiration dates for guidance, though properly stored water remains safe indefinitely. For containers you fill yourself, start with municipally treated tap water, which already contains chlorine for preservation. Label each container with the storage date and rotate your supply every six months to maintain freshness. Keep containers off concrete floors using wooden pallets or shelving to prevent chemical leaching. Understanding emergency water safety principles ensures your stored supply remains drinkable when you need it most, providing peace of mind for any crisis situation.
Outdoor and Natural Water Sources
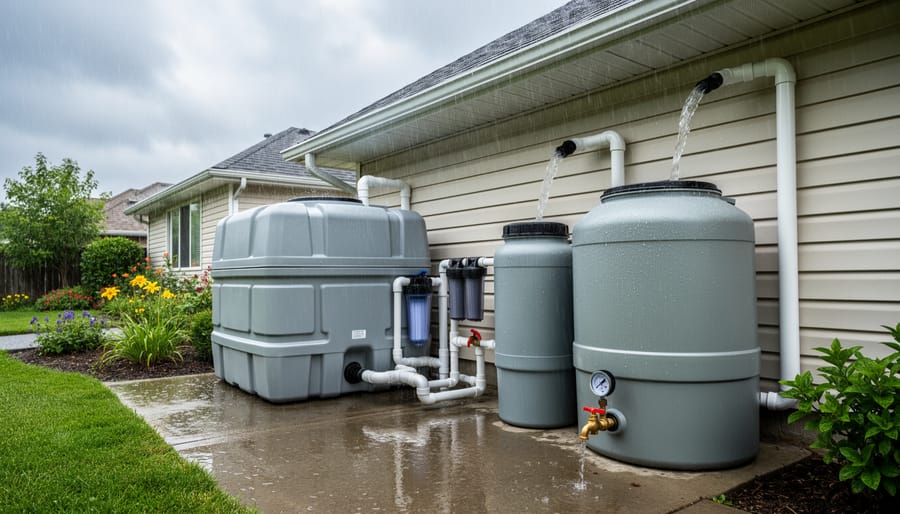
Rainwater Collection During Emergencies
When municipal water systems fail during emergencies, rainwater becomes one of the most reliable alternative sources. Setting up a basic collection system takes just minutes with materials you likely already have at home.
The simplest method involves spreading a clean tarp between elevated points like fence posts or tree branches, creating a sloped surface that funnels water into containers. Position the lowest corner of the tarp above your largest available bucket or barrel. For better efficiency, place a small weight or rock at this collection point to create a deeper funnel. Even a modest 10×10 foot tarp can collect over 60 gallons from just one inch of rainfall.
If you have existing gutters, disconnect downspouts and position clean garbage cans or storage bins underneath. Clean your gutters beforehand when possible, as debris reduces water quality. No gutters? Create makeshift versions using cut plastic bottles or PVC pipe sections angled along your roofline.
Maximize collection by positioning multiple containers around your property during rainfall. Cover containers with breathable mesh or cloth to keep out debris and insects while allowing water to enter. Remember that first-flush water from roofs and tarps contains the most contaminants, so let the initial runoff wash away dirt before you start collecting.
Always treat collected rainwater before drinking, as it can contain airborne pollutants, bacteria, and particles from collection surfaces.
Natural Water Bodies
Natural water bodies like streams, rivers, ponds, and lakes can serve as crucial emergency water sources when household supplies run dry. However, understanding how to evaluate and safely collect from these sources is essential for your family’s health.
When approaching a natural water source, start with a visual assessment. Look for clear, flowing water rather than stagnant pools, as movement helps reduce bacterial growth. Avoid water with visible algae blooms, which appear as green or blue-green surface scum and can produce harmful toxins. Similarly, stay away from water with oil sheens, foam, or dead fish nearby, as these indicate serious contamination.
Upstream considerations matter significantly. Water flowing through agricultural areas may contain pesticides and animal waste, while sources near industrial sites or urban development risk chemical contamination. Whenever possible, collect water from upstream locations, away from potential pollution sources.
Even crystal-clear water from pristine-looking streams can harbor invisible threats like bacteria, viruses, and parasites such as Giardia. Natural water should always be treated before drinking, even if it appears clean. Remember that wildlife, decomposing organic matter, and naturally occurring minerals all affect water safety.
During emergencies, prioritize flowing water sources over stagnant ones, and always treat collected water through boiling, filtration, or chemical purification before consumption to protect against waterborne illnesses.
Wells and Springs
When electricity fails, wells equipped with electric pumps become temporarily inaccessible unless you have backup solutions. Installing a manual hand pump alongside your existing electric pump creates a reliable backup system. These pumps work through simple mechanical action, drawing water from depths up to 300 feet depending on the model. Consider a pitcher pump for shallow wells or a deep-well hand pump for greater depths.
Natural springs offer another valuable emergency water source if you’re fortunate enough to have one nearby. Springs occur where underground aquifers naturally surface, typically in hillsides or low-lying areas. To locate springs in your area, check geological survey maps, consult with local environmental agencies, or observe where vegetation appears unusually lush during dry periods. Before relying on spring water, test it for contaminants and always purify it before drinking, as even pristine-looking sources can harbor harmful bacteria or parasites from wildlife.
Snow and Ice
In cold-weather emergencies, snow and ice can provide essential water when other sources are unavailable. However, melting these frozen resources requires careful planning to conserve energy while ensuring safe drinking water.
Start by collecting clean, freshly fallen snow rather than old or discolored snow from the ground, which may contain contaminants. White, fluffy snow yields more water than hard-packed ice, though both work in emergencies. Avoid snow near roads, animal tracks, or industrial areas.
The most energy-efficient melting method involves gradually adding small amounts of snow or ice to water that’s already liquid in your container. This prevents scorching your pot and uses less fuel than melting snow alone. If starting from scratch, place a small amount of water at the bottom of your pot first, then add snow incrementally as it melts.
For passive melting without fuel, fill dark-colored containers with snow and place them in direct sunlight or near heat sources like wood stoves. Black garbage bags work particularly well for this sustainable approach. You can also hang mesh bags of snow near indoor heat sources for slow, fuel-free melting.
Remember that melted snow and ice still require purification before drinking. Even pristine-looking snow can harbor bacteria, parasites, or airborne pollutants. Always boil melted snow for at least one minute, or use appropriate filtration methods to ensure safety.
Emergency Water Collection Methods and Equipment
DIY Collection Systems
When regular water sources aren’t available, you can create effective collection systems using common household items. These improvised solutions work surprisingly well during emergencies and demonstrate sustainable, resourceful thinking.
Start with what you already have: clean buckets, storage bins, and food-grade containers make excellent water collectors. Position these strategically under roof gutters, downspouts, or anywhere rainwater naturally flows. For larger collection areas, spread clean tarps or plastic sheeting at an angle, securing the corners and allowing water to funnel into containers below. Even shower curtains or camping tarps work in a pinch.
Create a simple dew collection system by tying absorbent cloth to your ankles early in the morning and walking through grassy areas. Wring out the collected moisture into a container. This ancient technique can yield surprising amounts of water in humid climates.
For indoor collection during plumbing failures, place pots and pans under dripping faucets or leaky pipes to capture every drop. Line bathtubs with clean plastic sheeting to maximize storage capacity if you receive advance warning of water shutoffs.
Remember that all collected water requires proper purification before drinking, regardless of how clean it appears. These DIY systems provide the raw material, but treatment remains essential for safety. Label all collection containers clearly and keep them covered to prevent contamination from debris, insects, or animals.
Essential Collection Tools to Keep on Hand
Having the right collection tools ready before an emergency strikes can make the difference between struggling to gather water and efficiently securing your family’s needs. Start with food-grade water containers in various sizes—5-gallon jugs are ideal for stationary storage, while 1-gallon containers offer portability during evacuations. Look for containers specifically labeled as BPA-free and designed for potable water storage.
A sturdy battery-powered or hand-crank siphon pump simplifies transferring water from hard-to-reach sources like water heaters or rainwater barrels without contamination. Pair this with collapsible funnels that won’t take up precious storage space but make filling narrow-mouthed containers much easier, especially when working with makeshift collection methods.
Keep several clean, food-grade buckets with tight-fitting lids on hand—these versatile tools work for both collection and temporary storage. Portable water bladders or hydration reservoirs designed for camping serve dual purposes: they’re excellent for emergency collection and compact when empty.
Don’t overlook simple but essential items like plastic sheeting or tarps for creating rain catchment systems, along with heavy-duty plastic bags that can serve as emergency liners or temporary containers. A basic water testing kit helps you assess source quality before treatment.
Store all collection equipment together in an accessible location, clearly labeled and protected from contamination. Regularly inspect containers for cracks or degradation, replacing them as needed. Remember, the best collection system is one you already understand how to use, so familiarize yourself with each tool before crisis strikes.
Making Collected Water Safe to Drink
Boiling: The Most Reliable Method
Boiling remains the gold standard for emergency water purification because it eliminates virtually all harmful bacteria, viruses, and parasites without chemicals or special equipment. The process is straightforward: bring water to a rolling boil for one minute at elevations below 6,500 feet, or three minutes at higher altitudes where water boils at lower temperatures.
To maximize fuel efficiency during emergencies, consider these practical tips. Use a lid to reduce boiling time by up to 30 percent, conserving precious fuel supplies. Pre-filter cloudy water through a clean cloth to remove sediment, which improves effectiveness and reduces fuel waste. Store multiple fuel sources like propane canisters, wood, or portable camping stoves to ensure you have backup options.
Plan your fuel needs realistically. A typical camping stove uses about one ounce of fuel per quart of boiled water. For a family of four needing two gallons daily, that translates to roughly eight ounces of fuel per day. While boiled water tastes flat due to reduced oxygen, you can improve flavor by pouring it between clean containers several times to re-aerate it, making it more palatable for your household’s emergency drinking needs.
Chemical Treatment Options
When municipal water becomes unavailable, chemical treatments offer a reliable method to disinfect water from alternative sources. Unscented household bleach containing 5-8% sodium hypochlorite is the most accessible option for homeowners. Add 8 drops (approximately 1/8 teaspoon) per gallon of clear water, or 16 drops if the water appears cloudy. Mix thoroughly and let stand for 30 minutes before drinking. You should detect a slight chlorine smell; if not, repeat the dose and wait another 15 minutes.
Water purification tablets provide a portable, eco-friendly alternative with precise dosing. Follow manufacturer instructions carefully, as wait times vary between products—typically 30 minutes to 4 hours. Iodine tablets work quickly but aren’t recommended for pregnant women or those with thyroid conditions.
For sustainable preparedness, consider rotating your chemical supplies every 6-12 months to maintain effectiveness. Store treatments in cool, dark locations away from direct sunlight. While chemical methods effectively eliminate bacteria and viruses, they won’t remove chemical contaminants or heavy metals, making source water selection critically important for comprehensive emergency water safety.
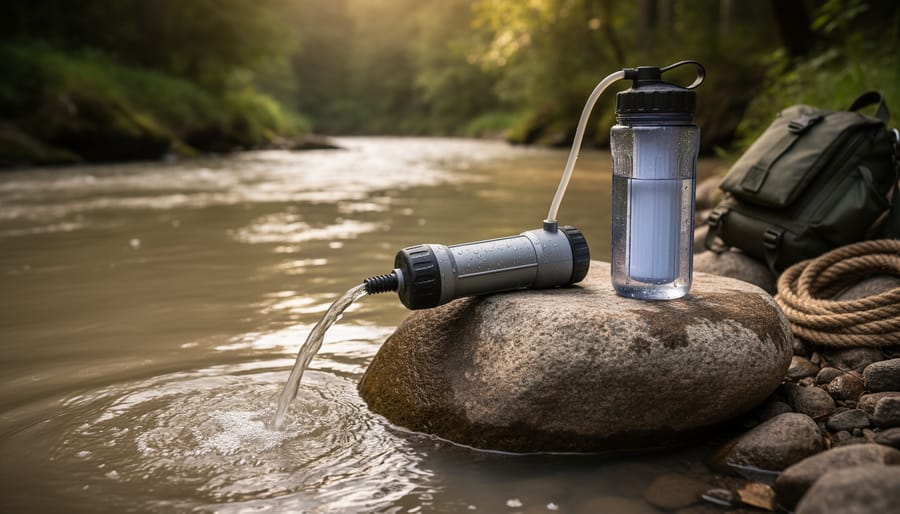
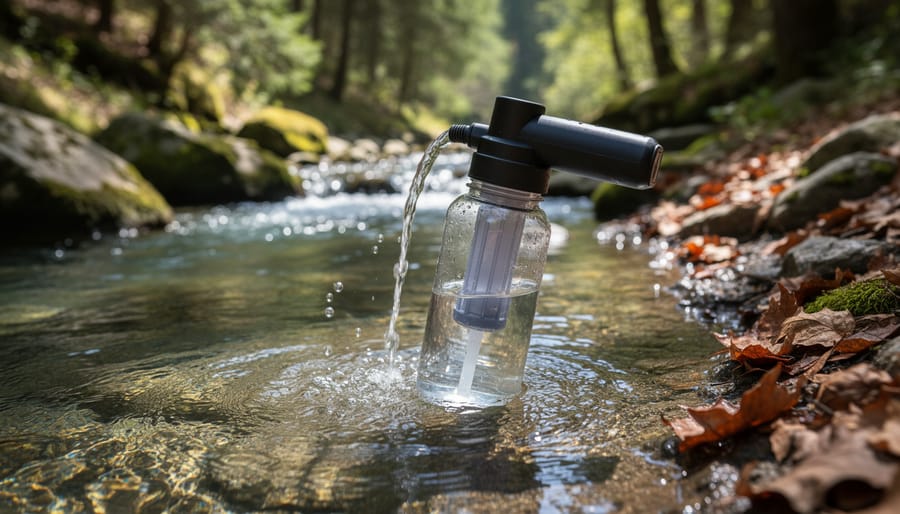
Emergency Filtration Systems
When emergency strikes and water quality becomes uncertain, having reliable filtration systems can mean the difference between safety and illness. Portable water filters offer an immediate solution for purifying questionable water sources. Straw-style filters, like those using hollow-fiber membrane technology, allow you to drink directly from streams or containers by removing bacteria and protozoa. These compact devices fit easily in emergency kits and require no power or chemicals.
Gravity-fed filtration systems provide a hands-free approach perfect for filtering larger quantities of water at base camps or home emergencies. These systems use the natural force of gravity to push water through ceramic or carbon-based filters, effectively removing contaminants while requiring minimal effort. They’re ideal for families needing multiple gallons daily.
For true emergency situations, understanding DIY filtration methods offers crucial backup options. A basic sand and charcoal filter constructed from available materials can remove sediment and some impurities, though it won’t eliminate all pathogens. Layering gravel, sand, and crushed charcoal in a container creates a simple pre-filter that clarifies murky water before applying other emergency water purification methods like boiling or chemical treatment. Remember, filtration alone may not eliminate viruses, so combining methods ensures the safest drinking water possible.
UV and Solar Purification
UV purification pens offer a modern, chemical-free solution for emergency water treatment. These battery-powered devices use ultraviolet light to neutralize harmful microorganisms in just 60-90 seconds, making them ideal for emergency kits. Simply stir the pen through clear water to eliminate bacteria, viruses, and protozoa without altering taste or requiring fuel.
For a sustainable, zero-energy alternative, try SODIS (solar disinfection). Fill clear plastic or glass bottles with filtered water and place them in direct sunlight for 6 hours on sunny days or 2 consecutive days when cloudy. The sun’s UV rays naturally destroy pathogens. This method works best in warm climates and requires no equipment beyond transparent bottles, making it perfect for extended emergencies when other resources run out.
What to Avoid: Dangerous Water Sources
Contaminated and Chemical Sources
Not all water sources are salvageable during emergencies. Certain contaminated sources pose serious health risks that standard purification methods cannot address. Avoid water with strange colors, oily sheens, or unusual odors—these often indicate chemical contamination from nearby factories or storage facilities. Water downstream from industrial areas, gas stations, or farms may contain chemical pollutants like pesticides, fertilizers, or petroleum products that boiling or filtering cannot remove. Radiological contamination near nuclear facilities is equally dangerous. Stagnant water with heavy algae growth may harbor toxic substances rather than just biological contaminants. During floods, floodwater often carries hazardous materials from overwhelmed sewage systems, chemical storage, and contaminated soil. If you suspect chemical contamination, seek alternative sources or wait for official guidance before treating and consuming the water. Your safety depends on recognizing when water is beyond home treatment capabilities.
Recognizing Biological Hazards
When assessing natural water sources during emergencies, several visual clues indicate potential biological contamination. Look for cloudy or murky water, which often harbors bacteria, viruses, and parasites. Avoid water with visible algae blooms, particularly bright green or reddish surface films, as these can contain harmful toxins. Stagnant pools with minimal flow are breeding grounds for disease-carrying organisms.
Pay attention to surrounding environmental indicators. Water downstream from agricultural areas, livestock operations, or human settlements carries higher contamination risks from animal waste and sewage. Dead animals or excessive insect activity near the water source signal potential health hazards. Water with an unpleasant odor or unusual discoloration beyond simple sediment should raise immediate concerns.
Even crystal-clear mountain streams can harbor invisible threats like Giardia and Cryptosporidium parasites. Never assume natural water is safe based on appearance alone. In emergency situations, always treat water from natural sources through boiling, filtration, or chemical purification before drinking. Understanding these warning signs helps you make informed decisions about which water sources to prioritize and how aggressively to treat them for your family’s safety.
Building Your Emergency Water Preparedness Plan
Creating a Household Water Inventory
Start by taking stock of what you already have. Walk through your home and list all existing water sources: gallons stored in bottles, your water heater capacity (typically 30-50 gallons), toilet tanks (not the bowl), and any water coolers or dispensers. Next, count your storage containers—empty bottles, food-grade buckets, and even bathtubs that could be filled in advance of an emergency.
Calculate your household’s daily needs using the standard recommendation of one gallon per person per day for drinking and sanitation. Multiply this by the number of people in your home, then by at least three days (though two weeks is ideal for comprehensive preparedness).
Compare your available resources against your calculated needs to identify gaps. Perhaps you have sufficient storage containers but they’re empty, or you have water stored but it’s past its recommended rotation date. Document areas where you fall short—maybe you need additional food-grade containers, a water filtration system for treating questionable sources, or simply a plan for refilling existing containers regularly. This honest assessment creates your roadmap for building a robust emergency water supply that keeps your household safe and self-sufficient during disruptions.
Essential Supplies Checklist
Building a comprehensive emergency water kit requires strategic planning across three priority levels. Start with Priority 1 essentials: food-grade water storage containers (at least 14 gallons per person), a reliable water filter or purification tablets, and unscented household bleach for disinfection. These items address immediate survival needs during the first 72 hours.
Priority 2 items enhance your capabilities: collapsible water carriers for transport, a manual siphon pump, coffee filters or clean cloth for pre-filtering debris, and waterproof markers to label containers with fill dates. Consider adding a portable water testing kit to verify safety.
Priority 3 supplies support extended emergencies: rain catchment materials like tarps and food-grade buckets, additional filtration options such as ceramic filters, and a solar still for distillation. Include heavy-duty gloves, eye protection for handling chemicals, and backup containers.
Store all supplies in an accessible location, rotating water every six months. This layered approach ensures you’re prepared whether facing a brief service disruption or prolonged emergency while maintaining environmentally-conscious practices through reusable containers and sustainable collection methods.
Practice and Maintenance
Testing your emergency water systems before disaster strikes is essential for ensuring they’ll work when needed most. Set a schedule to inspect your water storage containers every six months, checking for leaks, cracks, or contamination. Practice using your filtration devices and purification methods so you’re familiar with the process under pressure. For stored water safety, rotate your supply every 6-12 months, marking containers with fill dates. Test backup collection systems like rain barrels during normal conditions to identify any issues. Regular equipment checks should include replacing expired purification tablets, cleaning filters, and ensuring all tools are accessible. This hands-on practice builds confidence and reveals gaps in your preparedness plan, allowing you to make improvements before an actual emergency occurs.
Water preparedness is not just about surviving an emergency—it’s about building a resilient, sustainable lifestyle that protects your family and reduces dependency on fragile infrastructure. By understanding emergency water sourcing and collection strategies, you’re taking meaningful steps toward true household independence and environmental stewardship.
The knowledge you’ve gained about identifying water sources, implementing effective collection methods, and properly treating water ensures you can maintain safety and dignity during any crisis. Whether facing natural disasters, infrastructure failures, or extended power outages, you now have the tools to secure this most essential resource.
The beauty of water preparedness lies in its alignment with sustainable living principles. Rainwater catchment systems, water conservation practices, and natural filtration methods all contribute to reduced environmental impact while strengthening your emergency readiness. These aren’t separate goals—they’re complementary paths toward a more resilient future.
Start today with manageable first steps. Calculate your household’s water needs, inventory current supplies, and identify at least three potential emergency water sources near your home. Store appropriate purification equipment and practice using it before an emergency strikes. Even small actions, like filling a few extra containers or researching local water sources, build momentum toward comprehensive preparedness.
Remember, the best time to prepare was yesterday—the second best time is now. Your family’s safety and peace of mind depend on the actions you take today. Begin your water preparedness journey and embrace the confidence that comes from knowing you’re ready for whatever challenges tomorrow may bring.