Boil water at a rolling temperature for at least one minute to eliminate bacteria, viruses, and parasites—the most reliable purification method when you have access to heat and fuel. Use household bleach by adding 8 drops of unscented 6% bleach per gallon of clear water, mixing thoroughly, and waiting 30 minutes before drinking to chemically disinfect when boiling isn’t possible. Filter water through multiple layers of clean cloth, coffee filters, or sand to remove visible particles and sediment before applying chemical or heat treatment for maximum effectiveness. Store at least one gallon of water per person per day for three days minimum in food-grade containers, rotating your supply every six months to ensure you’re prepared before natural disasters or infrastructure failures strike.
Access to clean drinking water becomes critically uncertain during hurricanes, floods, earthquakes, or prolonged power outages when municipal treatment systems fail. Understanding multiple purification techniques transforms potentially deadly contaminated water into safe drinking supply, protecting your family from waterborne diseases like cholera, dysentery, and giardia. Each method—whether thermal, chemical, or mechanical—targets specific contaminants through different mechanisms, making knowledge of several approaches essential for true emergency preparedness. The difference between safe and dangerous water often comes down to proper purification technique and timing, skills every household should master before crisis situations arise. This guide provides the scientific foundation and practical instructions you need to confidently purify water using readily available household items or portable emergency equipment.
Understanding the Invisible Threats in Untreated Water
When disaster strikes or you’re away from municipal water systems, the water you find isn’t always what it appears to be. Even crystal-clear water from streams, lakes, or emergency supplies can harbor invisible dangers that threaten your health within hours of consumption.
The biological threats in untreated water fall into three main categories. Bacteria like E. coli and Salmonella are single-celled organisms that multiply rapidly in contaminated water, causing severe gastrointestinal distress, dehydration, and in vulnerable populations, life-threatening complications. Viruses, including hepatitis A and norovirus, are even smaller invaders that attack your cells directly and spread easily through water contaminated by human or animal waste. Parasites such as Giardia and Cryptosporidium form protective cysts that can survive in water for months, causing prolonged illness with symptoms that may not appear for weeks after exposure.
Beyond biological contaminants, chemical contamination poses serious risks in emergency situations. Agricultural runoff introduces pesticides and fertilizers into water sources, while industrial pollutants like heavy metals can leach from soil or damaged infrastructure. These chemicals don’t cause immediate illness like bacteria, making them particularly insidious. Long-term exposure affects organ function, cognitive development, and overall health.
Physical contaminants like sediment, rust, and debris may seem harmless compared to microscopic threats, but they can harbor dangerous pathogens and make water unpalatable. More importantly, sediment interferes with many purification methods, reducing their effectiveness and potentially allowing harmful contaminants to pass through.
Understanding these threats isn’t about creating fear but empowering you with knowledge. When you recognize what lurks in untreated water, you can make informed decisions about purification methods and protect your family’s health during emergencies. The good news is that with proper techniques, you can transform questionable water sources into safe drinking water, even when modern conveniences aren’t available.
Boiling: Your Most Reliable Emergency Ally
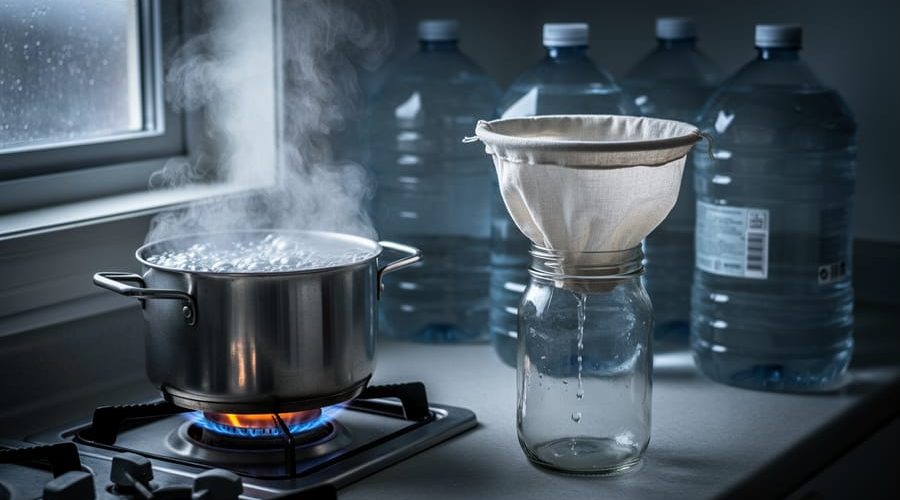
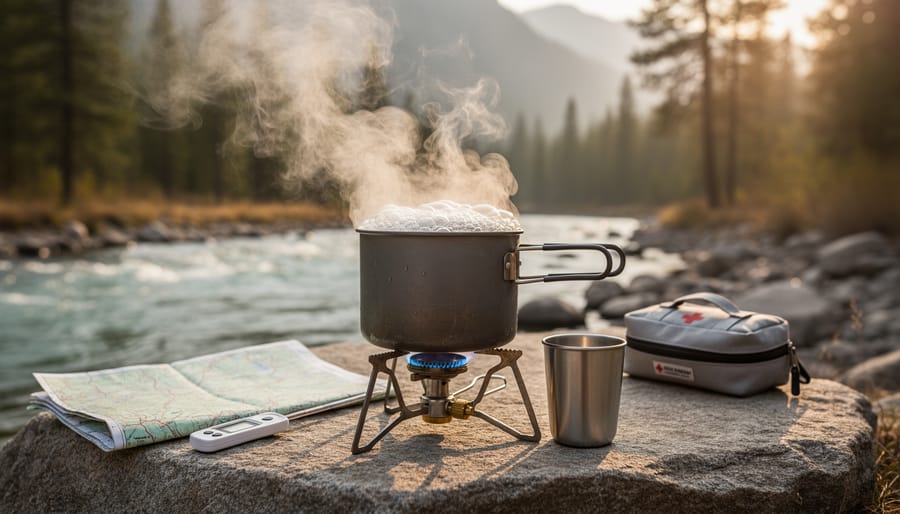
When disaster strikes and your water supply becomes questionable, boiling remains the most dependable purification method available. This time-tested technique effectively eliminates bacteria, viruses, and parasites that cause waterborne illnesses, making contaminated water safe to drink without requiring special equipment or chemicals.
The process is straightforward: bring water to a rolling boil and maintain it for at least one minute at sea level. However, elevation matters significantly. If you’re above 6,500 feet, extend boiling time to three minutes since water boils at lower temperatures in higher altitudes, requiring longer exposure to kill harmful organisms effectively.
To maximize effectiveness, start with the clearest water source possible. If your water contains visible debris or sediment, strain it through a clean cloth or coffee filter first. This pre-filtering step prevents particles from shielding microorganisms during boiling and improves taste.
Fuel considerations become crucial during extended emergencies. A standard camping stove canister provides approximately 60 minutes of burn time, enough to purify several gallons. For long-term situations, consider stockpiling multiple fuel sources including propane, butane canisters, or traditional firewood. Solar cookers offer an eco-friendly alternative when weather permits, aligning with sustainable emergency preparedness practices.
Understanding boiling’s limitations is equally important. While it destroys biological contaminants, it cannot remove chemical pollutants, heavy metals, or radioactive particles. Boiling also concentrates any chemicals present as water evaporates. For comprehensive protection against multiple contaminant types, combine boiling with other purification methods.
Once boiled, let water cool naturally and store it in clean, sanitized containers. Properly boiled and stored water remains safe indefinitely, making this method invaluable for building emergency water reserves that sustain your household when municipal systems fail.
Chemical Disinfection Methods That Fit in Your Pocket
Household Bleach: The Cheapest Insurance Policy
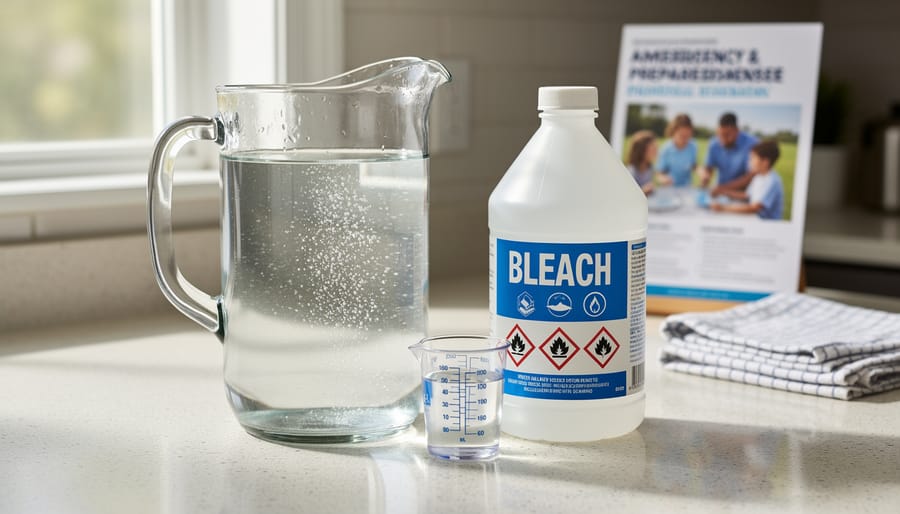
Household bleach is one of the most reliable and cost-effective solutions for emergency water purification. When you’re in a crisis situation without access to clean water, a single bottle of unscented chlorine bleach can treat hundreds of gallons. Here’s how to use it safely and effectively.
First, ensure you’re using regular, unscented household bleach containing 5-9% sodium hypochlorite. Avoid scented varieties or those with added cleaners, as these contain chemicals unsafe for drinking. Check the expiration date, as bleach loses potency over time, typically remaining effective for about a year when stored properly.
The basic ratio is simple: add 8 drops of bleach per gallon of clear water, or 16 drops if the water appears cloudy. Use a clean dropper or measuring spoon for accuracy. After adding bleach, stir the water thoroughly and let it sit for at least 30 minutes before drinking. You should detect a slight chlorine smell afterward. If you don’t smell any chlorine, repeat the dosage and wait another 15 minutes.
For larger quantities, use one-quarter teaspoon per 4 gallons of clear water. Always start with the smallest recommended amount, as too much bleach can cause stomach upset.
Important safety considerations include never mixing bleach with other chemicals, storing it in a cool, dark place away from children, and filtering out sediment before treatment when possible. While bleach effectively kills bacteria and viruses, it won’t remove chemical contaminants or heavy metals from your water supply.
Water Purification Tablets and Drops
Water purification tablets and drops offer a lightweight, compact solution for emergency water treatment, making them ideal for bug-out bags and emergency kits. These chemical treatments work by killing harmful bacteria, viruses, and protozoa, though understanding their differences helps you choose the right option for your situation.
Iodine tablets have been a trusted choice for decades, effectively eliminating most waterborne pathogens within 30 minutes. They’re affordable and have a shelf life of about five years when stored properly in cool, dry conditions. However, iodine leaves a distinctive medicinal taste that many find unpleasant, and it’s not recommended for pregnant women, people with thyroid conditions, or for continuous use beyond a few weeks. Iodine also doesn’t kill cryptosporidium, a resilient parasite sometimes found in surface water.
Chlorine dioxide tablets represent a more modern approach to water purification. They effectively eliminate all common waterborne threats, including cryptosporidium, making them more comprehensive than iodine. The taste is significantly better, often described as mildly chlorinated rather than medicinal. Treatment time ranges from 30 minutes for bacteria and viruses to four hours for cryptosporidium. These tablets typically last three to five years unopened, though some formulations can degrade faster once exposed to air and moisture.
When choosing between types, consider your specific needs. Iodine works well for short-term emergencies where cost matters most, while chlorine dioxide suits longer-term situations, family preparedness, or when treating questionable water sources. Both options require following manufacturer instructions carefully regarding dosage and contact time. For homeowners building emergency supplies, keeping both types provides flexibility while maintaining an eco-conscious approach to water safety without relying on single-use plastic bottles.
Filtration Systems: From DIY to Advanced Technology
Portable Water Filters and Purifiers
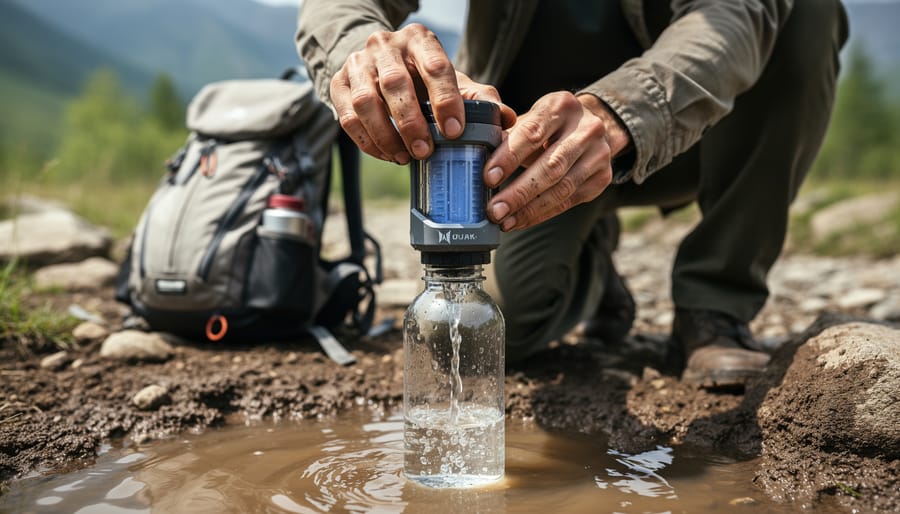
When disaster strikes and tap water becomes unavailable or unsafe, portable water filters and purifiers offer reliable emergency solutions. These compact devices are designed to remove harmful contaminants quickly, making questionable water sources drinkable within minutes.
Commercial emergency filters come in three main styles, each suited to different situations. Pump filters work by manually forcing water through filtration cartridges, making them ideal for filling multiple containers or hydration packs. Gravity filters use the simple principle of water flowing downward through a filter into a clean collection bag, requiring no physical effort but taking slightly longer. Straw-style filters allow you to drink directly from water sources by sucking water through the filtration media, perfect for lightweight emergency kits or bug-out bags.
Most portable filters effectively remove bacteria, protozoa like giardia and cryptosporidium, and sediment from water. However, standard filters typically cannot eliminate viruses, which are smaller than bacteria, or chemical contaminants like pesticides and heavy metals. For comprehensive protection, look for devices labeled as purifiers rather than just filters, as these combine filtration with additional treatment methods like ultraviolet light or chemical purification to neutralize viruses.
When selecting emergency water equipment, prioritize filters with pore sizes of 0.2 microns or smaller, which effectively block bacteria and protozoa. Check the device’s capacity rating to understand how many gallons it can process before requiring replacement cartridges. Flow rate matters during emergencies, so consider how quickly you need water versus how much effort you can expend. Durability and ease of maintenance are equally important, as you want equipment that performs reliably when you need it most.
Keep replacement filters on hand and familiarize yourself with operating procedures before emergencies arise, ensuring you can access safe drinking water when conventional sources fail.
Building an Emergency Sand Filter
When conventional water treatment isn’t available, a DIY emergency sand filter can effectively remove sediment, debris, and many harmful contaminants from questionable water sources. This centuries-old filtration method uses natural materials to create multiple barriers that trap particles as water flows through.
To build a basic emergency sand filter, you’ll need a clean container like a large plastic bottle or bucket, clean sand, gravel in varying sizes, activated charcoal (from aquarium stores or crushed charcoal from hardwood campfires), and a clean cloth or coffee filter. Start by cutting the bottom off a plastic bottle and inverting it, or punch small holes in the bottom of a bucket for drainage.
Layer your materials from bottom to top: begin with the cloth or coffee filter to prevent material loss, then add two inches of fine gravel, followed by two inches of coarse sand, two inches of fine sand, one inch of crushed activated charcoal, another two inches of coarse sand, and finally two inches of small stones or pebbles on top. Each layer should be rinsed beforehand to remove dust and fine particles.
Pour water slowly through the top, allowing it to trickle through the layers. The first few batches should be discarded as the filter settles. This system effectively removes sediment, many parasites, some bacteria, and reduces cloudiness and unpleasant tastes. The activated charcoal layer absorbs chemicals, pesticides, and improves flavor.
However, understand what this filter cannot do. It doesn’t eliminate viruses, dissolved chemicals, or heavy metals, and it won’t make saltwater drinkable. Think of it as a pre-treatment step that makes water clearer and safer, but not necessarily potable. Always combine sand filtration with additional purification methods like boiling or chemical treatment for complete safety. This approach makes sense when dealing with visibly contaminated water from streams, ponds, or flooded areas where removing physical debris is the first priority before further treatment.
Solar Disinfection: Harnessing Nature’s Power
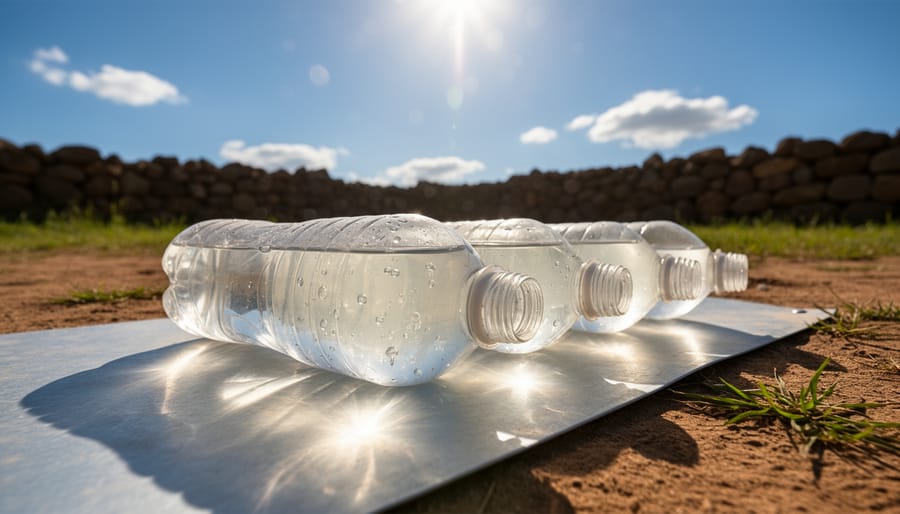
One of nature’s most accessible purification methods requires nothing more than sunlight and a clear plastic bottle. Solar Disinfection, known as SODIS, offers an eco-friendly emergency solution that’s been validated by the World Health Organization for household water treatment.
The process works through a combination of UV-A radiation and increased water temperature. When sunlight penetrates a clear PET plastic bottle filled with contaminated water, the UV rays damage the DNA of harmful microorganisms, rendering them unable to reproduce and cause illness. If the water temperature rises above 122°F (50°C), the disinfection effect becomes even more powerful through thermal treatment.
To use this method effectively, fill clean, transparent plastic bottles (typically 1-2 liters) with water that’s already been filtered to remove visible particles. Cloudy or turbid water blocks UV penetration, reducing effectiveness. Place the bottles horizontally on a reflective surface like corrugated metal roofing in direct sunlight. The water needs at least six hours of strong sunlight, or two consecutive days if skies are cloudy.
SODIS proves highly effective against bacteria like E. coli and viruses such as rotavirus, achieving elimination rates above 99.9% under optimal conditions. However, it’s less reliable against certain parasitic cysts and provides no protection against chemical contaminants.
Weather plays a critical role in this method’s success. Overcast conditions require extended exposure times, and the technique simply won’t work during prolonged rainy periods or in areas with limited sunlight. The bottles themselves must remain clear and scratch-free, as degradation reduces UV transmission.
While SODIS won’t replace modern purification systems, it represents an invaluable zero-cost backup method for emergency situations, particularly appealing for those committed to sustainable living practices without relying on fuel or electricity.
Combining Methods for Maximum Safety
No single purification method tackles every contaminant, which is why layering techniques offers the most reliable protection during emergencies. Think of it as creating a safety net with multiple strands—if one method misses something, another catches it.
The gold standard approach combines physical filtration with chemical or UV disinfection. Filtration removes visible particles, sediment, and many parasites, while disinfection eliminates bacteria and viruses that might slip through. For example, filtering murky stream water through a portable filter first, then treating it with purification tablets, addresses both particle contamination and microscopic pathogens.
Consider your water source when selecting methods. Clear water from a spring might only need boiling or UV treatment, while floodwater containing chemical runoff requires activated carbon filtration plus disinfection. Stagnant pond water benefits from pre-filtering through cloth to remove debris, followed by a ceramic filter, and finally chemical treatment.
This redundancy principle proves particularly valuable when dealing with unknown water quality. During disasters, you cannot always identify what contaminants lurk in available water sources. Using multiple methods compensates for this uncertainty and accounts for varying effectiveness—some methods work better in cold water, others in warm.
For household preparedness, stock complementary supplies: a quality filter system paired with backup purification tablets creates flexibility. This combination allows you to adapt to different scenarios while maintaining confidence in your water’s safety, even when municipal systems fail or you face extended emergencies.
Finding and Pre-Treating Emergency Water Sources
During an emergency, not all water sources are created equal. Knowing where to look and how to prepare water before purification can significantly reduce health risks and make treatment methods more effective.
When searching for water, prioritize flowing sources like streams and rivers over stagnant ponds or puddles. Moving water naturally contains less bacterial growth and fewer parasites than standing water. If you’re near a stream, collect water from upstream areas, away from potential contamination points like campsites, agricultural runoff, or industrial sites. Clear, cold water from springs or high-elevation sources typically contains fewer contaminants than warm, murky water.
However, even the clearest-looking water can harbor invisible threats like bacteria, viruses, and protozoa, making treatment essential regardless of appearance. If flowing water isn’t available, rainwater collection offers a relatively clean alternative, though it should still be purified before drinking.
Before applying any purification method, pre-treatment is crucial for cloudy or sediment-heavy water. Particles and organic matter can shield harmful microorganisms from disinfection processes and reduce the effectiveness of chemical treatments and filters. Start by letting water sit undisturbed in a container for at least 30 minutes, allowing heavy sediment to settle at the bottom. Carefully pour off the clearer water from the top, leaving the sediment behind.
For particularly murky water, pre-filtering through tightly-woven cloth, a coffee filter, or even a clean cotton t-shirt can remove larger particles. This simple step protects your purification equipment from clogging and makes chemical treatments work more efficiently. Some innovative, eco-conscious preppers even create makeshift sand filters using bottles and layers of clean sand and gravel, demonstrating how sustainable thinking applies even in emergency situations.
Remember, pre-treatment alone doesn’t make water safe to drink. It simply prepares it for the actual purification process that follows.
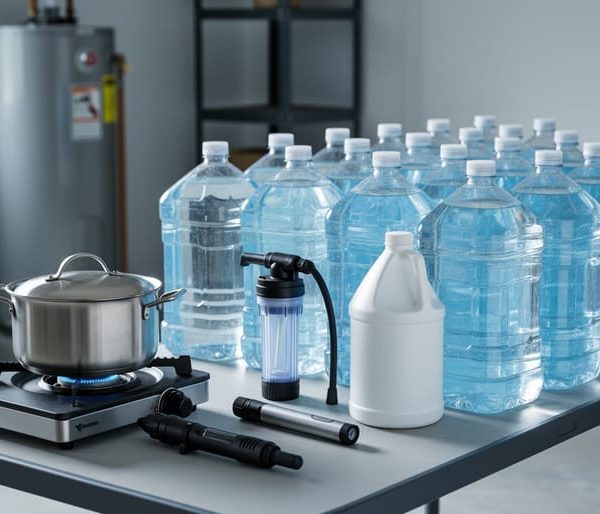
Building Your Home Emergency Water Kit
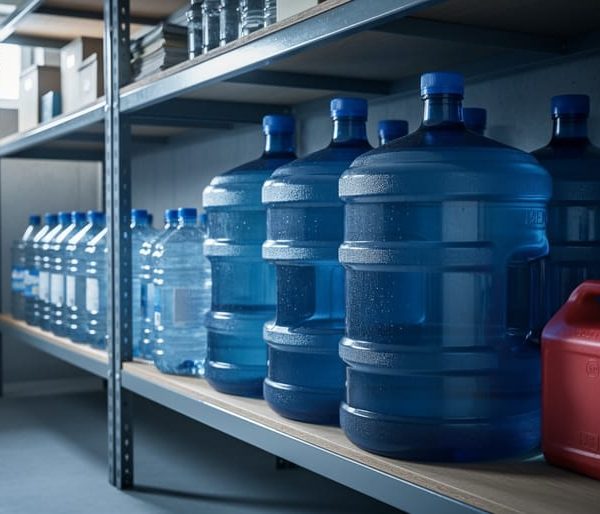
Creating a well-prepared home emergency water kit ensures your family has access to safe drinking water during unexpected crises. The foundation starts with selecting proper storage containers. Food-grade plastic containers marked with recycling codes 1, 2, 4, or 7 work best, though glass remains the most eco-friendly option if breakage isn’t a concern. Avoid containers that previously held milk or juice, as proteins and sugars can promote bacterial growth. For sustainability-minded households, consider repurposing large food-grade containers or investing in durable stainless steel options that last decades.
Store at least one gallon of water per person per day, planning for a minimum three-day supply. Keep containers in cool, dark locations away from direct sunlight and chemicals like gasoline or pesticides. Basements and interior closets work well, but avoid concrete floors where leaching can occur. Place containers on wooden pallets or plastic sheeting instead.
Your purification toolkit should include multiple backup methods. Pack a portable water filter rated for bacteria and protozoa removal, water purification tablets, unscented household bleach for chemical disinfection, and a small camping stove or fuel source for boiling. Include a basic water testing kit to check for contaminants, though simple visual inspection often reveals cloudiness or debris.
For those committed to zero-waste living, reusable cloth filters for pre-filtering debris and solar water disinfection bottles offer chemical-free alternatives. A hand-crank or solar-powered UV purification pen provides cutting-edge technology without battery waste.
Proper emergency water storage requires rotating supplies every six months. Mark containers with fill dates using permanent marker or weatherproof labels. Set phone reminders to empty, clean, and refill containers regularly. This rotation prevents stagnation while ensuring your purification tools remain functional when needed most.
Keep your emergency kit accessible but secure, storing everything together in waterproof bins. Include printed instructions for each purification method, as internet access may be unavailable during emergencies.
Knowing how to purify water during an emergency isn’t just about survival—it’s about empowerment and peace of mind. By understanding these methods now, you’re taking control of your family’s safety and building resilience for whatever challenges may arise. The techniques covered here, from boiling to filtration to chemical treatment, become second nature only through practice, so don’t wait for a crisis to try them out.
Start building your emergency preparedness toolkit today. Test your filtration devices, rotate your stored emergency water, and familiarize yourself with multiple purification methods. This knowledge naturally extends beyond emergencies—it deepens your appreciation for the clean water flowing from your tap and highlights why protecting our water sources matters for everyone.
Consider this your starting point for a more water-conscious lifestyle. As you develop these skills, you’re not only safeguarding your household but also joining a community of people committed to environmental stewardship and sustainable living. The confidence you gain from mastering emergency water purification creates a foundation for exploring broader water quality improvements and eco-friendly practices in your daily life.