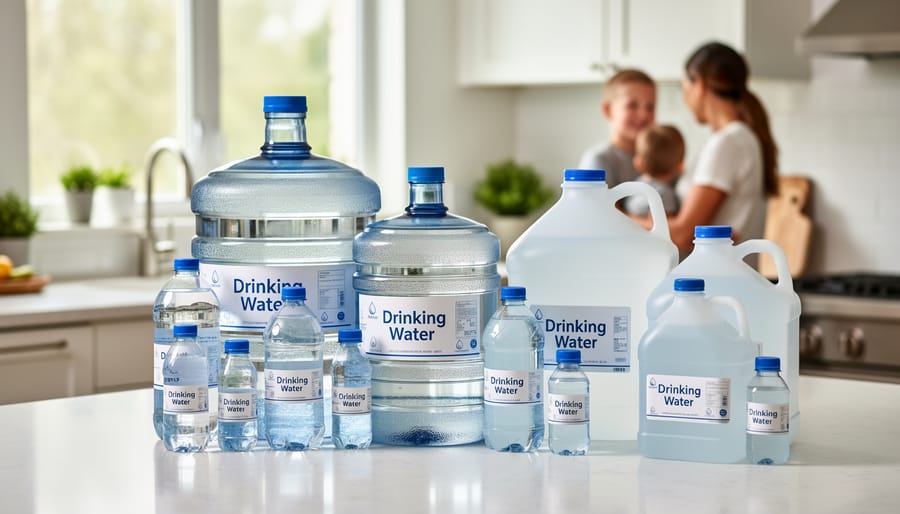
Store 14 gallons of water per person as your baseline emergency supply—one gallon per day for two weeks of drinking, cooking, and basic hygiene. This calculation accounts for actual survival needs during disasters when municipal water systems fail or become contaminated.
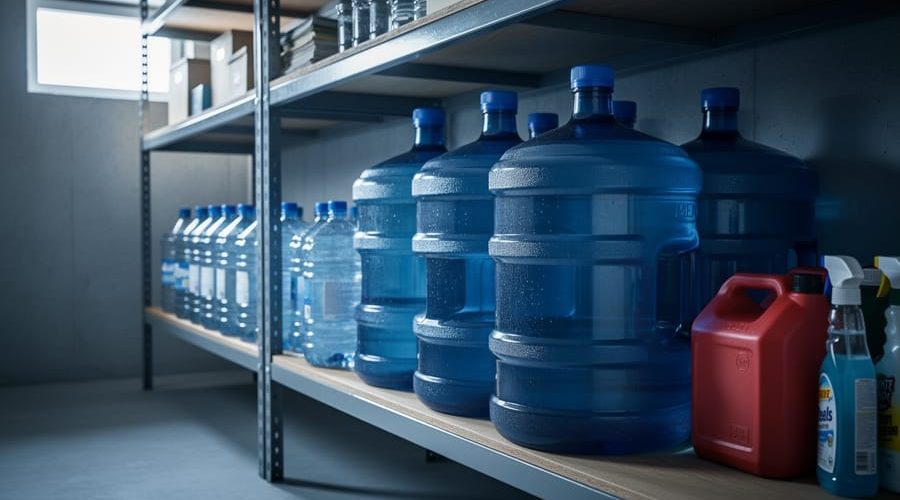
Choose food-grade plastic containers marked with recycling codes #1, #2, #4, or #7, or invest in purpose-built water storage barrels that prevent bacterial growth and chemical leaching. Glass works for smaller quantities, but weight limitations make it impractical for families needing 50+ gallons. Avoid milk jugs and containers that previously held non-food substances, as residues compromise water safety even after thorough cleaning.
Rotate your stored water every six months by marking containers with filling dates and using the oldest water first for gardening or household cleaning before refilling. This rotation schedule prevents stagnation and ensures your emergency supply remains fresh and safe to drink. Set calendar reminders tied to daylight saving time changes as a simple memory trigger.
Store containers in cool, dark locations away from direct sunlight, gasoline, pesticides, and cleaning products. Temperature fluctuations and chemical vapors penetrate plastic over time, affecting water quality. Basements, interior closets, and under-bed storage work well for maintaining stable conditions.
The difference between having water during an emergency and scrambling for supplies often comes down to planning done months earlier. A properly maintained water storage system provides peace of mind and genuine security when infrastructure fails, making it one of the most valuable investments in household preparedness.
Understanding Emergency Water Storage Basics
How Much Water Does Your Household Actually Need?
Understanding your household’s water needs is the foundation of effective emergency planning. The general rule of thumb is one gallon per person per day, but let’s break down what this actually means for your family.
For basic survival, each person needs approximately half a gallon daily for drinking alone. However, you’ll also need water for food preparation, basic hygiene like handwashing and teeth brushing, and minimal cleaning. This brings the realistic daily requirement to one gallon per person for short-term emergencies.
For a more comfortable and sustainable emergency plan, consider storing 1.5 to 2 gallons per person daily. This allows for cooking dried foods, maintaining better hygiene standards, and some dishwashing. Remember that hot weather, physical activity, or health conditions can increase these needs significantly.
Here’s a practical calculation guide for different household sizes: A two-person household should store a minimum of 14 gallons for a week (2 people x 1 gallon x 7 days), though 28 gallons provides better flexibility. A family of four needs at least 28 gallons weekly, with 56 gallons being ideal. For larger families of six, plan for 42 to 84 gallons per week.
Don’t forget about pets in your calculations. Dogs typically need one ounce of water per pound of body weight daily, while cats require about one cup per day. These often-overlooked family members depend on your preparedness too.
What Happens to Stored Water Over Time
Even properly sealed water doesn’t remain pristine forever. Understanding what happens during storage helps you make informed decisions about rotation schedules and container choices.
When water sits in storage, several natural processes begin working against its freshness. While water molecules themselves don’t expire, the environment within your container gradually changes. Sealed water in food-grade containers typically remains safe for six months to a year, though commercially bottled water often lists longer shelf lives due to controlled bottling conditions.
Bacterial growth represents the primary concern for stored water. Although chlorinated tap water starts with minimal bacteria, any microorganisms present can slowly multiply, especially if containers weren’t properly sanitized before filling. This growth accelerates in warm conditions, which is why cool, dark storage locations are essential. Additionally, opening and resealing containers introduces new bacteria and oxygen, speeding up degradation.
Chemical leaching presents another challenge, particularly with certain plastic containers. Over time, chemicals from container walls can migrate into water, especially when exposed to heat or sunlight. This is why food-grade HDPE or glass containers are recommended over recycled or unknown plastics. Understanding these water contamination risks helps you select appropriate storage materials.
Even without bacterial or chemical issues, stored water can develop a stale taste as dissolved gases escape or settle. While this affects palatability rather than safety, it reinforces why regular rotation matters. By understanding these degradation processes, you can implement effective storage practices that ensure your emergency water supply remains genuinely reliable when needed.
Choosing the Right Storage Containers and Location
Food-Grade Containers: What Works and What Doesn’t
Choosing the right containers is your first line of defense against contaminated water during emergencies. Not all plastics are created equal when it comes to long-term water storage, and understanding safe materials protects your family’s health.
Food-grade plastics marked with recycling codes #1 (PETE or PET) and #2 (HDPE) are your safest bets. HDPE, or high-density polyethylene, offers excellent durability and won’t leach chemicals into your water supply over time. You’ll find this material in blue water barrels and commercial storage containers. PETE plastics work well for shorter-term storage and appear in many bottled water products, though they’re less durable for repeated use than HDPE.
Glass containers provide an eco-friendly alternative that never leaches chemicals, making them ideal for environmentally-conscious households. However, they’re heavier, breakable, and impractical for large-volume storage.
Container sizes matter too. Five-gallon carboys strike a practical balance between portability and storage efficiency, while 55-gallon drums maximize space for stationary storage. Smaller one-gallon jugs offer flexibility for rotation schedules and distribution during emergencies.
Avoid containers previously holding milk, juice, or non-food products. Even thorough cleaning cannot eliminate residual sugars and chemicals that breed bacteria or contaminate stored water. Similarly, steer clear of containers without food-grade certification, as industrial plastics may contain harmful additives that migrate into water over months of storage. When in doubt, look for FDA-approved food-grade certification labels before committing to any storage solution.
Storage Environment Essentials
The location where you store emergency water plays a crucial role in maintaining its safety and drinkability. Think of your storage area as a protective bubble that shields your water supply from elements that could compromise its quality.
Temperature stability is your first priority. Store water in a cool location, ideally between 50-70°F. Avoid areas that experience temperature swings, like garages or attics, as heat can accelerate chemical leaching from plastic containers and encourage bacterial growth. Basements often provide ideal conditions, though ensure they’re not prone to flooding.
Light exposure is water’s silent enemy. Sunlight and even artificial light can promote algae growth and degrade plastic containers over time. Choose a dark storage space, or cover your containers with opaque tarps or store them inside cabinets.
Keep your water storage area dry with low humidity to prevent mold growth on container exteriors and labels. Elevated shelving helps protect containers from potential floor moisture or minor flooding.
Finally, maintain physical separation from contaminants. Store water away from pesticides, gasoline, paint, or household chemicals, as plastic containers can absorb odors and potentially harmful vapors. Position containers at least six inches off concrete floors using pallets or shelving, as concrete can transfer chemicals into stored water over extended periods.
Labeling and Organization Systems
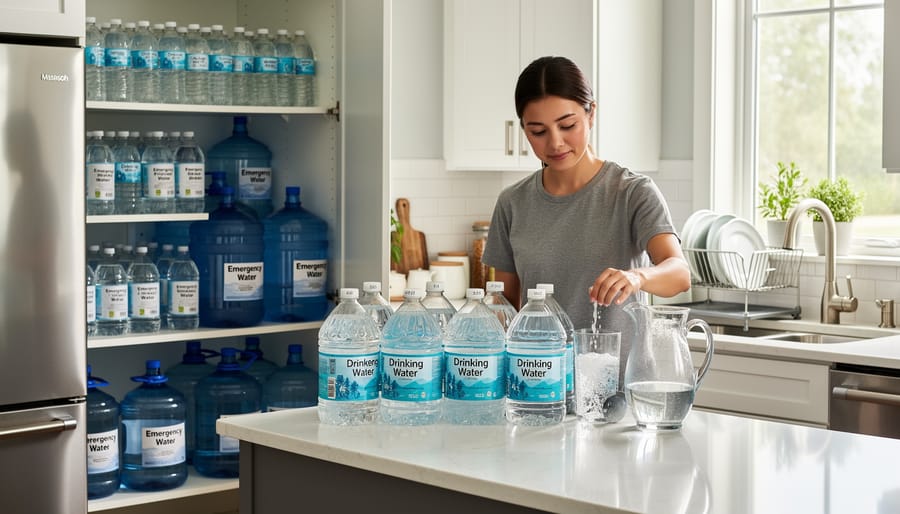
A clear labeling and organization system is essential for maintaining safe emergency water storage and ensuring you can quickly access supplies when needed. Start by marking each container with the filling date using a permanent marker or waterproof labels. Include the water source (tap, filtered, or purchased) to track treatment methods.
Create a simple rotation schedule based on your storage method. Most experts recommend rotating stored tap water every six months, while commercially bottled water can follow the printed expiration dates. Set calendar reminders or use smartphone apps to track rotation deadlines, making the process nearly effortless.
Organize containers using the “first in, first out” method by placing newly filled containers at the back of your storage area. This natural rotation system ensures older water gets used first. Consider color-coding labels by season or month for visual tracking.
For households with multiple storage locations, maintain a simple inventory log noting container quantity, location, and next rotation date. This becomes invaluable during emergencies when stress levels are high. Store your inventory sheet in an accessible spot, perhaps photographed on your phone for backup.
Group containers by size and purpose—drinking water separate from cleaning water—and ensure pathways remain clear for easy access. This thoughtful organization transforms emergency preparedness from overwhelming to manageable, aligning with sustainable household practices that reduce waste while maintaining safety.

Creating Your Water Rotation Schedule
The Six-Month Rule and When to Break It
The standard six-month rotation guideline for emergency water storage provides a simple baseline that works well for most households. This timeframe balances safety with practicality, ensuring your water remains fresh without creating an overly burdensome maintenance schedule. However, understanding when to adjust this timeline can help you optimize your efforts and resources.
Several factors influence how long stored water stays safe and palatable. Storage temperature plays a crucial role—water kept in cool, dark spaces around 50-70°F maintains quality longer than containers exposed to heat or sunlight. Container quality matters too. Food-grade containers with proper seals prevent contamination more effectively than repurposed bottles. If you’re using commercially bottled water, you can often extend rotation to the printed expiration date, typically 1-2 years.
You can safely extend your rotation schedule beyond six months if your water meets specific criteria. Cool basement storage, high-quality containers, and water treated with proper purification methods create favorable conditions for longer storage. Conversely, shorten your rotation schedule if containers are stored in garages with temperature fluctuations, near chemicals or petroleum products, or in locations with direct sunlight exposure.
An eco-friendly approach involves rotating stored water into your household use rather than dumping it. Use older emergency water for gardening, cleaning, or pet bowls before refilling containers. This sustainable practice ensures nothing goes to waste while maintaining a fresh emergency supply. Consider marking containers with fill dates using waterproof labels to track your rotation schedule effortlessly.
Smart Rotation Strategies That Actually Work
The most effective rotation strategy isn’t about dumping gallons of water down the drain every six months. Instead, integrate your emergency supply into your household routine in ways that feel natural and sustainable.
Start with the First-In-First-Out method by positioning your oldest containers at the front of your storage area. When you need water for everyday tasks, grab from the front and replace with fresh containers at the back. This simple system ensures nothing sits unused for too long.
Consider using stored water for activities where absolute purity matters less. Your six-month-old emergency water works perfectly for watering houseplants, filling pet bowls, or cleaning floors. Some households dedicate stored water to weekend cooking projects like making stocks or boiling pasta, which eliminates any taste concerns through the cooking process.
Create a monthly rotation ritual by using two to three gallons for household cleaning tasks. This manageable amount keeps your supply fresh without overwhelming your routine. Mark containers with storage dates using permanent markers, making it easy to identify which ones need rotation first.
For those with gardens, stored water becomes especially valuable during summer months. Using five-gallon containers for garden irrigation every few weeks maintains freshness while supporting your plants during dry spells. This approach aligns with water conservation principles while serving a practical purpose.
Set calendar reminders every three months to assess your supply. During these check-ins, use any containers approaching their six-month mark for car washing, outdoor cleaning, or filling humidifiers. This proactive approach prevents waste and ensures your emergency reserve remains reliably fresh when you need it most.
Calendar Reminders and Tracking Tools
Keeping track of water rotation dates doesn’t require complicated spreadsheets or expensive apps. The simplest approach uses a permanent marker to write the storage date directly on each container, making it easy to spot which ones need rotation first. For those who prefer digital solutions, free smartphone calendar apps work perfectly. Set recurring reminders every six months for stored tap water or annually for commercially bottled water, giving you advance notice before rotation deadlines arrive.
Several free water storage tracker apps now offer inventory management features specifically designed for emergency preparedness. These tools let you log container quantities, storage locations, and expiration dates while sending automatic notifications when rotation time approaches. For a low-tech alternative, create a simple paper chart on your refrigerator listing each storage area and the month you last refreshed those containers.
Consider pairing your tracking system with routine household tasks you already perform, like changing smoke detector batteries or servicing HVAC systems. This mental connection helps make water rotation a natural part of your home maintenance routine rather than an easily forgotten chore. Whatever method you choose, consistency matters more than complexity. Even the most basic tracking system that you actually use beats sophisticated solutions that get abandoned after a few months.
Testing and Treating Your Stored Water
How to Test Water Safety at Home
Testing water safety is a crucial step in maintaining your emergency water supply. Before relying on stored water, conduct simple sensory checks first. Pour a small amount into a clear glass and examine its clarity under good lighting. Fresh water should be crystal clear without cloudiness or floating particles. Next, smell the water closely. It should be odorless, though water stored in certain containers may have a faint plastic smell initially. Finally, taste a small sip. Safe water tastes neutral without any chemical, metallic, or musty flavors.
For deeper peace of mind, home water testing kits provide valuable insights into your water quality. These affordable kits test for common contaminants like bacteria, lead, chlorine levels, and pH balance. Consider testing your stored water every six months, especially if you notice any changes in appearance or smell. Testing becomes particularly important if your storage containers are older, if water has been stored longer than recommended rotation periods, or after any potential contamination event in your area. Modern testing strips make the process quick and straightforward, giving you measurable results within minutes and helping ensure your emergency supply remains truly safe for consumption.
Pre-Storage Treatment Options
Treating water before storage is a smart safeguard that ensures your emergency supply remains safe for consumption. Even if you’re using municipal tap water, pre-treatment adds an extra layer of protection against potential contamination during long-term storage.
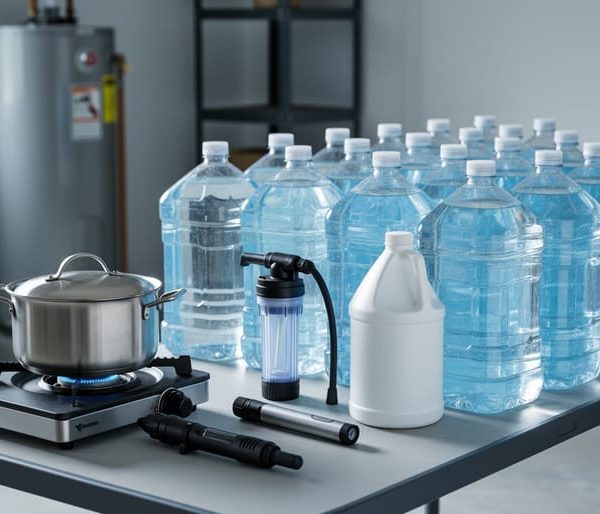
Filtration is your first line of defense. If you’re storing water from questionable sources like rainwater collection systems, run it through a quality filter first. Simple carbon filters remove chlorine taste and odor, while more advanced systems eliminate bacteria and parasites. For emergency preparedness, consider keeping a gravity-fed filtration system on hand as a sustainable backup option.
Bleach treatment is the most cost-effective pre-storage method. Use unscented household bleach containing 5-6% sodium hypochlorite. Add 8 drops per gallon of clear water, or 16 drops if the water appears cloudy. Mix thoroughly and let it stand for 30 minutes. You should detect a slight chlorine smell; if not, repeat the dosage and wait another 15 minutes. This method keeps water safe for up to six months when stored properly.
Purification tablets offer convenience and precise dosing. Follow the manufacturer’s instructions carefully, as different brands contain varying active ingredients like chlorine dioxide or iodine. These tablets typically treat one quart or liter at a time and require a 30-minute waiting period.
Whichever method you choose, always label your containers with the treatment date and method used. This helps track your rotation schedule and ensures your emergency water remains reliably safe when you need it most.
Emergency Purification for Questionable Water
If your stored water appears cloudy, discolored, or has an unusual odor, don’t panic—you have reliable backup options. Boiling remains the most effective emergency purification method: bring water to a rolling boil for one minute (three minutes above 6,500 feet elevation) to eliminate bacteria, viruses, and parasites. This time-tested approach requires no special equipment beyond a heat source.
For situations where boiling isn’t feasible, portable water filters with activated carbon can remove sediment and many contaminants. Look for filters certified to remove bacteria and protozoa—these eco-friendly tools are reusable and reduce waste compared to disposable options.
Chemical treatment serves as your last-resort solution. Unscented household bleach (8.25% sodium hypochlorite) works effectively: add 8 drops per gallon of clear water or 16 drops for cloudy water, mix thoroughly, and wait 30 minutes before drinking. Water purification tablets containing chlorine dioxide offer a more convenient alternative with similar effectiveness.
Remember that cloudy water should be filtered through clean cloth before chemical treatment or boiling for best results.
Integrating Filtration Systems with Emergency Storage
Using Your Home Filtration System for Storage Prep
If you already have a water filtration systems installed in your home, you’re already one step ahead in emergency water preparation. These systems can provide cleaner, contaminant-free water as your starting point for long-term storage, significantly reducing the risk of bacterial growth or chemical contamination during storage periods.
Before filling your emergency containers, run tap water through your filtration system to remove chlorine, sediment, heavy metals, and other impurities. This creates a purer baseline that requires less chemical treatment and stores more reliably. Many modern filtration systems remove up to 99% of common contaminants, giving you peace of mind that your stored water begins at the highest quality possible.
Consider your filtration system as a dual-purpose investment. During normal times, it improves your daily drinking water quality while supporting sustainable living by reducing bottled water dependence. During emergencies, it becomes a critical tool for processing water from alternative sources like rainwater collection or questionable municipal supplies.
For maximum preparedness, keep replacement filters on hand and know your system’s capacity. Some systems can process several gallons per hour, making them invaluable for refreshing stored water supplies or treating new water sources when grid power remains available. This integrated approach combines everyday eco-conscious living with practical emergency readiness.
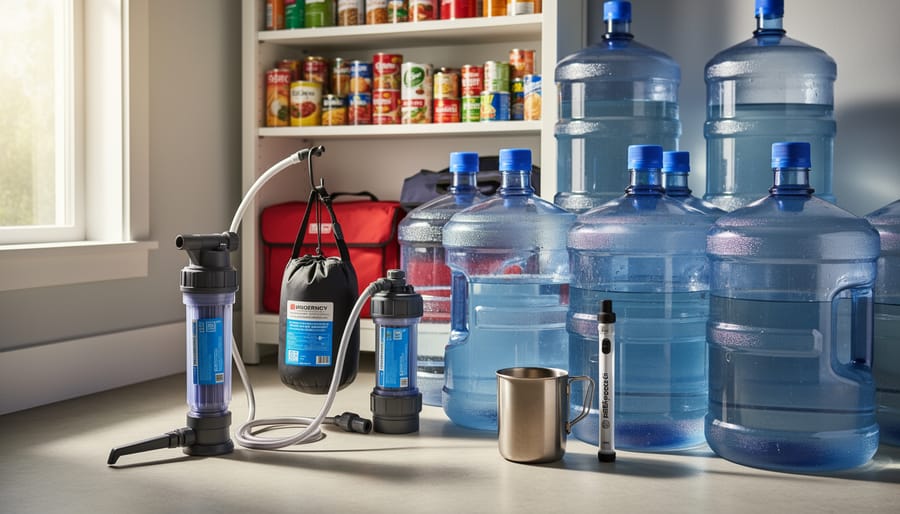
Portable Filters as Part of Your Emergency Kit
Even the most carefully stored emergency water supply can run out during extended emergencies. That’s where portable water filters become essential companions to your storage plan. These compact devices provide a critical backup layer, allowing you to safely purify water from streams, lakes, or even questionable municipal sources when your stored supply depletes.
Modern portable filters use advanced filtration technology to remove bacteria, protozoa, and many contaminants. Options range from personal straw-style filters perfect for grab-and-go bags to gravity-fed systems that can purify several gallons for family use. Pump filters offer middle-ground versatility, letting you process water quickly without electricity.
When selecting a portable filter for your emergency kit, look for models certified to remove at least 99.9% of waterborne pathogens. Consider filters with replaceable cartridges rather than single-use designs for sustainability and long-term preparedness. Many eco-conscious models now feature biodegradable components or extended filter lifespans that reduce waste.
Keep your portable filter alongside your stored water, checking it annually to ensure seals remain intact and moving parts function smoothly. Familiarize yourself with operation before emergencies strike. This combination approach of stored water plus portable purification capability creates a resilient, sustainable emergency water system that adapts to various crisis scenarios.
Common Emergency Water Storage Mistakes to Avoid
The ‘Set It and Forget It’ Trap
One of the biggest mistakes in emergency preparedness is treating stored water like canned goods in the back of your pantry. Many households fill containers with the best intentions, stash them away, and don’t think about them again for years. This creates a serious problem: even properly stored water can develop issues over time. Sediment can accumulate, container materials may degrade, and seal integrity can fail, potentially introducing contaminants.
The solution is surprisingly simple. Rather than viewing water storage as a one-time task, integrate it into your regular routines. Consider adopting a first-in-first-out approach by dating your containers and using older water for household tasks like watering plants or washing floors. Replace that water immediately with fresh supplies. Set quarterly calendar reminders to inspect containers for cloudiness, leaks, or unusual odors. If you notice any changes, it’s time to refresh that supply.
For homeowners embracing sustainable living practices, this rotation system actually reduces waste. You’re not dumping gallons of questionable water down the drain every few years. Instead, you’re actively cycling through your supply, ensuring your emergency reserve remains safe and effective when you truly need it. Think of water rotation as preventive maintenance for your household’s most essential resource.
Container and Location Pitfalls
Even well-intentioned homeowners make critical mistakes that compromise their emergency water supply. Understanding these common pitfalls helps you avoid contamination risks and storage failures.
Milk jugs and similar food-grade containers might seem practical for reuse, but their thin plastic breaks down quickly, leading to leaks and bacterial growth. These containers aren’t designed for long-term water storage and can leach chemicals over time. Instead, choose containers specifically manufactured for water storage with thicker, more durable materials.
Location matters tremendously for water safety. Never store emergency water near household cleaners, gasoline, pesticides, or other chemical contaminants. Plastic containers can absorb vapors from nearby substances, tainting your water supply. Keep at least several feet of distance between water and any potentially hazardous materials.
Sunlight exposure accelerates algae growth and degrades plastic containers. Always store water in dark, cool locations away from windows and direct light sources. Basements work well if dry and temperature-controlled.
Finally, avoid placing containers directly on concrete floors, especially in garages or basements. Concrete can leach chemicals and creates temperature fluctuations. Use wooden pallets or plastic sheeting as barriers to protect your water investment.
Over-Relying on Bottled Water
While convenient, relying solely on bottled water for emergencies has significant drawbacks. Most bottled water carries expiration dates ranging from one to two years, requiring frequent replacement that becomes costly over time. A family’s emergency supply might run hundreds of dollars annually just to maintain fresh stock. From an environmental perspective, single-use plastic bottles contribute substantially to landfill waste and require significant energy to manufacture and transport. Home water storage systems offer a more sustainable and economical alternative. Large food-grade containers can store water safely for extended periods when properly treated and rotated, eliminating ongoing plastic waste. By combining home storage with a quality filtration system, you’ll reduce both environmental impact and long-term costs while ensuring reliable access to clean water during emergencies. This approach aligns with sustainable living principles without compromising preparedness.
Building a Sustainable Emergency Water Plan
Reducing Waste Through Smart Rotation
Smart rotation practices transform emergency water storage from a wasteful chore into an integrated part of sustainable household management. Rather than dumping and refilling containers every six months, consider a first-in-first-out approach that puts stored water to practical use before replacing it.
The key is labeling containers with storage dates and creating a rotation calendar. When it’s time to refresh your supply, use the old water for gardening, cleaning, or flushing toilets instead of pouring it down the drain. This approach ensures your emergency supply stays fresh while eliminating waste entirely.
Consider using food-grade containers that can pull double duty in your household. Large water jugs stored in cool, dark spaces maintain quality for months and can be cycled through regular cooking and drinking use. This integration means you’re constantly using and replacing water naturally, reducing the mental burden of remembering rotation schedules.
For those with home filtration systems, stored water can be run through filters before use, extending its practical life and providing an extra safety layer. Some households successfully integrate rain catchment systems with emergency storage, creating a closed-loop system where collected water serves immediate needs while overflow maintains emergency reserves. This innovative approach combines preparedness with water conservation, making emergency planning an asset to sustainable living rather than a resource drain.
Rainwater Collection as a Backup Strategy
Rainwater collection systems offer a sustainable and cost-effective way to supplement your emergency water supply while reducing dependence on municipal sources. By capturing water that falls naturally on your property, you create an additional layer of security that activates automatically during rainfall events.
A basic rainwater harvesting setup includes gutters, downspouts, filtration screens, and storage tanks. During emergencies when grid-dependent water systems fail, these systems continue functioning independently, providing water for drinking (after proper treatment), sanitation, and other household needs. Modern systems can be surprisingly simple, ranging from basic rain barrels collecting 50-100 gallons to sophisticated tanks storing thousands of gallons.
The key advantage for emergency preparedness is diversification. Rather than relying solely on stored water that requires regular rotation, rainwater systems actively replenish your supply. This proves especially valuable during extended emergencies where your initial water stores might run low.
However, remember that collected rainwater requires treatment before drinking. Roof surfaces collect contaminants like bird droppings, dust, and atmospheric pollutants. Plan to incorporate filtration and purification methods into your system, such as first-flush diverters, sediment filters, and UV sterilization or chemical treatment. When properly designed and maintained, rainwater collection transforms your home into a more resilient, self-sufficient household capable of weathering water emergencies with greater confidence.
Emergency water storage isn’t a set-it-and-forget-it task. The difference between truly being prepared and simply having containers gathering dust in your basement comes down to one thing: active management. Water doesn’t stay safe indefinitely, even in the best containers under ideal conditions. By committing to a rotation plan, you’re ensuring that when an emergency strikes, your stored water will be genuinely drinkable and safe for your family.
The good news? Getting started is simpler than you might think. Begin today by labeling your existing water containers with storage dates. Set a calendar reminder for six months from now to check and rotate your supply. If you’re storing tap water, mark the date when you filled each container. For commercially bottled water, note the expiration date where you can easily see it. These small steps take only minutes but make all the difference.
Think of water rotation as part of your household routine, like changing air filters or testing smoke detectors. Modern innovations, including smart monitoring systems and filtration technologies, can make this process even easier by alerting you when it’s time to refresh your supply or purify stored water.
The peace of mind that comes from knowing your emergency water is truly ready is invaluable. You’re not just storing water; you’re actively protecting your household’s most essential resource. Start your rotation plan today, and rest easier knowing you’ve taken this critical step toward genuine preparedness.