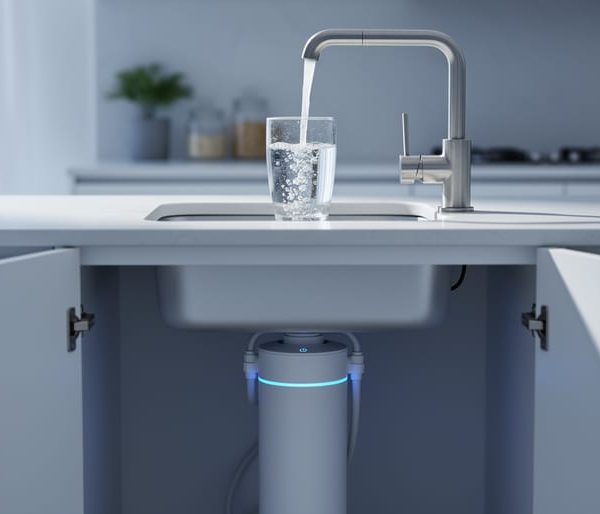
Visualize your whole house well water filtration system as a protective gauntlet between your well and every faucet in your home. Water travels from your well pump through a strategic sequence of filtration stages, each designed to remove specific contaminants before they reach your family. Understanding this flow—from sediment pre-filters that capture sand and rust, through specialized treatment tanks addressing iron or sulfur, to final carbon filters polishing taste and odor—empowers you to make informed decisions about protecting your water quality.
Most systems follow a logical progression: raw well water enters a sediment filter first, removing particles that could damage downstream components. Next, water flows through treatment stages customized to your specific water test results—perhaps a water softener for hardness, an iron filter for rust staining, or a UV light for bacterial protection. Finally, a carbon filter provides that last layer of purification before distribution throughout your home.
The beauty of these systems lies in their modular design. Unlike city water that arrives pre-treated, your well water system becomes a personalized solution tailored to your unique groundwater chemistry. Each component occupies a specific position for maximum effectiveness, with proper placement ensuring optimal flow rates and treatment contact time. Knowing where each stage fits and why it matters transforms a confusing tangle of pipes and tanks into a comprehensible water safety system you can confidently maintain and troubleshoot.
What Makes Well Water Different (And Why It Needs Special Treatment)
Unlike municipal water that flows through treatment plants before reaching your tap, well water comes straight from underground aquifers without any prior filtration. This direct source means your water often carries whatever minerals, sediments, and contaminants exist in your local geology and surrounding environment.
The most common well water challenges include sediment like sand and silt, which can cloud your water and damage appliances. Iron often appears as reddish-brown staining on fixtures and laundry, while sulfur creates that distinctive rotten egg smell. Hardness minerals, primarily calcium and magnesium, leave scale buildup on pipes and reduce soap effectiveness. Beyond these nuisances, more serious concerns include bacteria, nitrates from agricultural runoff, and heavy metals that can pose health risks.
What makes well water particularly complex is that each well has its own unique fingerprint of contaminants. Your neighbor’s water might battle iron while yours struggles with hardness, depending on the geological layers your wells tap into. Seasonal changes, nearby land use, and even weather patterns can shift your water chemistry over time.
This variability is precisely why well water demands a multi-stage filtration approach rather than a single filter solution. Municipal water systems already handle broad-spectrum treatment, but as a well owner, you become your own water treatment facility. A comprehensive system addresses different contaminant categories in sequence, with each stage tackling specific problems that a single filter cannot effectively manage alone.
Understanding your specific water composition through professional testing becomes the foundation for designing an effective filtration system. This targeted approach not only protects your health but also represents a sustainable choice by ensuring efficient resource use and reducing waste from ineffective single-stage solutions.

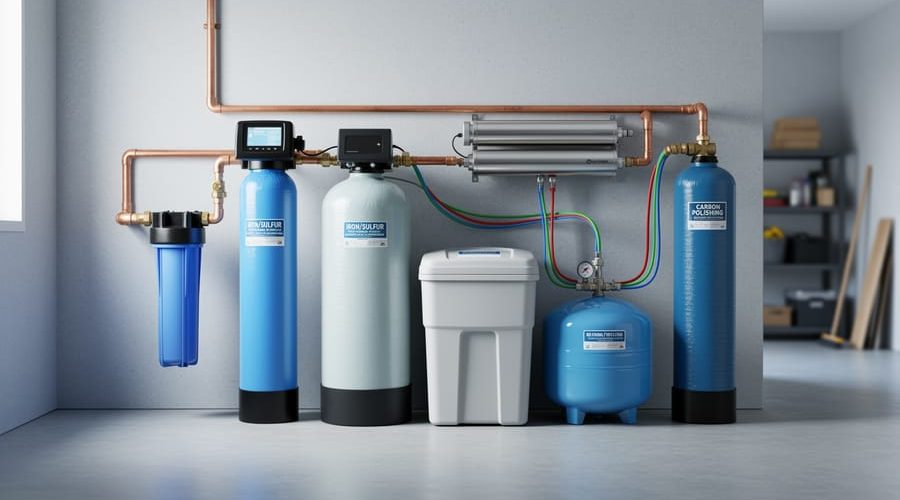
The Complete Well Water Filtration System Diagram Explained
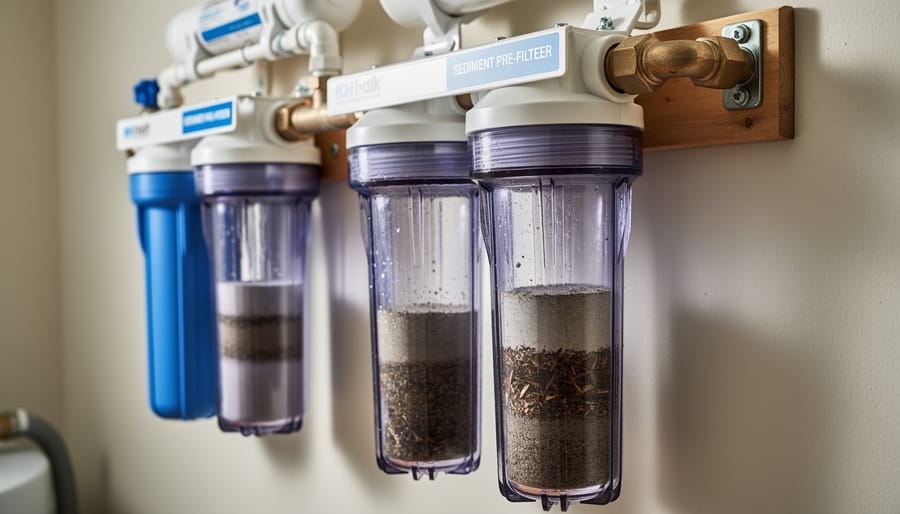
Stage 1: Sediment Pre-Filtration
As water flows from your well’s pressure tank, it first encounters the sediment pre-filter—your system’s frontline defender against visible particles and debris. This crucial stage captures sand, silt, rust, dirt, and other suspended solids before they can damage downstream components or contaminate your household water supply.
Sediment filters typically use pleated or spun polypropylene cartridges housed in a durable canister. As water passes through, the filter media traps particles while allowing clean water to continue through the system. This mechanical filtration process is straightforward yet remarkably effective at protecting your plumbing fixtures, appliances, and more sophisticated filters that follow.
The micron rating determines which particle sizes your filter captures. Most whole house systems use 5 to 20-micron filters for the initial stage, with smaller micron ratings (like 5-micron) capturing finer particles. Heavily contaminated well water may benefit from a dual-stage approach: a 20-micron filter first, followed by a 5-micron polishing filter.
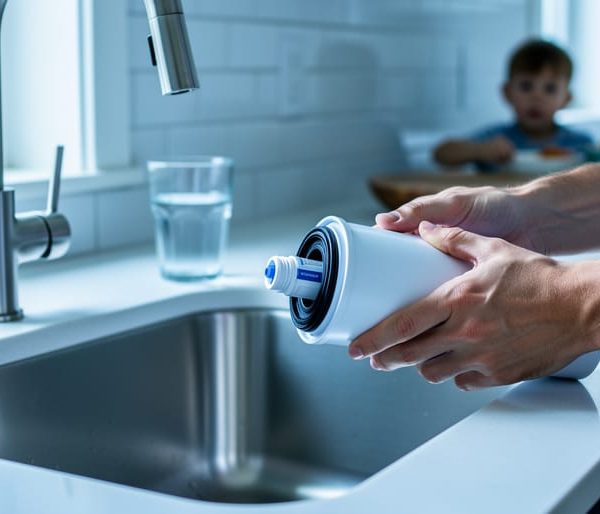
Regular cartridge replacement is essential—typically every three to six months depending on your water quality and household usage. Neglecting this maintenance reduces water pressure and compromises filtration efficiency. From an eco-living perspective, choosing reusable filter housings with replaceable cartridges minimizes plastic waste compared to disposable whole-unit systems.
Stage 2: Oxidation and Iron Removal
After sediment removal, well water often requires oxidation treatment to address dissolved metals like iron and manganese. These minerals appear clear when pumped from the ground but oxidize upon contact with air, creating rusty stains on fixtures, laundry, and dishes. This stage typically sits second in your filtration sequence for good reason.
Oxidation systems work by introducing oxygen or oxidizing agents that convert dissolved iron and manganese into solid particles that can be filtered out. Air injection systems are an eco-friendly option, using atmospheric air to trigger this chemical reaction without adding harsh chemicals. Alternatively, oxidizing filters containing manganese dioxide or similar media catalyze the transformation as water passes through.
Following oxidation, specialized iron filters capture the now-solid metal particles. These filters typically contain granular media that traps oxidized contaminants while allowing clean water to flow through. Effective iron and manganese removal at this stage prevents downstream damage to other filtration components and household appliances.
The positioning matters because sediment must be removed first to prevent clogging the oxidation media, while this stage must complete before final polishing filters to protect their delicate surfaces from metal staining.
Stage 3: Water Softening
After your water passes through initial filtration stages, it reaches the water softener—a crucial component for well water systems dealing with hard water. Positioned after sediment and chemical filters, the softener specifically targets dissolved minerals like calcium and magnesium that cause scale buildup in pipes and appliances.
The softener works through an ion exchange process. Hard water flows through a resin tank filled with tiny beads charged with sodium ions. As water passes through, calcium and magnesium ions attach to the beads while sodium ions release into the water, effectively removing hardness. Many homeowners opt for water filter and softener combos to streamline their system design and reduce installation space.
The regeneration cycle is essential for maintaining effectiveness. When resin beads become saturated with hardness minerals, the system automatically flushes them with a concentrated salt solution from a brine tank, typically during nighttime hours. This process recharges the beads and washes collected minerals down the drain.
Modern softeners use minimal water and salt during regeneration, supporting eco-friendly household operations while protecting your plumbing infrastructure and extending appliance lifespan significantly.
Stage 4: Carbon Filtration
After sediment removal and iron oxidation, Stage 4 introduces activated carbon filtration, a critical component that dramatically improves your water’s quality. These filters use specially treated carbon with millions of tiny pores that trap and absorb chemical contaminants through a process called adsorption. This eco-friendly technology effectively removes chlorine, volatile organic compounds (VOCs), pesticides, and herbicides that may have seeped into your well water from agricultural runoff or industrial sources.
Carbon filters also eliminate unpleasant tastes and odors, transforming your water from merely clean to truly refreshing. In most whole house systems, carbon filtration tanks are positioned after the oxidation and sediment stages but before the water reaches your home’s plumbing. This placement ensures the carbon isn’t overwhelmed by larger particles that earlier stages have already removed.
Many homeowners choose catalytic carbon filters as an innovative upgrade, offering superior contaminant removal and longer lifespan. These filters typically require replacement every 6-12 months depending on water usage and quality, making them a low-maintenance solution for sustainable, chemical-free water treatment throughout your entire home.
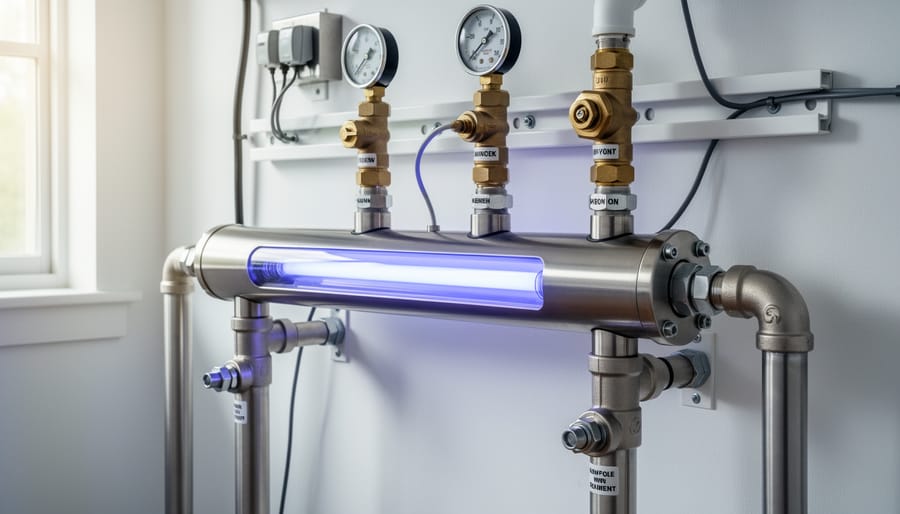
Stage 5: UV Disinfection (Optional but Recommended)
UV disinfection serves as your system’s final defense against microbiological threats that mechanical filters can’t remove. This stage uses ultraviolet light technology to neutralize bacteria, viruses, and parasites without adding chemicals to your water. The UV chamber installs after all other filtration stages, ensuring clear water passes through for maximum effectiveness since sediment can shield microorganisms from UV exposure.
UV systems work by exposing water to ultraviolet light at a specific wavelength that disrupts the DNA of harmful microorganisms, rendering them unable to reproduce or cause illness. This eco-friendly approach eliminates the need for chlorine or other chemical disinfectants, making it ideal for environmentally-conscious homeowners.
This stage becomes essential if your well water tests positive for coliform bacteria or if you live in areas prone to surface water contamination. Even without confirmed contamination, many homeowners choose best UV water purifier systems as preventive protection, especially for immunocompromised household members. The system requires minimal maintenance, typically just annual bulb replacement, and operates continuously using about the same energy as a standard light bulb.
Critical Components Beyond the Filters Themselves
When reviewing whole house well water filtration diagrams, you’ll notice certain components that don’t filter water but are absolutely essential for system operation and longevity. Understanding these often-overlooked parts helps you maintain your system effectively and troubleshoot issues when they arise.
The pressure tank works hand-in-hand with your well pump to maintain consistent water pressure throughout your home. This tank stores pressurized water, preventing your pump from cycling on and off constantly, which extends pump life and ensures steady flow. Most diagrams show the pressure tank positioned after the filtration stages to protect the tank from sediment buildup.
Bypass valves deserve special attention because they’re your system’s insurance policy. These valves allow you to redirect water around your filters during maintenance or emergencies. If a filter housing needs replacement or cleaning, you can activate the bypass to maintain water service throughout your home. This feature is particularly valuable for families who can’t afford complete water shutoffs during repairs.
Pressure gauges might seem like minor additions, but they’re your early warning system for filter clogs and system problems. Installing gauges before and after your filter stages lets you monitor pressure drops that indicate when filters need changing. This proactive approach prevents damage to your system and ensures optimal performance.
Drain lines are critical for filter backwashing and maintenance procedures. Many modern systems include automatic backwash features for sediment filters, which require properly installed drain lines to remove flushed contaminants. Without adequate drainage, you risk water damage and ineffective cleaning cycles.
Electrical connections power UV sterilization units, automatic backwash controllers, and monitoring systems. These components require dedicated electrical circuits with proper grounding for safety. Understanding where electrical components fit into your system diagram helps you plan installation locations near appropriate power sources while maintaining safe distances from water exposure points.
Where Each Component Lives in Your Home
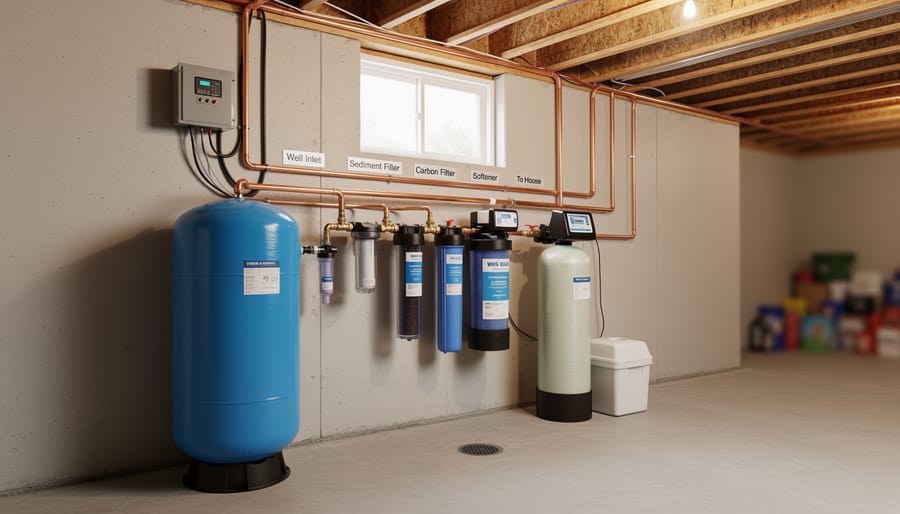
Understanding where your filtration system components will actually live in your home helps you plan for installation and future maintenance needs. Most homeowners install their whole house well water systems where the main water line enters the home, typically in the basement, crawl space, or utility room.
In basement installations, you’ll have the most flexibility and comfort. The ideal setup places components along an exterior wall near your pressure tank, allowing 3-4 feet of clearance in front of each unit for filter changes and servicing. Basements offer the advantage of standing headroom, making routine maintenance much easier on your back. Plan for adequate lighting and consider a floor drain nearby in case of leaks during filter replacements.
Crawl space installations require more careful planning due to limited vertical clearance. You’ll need at least 4-5 feet of height to comfortably access filters, though some compact systems can work in tighter spaces. The key is ensuring you can actually reach and turn filter housings without contorting yourself. Many homeowners opt for access panels or enlarged entry points to make maintenance less challenging in these confined areas.
Regardless of location, your pre-filter and sediment filter should sit first in line after the pressure tank, followed by specialized treatment units like iron filters or water softeners, with carbon filtration typically positioned last before water enters your home’s plumbing. Space each component 12-18 inches apart to allow wrench access to housing connections.
Temperature matters too. All components should be in climate-controlled spaces protected from freezing, as frozen filter housings can crack and fail. Proper ventilation prevents moisture buildup around equipment, extending system lifespan while supporting your investment in cleaner, more sustainable home water quality.
Reading Your Water Flow Path (Following the Arrows)
Reading a whole house well water filtration system diagram is simpler than it might first appear. The key is following the arrows, which show your water’s journey from the well to your faucets.
Start at the entry point where water enters from your well pump. The arrows guide you through each filtration stage in sequence. Think of it like following a map with clear directional signs. Water always moves from left to right or top to bottom in most diagrams, mimicking the actual flow path through your home.
As you trace the arrows, you’ll notice they pass through various components: sediment filters, water softeners, carbon filters, and UV purifiers. Each arrow represents not just direction but also water pressure and flow continuity. This visual roadmap helps you understand which contaminants get removed at each stage.
Pay special attention to where arrows branch or merge. These junction points often indicate optional treatment paths or bypass valves that allow maintenance without shutting down your entire water supply. If arrows skip a component entirely, that filter might not be necessary for your specific water quality needs.
Watch for spots where arrows might show restricted flow or bottlenecks. These areas could become potential problem zones requiring regular maintenance. Narrow passages or sharp turns in the flow path can accumulate sediment faster, signaling where you’ll need more frequent filter changes.
Understanding this visual flow sequence empowers you to maintain your system effectively, troubleshoot issues, and make informed decisions about upgrades that support both your household needs and sustainable water management practices.
Customizing Your Diagram Based on Water Testing Results
The most critical step in designing your filtration system is testing your water before purchasing any equipment. A comprehensive water test reveals exactly which contaminants you’re dealing with, allowing you to build a targeted system that addresses your specific needs without unnecessary components.
Start with a certified laboratory test that screens for common well water issues including bacteria, nitrates, heavy metals like iron and manganese, hardness minerals, pH levels, and potential contaminants like arsenic or pesticides. Many county extension offices offer affordable testing services, or you can use EPA-certified private labs for more comprehensive analysis.
Once you receive your results, compare them against EPA guidelines and your local health department standards. This data becomes your blueprint for customization. For example, if your water shows high iron but acceptable hardness levels, you might need a dedicated iron filter but can skip the water softener. Conversely, homes with minimal contamination may only require basic sediment filtration and UV disinfection, avoiding the expense and environmental impact of unnecessary treatment stages.
This test-first approach prevents over-filtering, which wastes money and creates unnecessary water waste during backwashing cycles. It also helps you avoid under-treating your water, ensuring your family’s safety. When selecting whole house water filter systems, match each component directly to your test findings rather than buying generic multi-stage systems that may include redundant features.
Remember to retest annually, as well water quality can change with seasons, nearby land use, or aquifer conditions. This sustainable approach ensures your system evolves with your actual needs while minimizing environmental footprint and operational costs.
The Environmental Impact of Your Filtration Choices
Your whole house filtration system’s environmental footprint deserves careful consideration when making choices that affect both your water quality and the planet. Different filtration components carry varying degrees of environmental impact that eco-conscious homeowners should understand.
Water softeners, while effective at removing hardness minerals, consume significant amounts of water during their regeneration cycles—typically 25-100 gallons per cycle. This wastewater, laden with salt and minerals, flows into your septic system or municipal drainage. For well water users on septic systems, this additional volume and salt content can strain bacterial processes essential for proper waste breakdown. Consider demand-initiated regeneration systems that regenerate based on actual water usage rather than timers, reducing unnecessary waste.
Filter disposal presents another environmental consideration. Sediment and carbon filters require replacement based on filter replacement frequency, which varies from three months to a year depending on water quality and household usage. Most filters aren’t recyclable through standard programs, ending up in landfills. Look for manufacturers offering recycling programs or consider washable sediment pre-filters that extend cartridge life.
UV purification systems consume electricity continuously—typically 30-60 watts—adding to your home’s energy footprint. While this amounts to modest costs annually, solar-powered homes can easily accommodate this load. The UV bulbs themselves require annual replacement and contain small amounts of mercury, necessitating proper disposal at hazardous waste facilities.
Sustainable alternatives include whole-house cartridge systems using bio-based filter media, or catalytic carbon filters that reduce chlorine without chemical additives. These cutting-edge innovations demonstrate how effective water treatment and environmental responsibility can align.
Understanding your whole house well water filtration system diagram is essential for maintaining clean, healthy water for years to come. A clear grasp of how each component works together empowers you to perform routine maintenance, identify potential issues early, and communicate effectively with service professionals when needed. This knowledge transforms what might seem like a complicated network of pipes and filters into a manageable, sustainable water solution for your home.
Before investing in any filtration system, professional water testing is absolutely critical. Every well has unique water chemistry, and what works perfectly for your neighbor might not address your specific contaminants. Testing reveals exactly which treatment stages you need, preventing both over-spending on unnecessary components and under-protecting your family from actual water quality issues.
Investing in comprehensive well water treatment goes beyond convenience. It’s a commitment to your family’s health, protecting appliances from damaging minerals, and embracing sustainable living by reducing reliance on bottled water. Modern filtration innovations continue making these systems more efficient and eco-friendly, ensuring your investment supports both your household and environmental responsibility. With proper understanding and maintenance, your filtration system becomes a reliable cornerstone of healthy, sustainable home living.