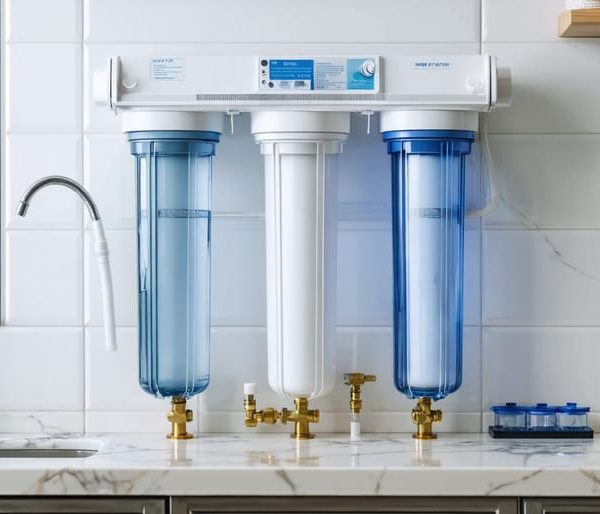
To install the CF1 Springwell water filtration system, you only need some basic plumbing knowledge, the manual, and the right tools. Unlike other types of water filters, the Springwell water filtration systems are not preassembled.
But, if you are not handy with tools, we recommend using a professional contractor who can handle any plumbing issues encountered along the way in many cases.
How to Install Springwell Filtration System
The CF1 Springwell filter will come with an instruction manual detailing how to install the system. In most cases, no two installations are the same. You can install the filtration system inside the house or outside where temperatures do not fall below freezing.
Before we will give you a detailed step-by-step guide on how to install the Springwell CF1 filtration system, take a look at the official explainer video from the Springwell Water company itself:
Here are some common steps you can follow for the installation.
Prerequisite for House Water Filter Installation
For DIYers, ensure to understand all the plumbing regulations in your locality.
Springwell whole house water filters are compatible with multiple connections with the help of adapters.
For proper system configuration, ensure that you check the labels on the filter system. Water from the outside will first pass through the carbon tank and then the sediment tank.
The tank width is 9″ and has a height of 48″. You need some space below the water tank to facilitate servicing.
Springwell System Components
These are the components shipped with the Springwell whole house water filter.
- Carbon tank
- Tank head for the carbon filter
- Sediment filter
- Spanner wrench
- Gasket and lube
- Mounting bracket
- Hose bib assembly
- Bypass valve
- 2 MNPT fittings
- pipe cutter
Installing the Tank Head for the Carbon Tank
Install the tank head in Springwell water filtration systems first. You need a tank head and carbon filtration tank. These steps can be done offsite. Remove the carbon tank cap. Proceed to locate the tank head. The top of the tank has a pipe that needs proper alignment to the opening at the bottom of the tank head.
After alignment, fit and press the tank head to the tank, ensuring the tank head and pipe opening are aligned. Tighten the tank head and use a tool, e.g., a screwdriver, to tighten the tank head further.
Presoaking the Water Filter System Tank
You need to soak the carbon in the tank 48 hours prior. The step will require bypass valves, a carbon tank and the 2 MNPT fittings, a hose bib assembly, and a lawn hose connected to a faucet. On the tank head, fix the bypass valve. Tighten the fasteners on the valves.
On each bypass valve connection, attach the MNPT fittings. Follow up by attaching the lawn hose pipe fitted with a hose bib to the pipe (inlet) and ensure the bypass is off to allow water to flow through the system. After the connection, please turn on the water until it exits the tank. Turn off the water supply and connect the hose if this is a success. Put the bypass on and presoak the tank for the next 48 hours.
Flushing the Carbon Tank
You need a hose bib assembly, carbon tank, and lawn hose to successfully flush the tank. On the tank inlet, connect the water hose and hose bib assembly. Put the bypass in the off position. Some of the water will be released due to the presoak. Flush by running water through it. Please note that the water will have a dark color initially. After about 5 minutes, it should turn clear.
Flushing also needs to be done in the opposite direction. Switch your hose bib assembly and water hose to the opposite side and let water through for 5 minutes. Remove the pipe assembly. Take the neoprene jacket and zip it onto the top of the tank gradually.
Preparation of the Sediment Filter
The sediment filter will come with a housing, an O ring with lube, and a sediment filter. The first step is to remove the lid from the housing and lay the O-ring inside the sediment filter groove. Follow up by taking the lube and spreading it around the O ring. Flip the O-ring and spread the lubricant along the grove. Put the sediment filter into its housing and tighten the lid.
Installing the Sediment-Filter System
You will need a drill bit and three PVC Nipples 1 inch (3 inches long) PVC for the installation. The sediment filter housing has an inlet and outlet. Attach the PVC nipples to both inlets. (Ensure to use plumbers tape)
Mount the sediment filter in proper alignment with the carbon tank. Using your 3″ drill bit, attach the mounting bracket securely. Orient the inlet and outlet properly before attaching the sediment filter with bolts.
Installing a Shut Off Valve
The shut-off valves are useful for controlling water flow in the system. Note that you need to turn off your water supply for this step. Attach the adapters to the main water supply. Follow this up by attaching the PVC valves to the shut-off valves. Connect the PVC nipple and the corrugated pipe, which must be tightened completely.
Installing the Whole House Water Filter Tank
Position the carbon tank just before the sediment filter. Connections should face backward. Perform a connection between the corrugated pipes and the shut-off valve inlet of the carbon tank. You will need another similar connection on the outlet of the carbon tank.
Make a similar connection with the corrugated pipe from the carbon tank to the inlet of the sediment tank. From the other side of the tank, connect another corrugated pipe from the outlet of the sediment tank to the waterline that goes to the house. Tighten all your connections to prevent leakage.
Testing the Water Filter System
Before turning the water back on, check the following details:
- Whether the sediment filter housing is tightly fitted.
- With the water supply still off, open any faucet in your house to allow water flow.
- Next is to check if the shut-off valve is leaking. Turn the water back on and check for leaks on the bypass valves.
- Let the water pass through the systems for at least 5 minutes. This ensures that all sediments are flushed out and the water is clear.
Final Thoughts
Getting pure drinking water is a priority for most homes. Springwell whole house water filters are a popular solution.
A professional should ideally install the Springwell house water filtration system. This ensures that the water system is properly installed and the water pressure and flow rate are factored in during installation.
A big advantage of this system is the minimal maintenance. The user will periodically need to check the sediment filter depending on the water quality.


