Your home’s gutters already channel thousands of gallons of free, clean water off your roof every year—water that can **reduce water bills**, nourish your garden, wash your car, and serve as emergency backup during droughts. Gutter rainwater collection transforms this overlooked resource into a practical water source by directing rainfall through a simple system of downspouts, filters, and storage tanks.
The concept is remarkably straightforward: install collection barrels at your downspouts, add basic filtration to remove leaves and debris, and you’ve created a sustainable water supply that requires minimal investment. A typical 1,000-square-foot roof generates approximately 600 gallons of water from just one inch of rainfall, meaning even modest rain events can fill multiple collection containers.
This accessible form of rainwater harvesting doesn’t require complex plumbing or expensive equipment to get started. Whether you’re looking to offset municipal water costs, maintain your landscape during water restrictions, or simply embrace more eco-conscious living practices, your existing gutter system provides the perfect foundation. The water you collect is naturally soft, free of chlorine and minerals, making it ideal for plants while reducing your environmental footprint.
Understanding how to properly set up, maintain, and utilize your gutter collection system ensures you maximize this renewable resource safely and effectively, turning every rainstorm into an opportunity for water independence.
Why Your Gutters Are the Perfect Starting Point for Rainwater Harvesting
How Much Water Can You Actually Collect?
Understanding your rainwater collection potential is surprisingly straightforward and can be incredibly motivating. The basic formula is simple: for every inch of rainfall, a 1,000 square foot roof collects approximately 600 gallons of water. This means even modest homes have significant harvesting capability.
To calculate your specific potential, multiply your roof’s square footage by 0.6, then multiply by your area’s average annual rainfall in inches. For example, a 1,500 square foot roof in an area receiving 30 inches of rain annually could collect about 27,000 gallons per year—that’s nearly 2,300 gallons monthly!
Let’s make this practical. If you live in Seattle with its 37 inches of average rainfall, that same 1,500 square foot roof could capture roughly 33,300 gallons annually. In drier Phoenix, with 8 inches annually, you’d still collect about 7,200 gallons—enough to significantly reduce municipal water usage for outdoor needs.
Even a moderate rainstorm dropping just half an inch can fill multiple rain barrels. A single one-inch rainfall event on a 1,000 square foot roof provides 600 gallons—sufficient to water a substantial garden for weeks or flush toilets throughout a typical month.
These calculations reveal an often-overlooked resource literally flowing off your roof. By capturing this free, sustainable water source, you’re not just reducing utility bills—you’re actively participating in water conservation and moving toward greater household self-sufficiency.
The Environmental Impact of Capturing Roof Runoff
Collecting rainwater from your gutters creates a ripple effect of environmental benefits that extend far beyond your property line. Every gallon you capture is one less gallon demanding treatment and pumping from municipal water systems, reducing the energy-intensive processes required to deliver water to your home.
Perhaps most significantly, gutter rainwater collection addresses one of suburbia’s biggest environmental challenges: stormwater runoff. When rain falls on rooftops and rushes through gutters into storm drains, it picks up pollutants, overwhelms drainage systems, and contributes to erosion and flooding. By intercepting this flow, you’re keeping excess water out of already-stressed municipal infrastructure while preventing contaminants from reaching local waterways.
The numbers tell a compelling story. A typical home roof can harvest thousands of gallons annually—water that would otherwise burden treatment facilities or cause environmental degradation. This captured resource becomes part of your sustainable household practices, complementing other conservation efforts like greywater recycling.
On a broader scale, widespread adoption of gutter collection systems reduces demand on aquifers and reservoirs, helping preserve these vital resources during droughts and population growth. You’re essentially creating a decentralized water supply that operates independently of energy-intensive distribution networks. This self-sufficiency represents a practical step toward climate resilience while actively contributing to watershed health in your community.
Essential Components of a Gutter Rainwater Collection System
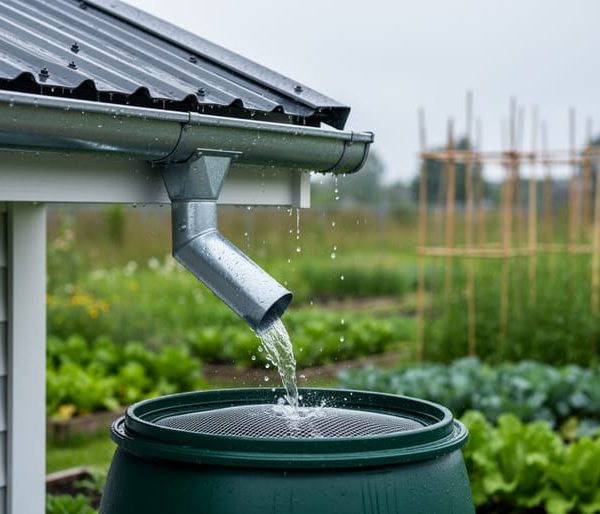
Gutters and Downspouts: Your Collection Network
Your gutters serve as the foundation of any rainwater collection system, channeling thousands of gallons from your roof to collection points. Understanding their materials, capacity, and condition helps you maximize collection efficiency while maintaining water quality.
**Material Matters**
Most homes feature one of three gutter types. Aluminum gutters are the most common choice, offering durability, rust resistance, and affordability—perfect for most collection systems. Vinyl gutters cost less initially but may crack in extreme temperatures and aren’t as sturdy for heavy water flow. Copper gutters, while expensive, last decades and naturally resist algae growth, though they can affect water chemistry.
For rainwater harvesting, seamless aluminum gutters work best. They minimize leaks and reduce contamination points where debris might accumulate.
**Sizing Your System**
Standard residential gutters measure 5 inches wide, adequate for most homes. However, larger roofs or areas with heavy rainfall benefit from 6-inch gutters that handle greater water volume without overflowing. Downspouts typically measure 2×3 inches or 3×4 inches—larger sizes prevent clogs and maintain steady flow to your collection tanks.
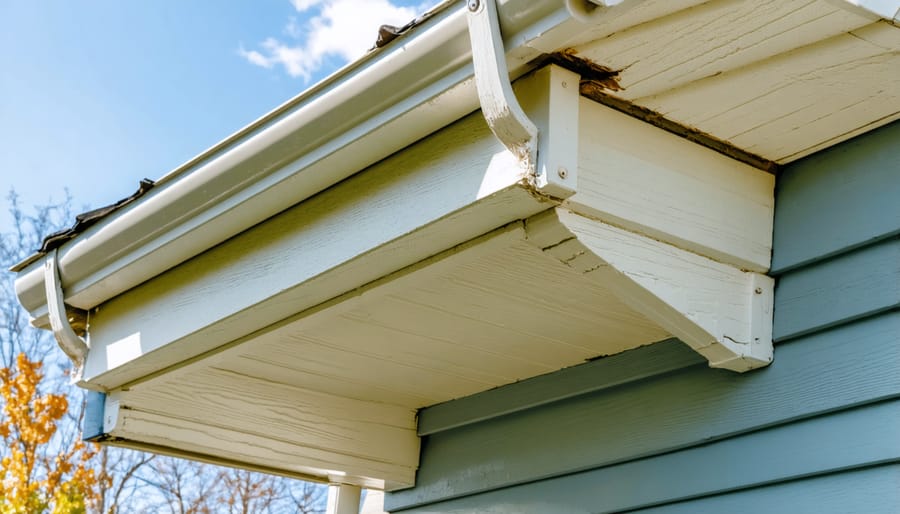
**Assessing What You Have**
Walk around your home and inspect existing gutters for rust, holes, or sagging sections that leak precious water. Check that gutters slope slightly (quarter-inch per 10 feet) toward downspouts for proper drainage. Look inside for accumulated debris—leaves and sediment compromise water quality.
If your gutters show significant wear, replacement before starting rainwater collection ensures you’re capturing clean water efficiently rather than contaminating your supply from deteriorating materials.
First-Flush Diverters: Keeping Debris Out
When rainwater first washes off your roof, it carries along accumulated dust, pollen, bird droppings, leaves, and other contaminants that have settled since the last rain. This initial runoff—typically the first few gallons—contains the highest concentration of pollutants and shouldn’t enter your storage tank. That’s where first-flush diverters become essential guardians of your water quality.
A first-flush diverter is a simple yet ingenious device installed between your downspout and storage tank. It automatically captures and diverts the dirtiest water away from your collection system, ensuring only cleaner runoff reaches your storage. Think of it as a sacrificial chamber that takes the hit so your main tank doesn’t have to.
Here’s how it works: As rain begins, the diverter fills with the contaminated initial flow. Once this chamber reaches capacity—usually holding anywhere from 10 to 40 gallons depending on your roof size—a float valve or ball mechanism seals it off. Subsequent cleaner water then bypasses the diverter and flows directly into your collection tank. Between rain events, a small drain hole slowly empties the diverter, resetting it for the next rainfall.
For eco-conscious homeowners, first-flush diverters represent a low-tech, high-impact innovation. They significantly reduce sediment, bacteria, and chemical pollutants in your collected water, requiring less filtration downstream and extending the life of your storage system while protecting your household from unnecessary contaminants.
Filtration and Screens: Your First Line of Defense
Before rainwater reaches your storage tank, effective filtration is crucial for keeping out debris, leaves, and contaminants. Think of screens and filters as gatekeepers that protect your collected water and reduce maintenance headaches down the line.
Start with **gutter guards** installed directly on your gutters. These prevent large debris like leaves, twigs, and seed pods from entering the system. Mesh gutter guards work well for most homeowners, though you’ll want to clean them seasonally to prevent buildup that reduces water flow.
At the downspout connection, install a **first-flush diverter**. This innovative device automatically diverts the first few gallons of rainfall—which contain the most contaminants from your roof—away from your storage tank. After this initial flush, cleaner water flows into your collection system.
Next, add a **fine mesh screen** (typically 1-2mm openings) where water enters your storage container. This catches smaller particles that slip past the gutter guards. Stainless steel screens last longer than plastic options and resist rust in wet conditions.
For those planning to use collected water for more than irrigation, consider adding an **inline sediment filter** between your tank and usage point. This provides an extra layer of protection and cleaner water overall.
**Maintenance matters**: Inspect and clean all screens monthly during peak collection seasons. Clogged filters dramatically reduce collection efficiency and can cause overflow issues. Set calendar reminders to make this routine inspection a habit. A few minutes of prevention saves hours of system repairs later.
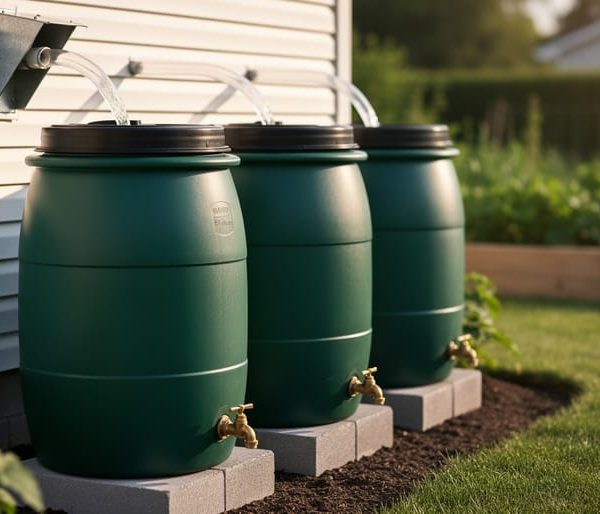
Storage Tanks: From Rain Barrels to Cisterns
Choosing the right storage solution depends on your budget, available space, and how much water you plan to collect. Let’s explore your options from smallest to largest.
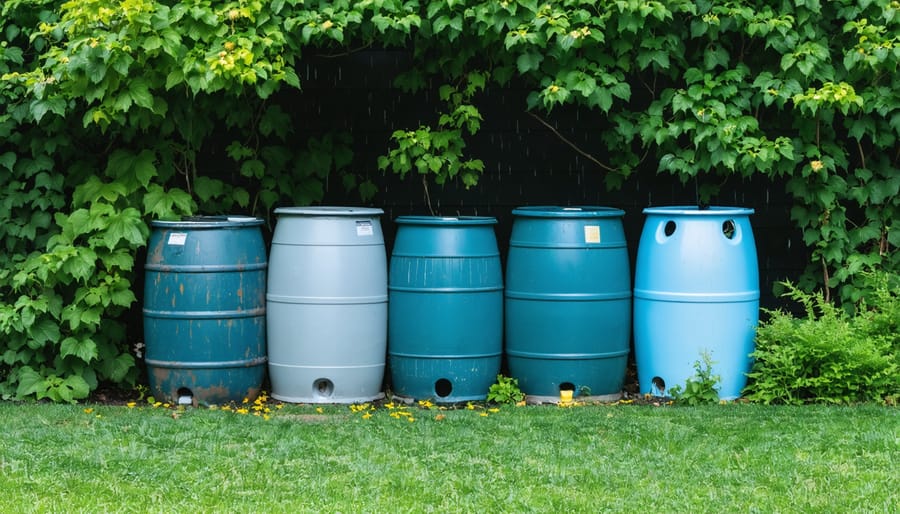
**Rain Barrels** are the most accessible entry point for beginners. These typically hold 50-80 gallons and sit directly beneath your downspout. Made from food-grade plastic or repurposed containers, they’re perfect for watering small gardens or flower beds. Expect to spend $50-150 for a basic setup. Place them on a sturdy platform near your garden to take advantage of gravity-fed watering. The main limitation? They fill quickly during heavy rain and empty just as fast during dry spells.
**Above-Ground Tanks** offer serious storage capacity, ranging from 200 to 5,000 gallons. These polyethylene or fiberglass tanks cost between $300-2,000 depending on size. They’re ideal if you have yard space and want to reduce reliance on municipal water for irrigation or even household uses. Consider UV-resistant materials if your tank will receive direct sunlight, and ensure your foundation can support the weight—water weighs about 8 pounds per gallon.
**Underground Cisterns** provide the ultimate storage solution while keeping your landscape pristine. With capacities from 1,000 to 10,000+ gallons, these concrete or plastic systems cost $2,000-10,000 including installation. They maintain cooler water temperatures year-round and eliminate freezing concerns in cold climates. However, installation requires excavation and professional expertise. Underground storage works beautifully for properties prioritizing aesthetics or those with limited above-ground space.
When selecting your system, calculate your roof’s collection potential by multiplying square footage by average rainfall. This ensures your storage capacity matches your collection capability, maximizing your rainwater harvesting investment.
Setting Up Your Gutter Collection System: A Practical Approach
Assessing Your Current Gutter System
Before connecting any rainwater collection components, it’s essential to ensure your existing gutter system is up to the task. Start by inspecting for visible leaks, cracks, or rust spots—common culprits that waste water before it reaches your collection tank. Walk around your home during a rainstorm to identify problem areas where water drips or overflows.
Next, check the slope of your gutters. They should tilt slightly (about a quarter-inch per 10 feet) toward the downspouts to prevent standing water and ensure efficient drainage. Use a level to verify proper grading, as incorrect slopes can reduce collection capacity and promote mosquito breeding.
Evaluate whether your gutters can handle your roof’s water volume. Undersized gutters may overflow during heavy rainfall, losing valuable water. Most residential homes use 5-inch gutters, but larger roofs might benefit from 6-inch systems.
Look for debris buildup, sagging sections, or loose fasteners that could compromise performance. Clean gutters thoroughly and make necessary repairs—tightening brackets, sealing joints, or replacing damaged sections—before installation. These simple upgrades maximize collection efficiency and prevent future maintenance headaches, ensuring your rainwater harvesting system operates at peak performance from day one.
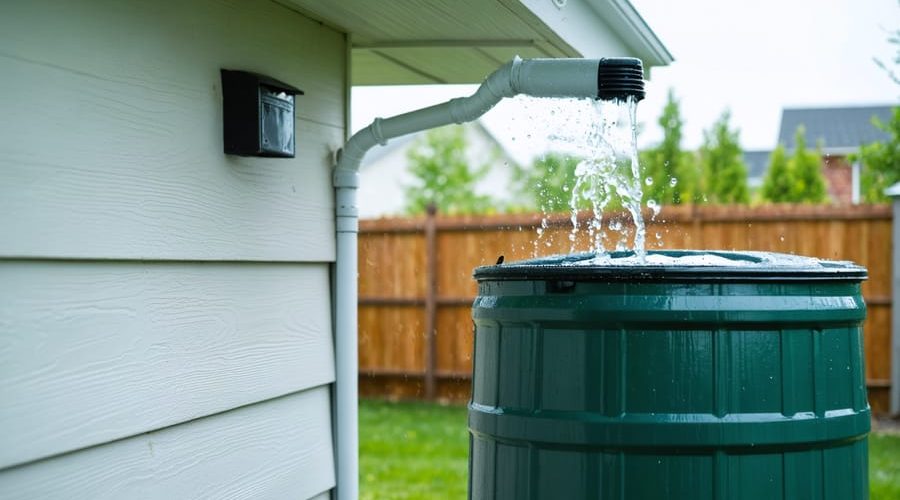
Choosing the Right Collection Point
Selecting the optimal collection point starts with evaluating your existing downspouts. Walk around your home during a rainstorm to observe water flow patterns and identify which downspouts handle the most runoff—these are your prime candidates for harvesting.
Consider proximity to your storage location first. The shorter the distance between your downspout and rain barrel or storage tank, the simpler and more affordable your installation will be. You’ll need fewer materials and reduce the risk of leaks from extended piping.
Think about where you’ll use the collected water most frequently. Positioning collection points near vegetable gardens, flower beds, or lawn areas you water regularly makes the system more practical for daily use. This convenience factor often determines whether you’ll actually maintain your rainwater harvesting habit long-term.
Ground slope matters significantly for drainage and overflow management. Choose collection points where water naturally flows away from your home’s foundation during heavy rainfall events. This prevents flooding issues if your storage reaches capacity.
Finally, ensure easy access for routine maintenance. You’ll need to clean filters, check connections, and winterize the system seasonally. Downspouts located in cramped spaces or behind dense landscaping create unnecessary obstacles that make upkeep frustrating and time-consuming.
Installation Basics: DIY vs. Professional Help
Deciding whether to install your rainwater collection system yourself or hire a professional depends on system complexity and your comfort level with basic home improvement tasks.
**DIY-Friendly Projects**
Simple barrel systems connected to downspouts are ideal beginner projects. You’ll need basic tools like a hacksaw, drill, measuring tape, and level. Most homeowners can complete a single-barrel setup in 2-4 hours for $100-$300 in materials. This approach works perfectly if you’re collecting water for gardens and outdoor use. The learning curve is minimal, and countless online tutorials guide you through each step.
**When to Call Professionals**
Professional installation becomes necessary for integrated systems with multiple storage tanks, first-flush diverters, pump systems, or indoor plumbing connections. These setups require plumbing expertise, electrical work for pumps, and proper foundation preparation for large tanks. Professional installation typically costs $2,000-$5,000 depending on system size and complexity, but ensures proper drainage slopes, leak-proof connections, and code compliance.
**The Middle Ground**
Many homeowners successfully combine approaches—handling basic barrel placement and downspout modifications themselves while hiring professionals for electrical pump installation or complex plumbing integration. This hybrid approach reduces costs while ensuring critical components are installed safely.
Consider your local building codes too. Some jurisdictions require permits or professional certification for rainwater systems, particularly those connecting to household plumbing. Check regulations before starting any project to avoid costly modifications later.
Keeping Your Collected Water Clean and Safe
Common Contaminants in Roof Runoff
Roof runoff naturally accumulates various contaminants before it reaches your collection system. Understanding these pollutants helps you determine appropriate filtration methods and suitable water uses.
**Roofing materials** themselves can leach substances into rainwater. Asphalt shingles may release petroleum-based compounds and granules, while metal roofs can contribute zinc, lead, or copper depending on their composition. Clay and concrete tiles generally produce cleaner runoff, making them ideal for rainwater harvesting.
**Organic debris** from overhanging trees introduces leaves, pollen, and twigs that decompose in your gutters, creating bacterial growth and unpleasant odors. Bird droppings add harmful bacteria and parasites that make untreated water unsafe for drinking or food preparation.
**Atmospheric deposition** brings industrial pollutants, vehicle emissions, and dust particles that settle on your roof between rain events. The “first flush” of rainfall typically carries the highest concentration of these contaminants.
For garden irrigation, most contaminants pose minimal concern. However, if you’re considering toilet flushing or clothes washing, basic filtration removes debris and sediment. Drinking water requires comprehensive treatment including fine filtration and disinfection to eliminate all biological and chemical hazards. Understanding your intended use guides your filtration investment appropriately.
Filtration Options for Harvested Rainwater
Harvested rainwater quality varies significantly depending on your roof material, local air quality, and collection system design. Matching the right filtration approach to your intended water use ensures both safety and cost-effectiveness.
For basic outdoor applications like garden irrigation, a simple **sediment filter** provides adequate protection. These filters remove leaves, twigs, dirt, and debris particles, preventing clogging in your irrigation system. Most sediment filters use mesh screens or cartridge designs that capture particles down to 5-50 microns—think of them as strainers that catch visible contaminants.
When you’re planning to use rainwater for car washing, filling toilets, or laundry, **carbon filters** become valuable additions. Activated carbon absorbs dissolved chemicals, removes unpleasant odors, and reduces discoloration caused by organic matter. These filters excel at eliminating pollutants that wash off roofing materials or settle from atmospheric dust.
For the highest water quality—suitable for bathing or even drinking (where legally permitted)—**UV treatment systems** provide an extra safety layer. Ultraviolet light deactivates bacteria, viruses, and other microorganisms without adding chemicals to your water. UV systems work best when paired with sediment and carbon pre-filtration, since clear water allows maximum UV penetration.
Consider a multi-stage approach: sediment filtration first (removing large particles), followed by carbon filtration (tackling dissolved contaminants), and finally UV treatment if needed. This layered strategy provides comprehensive protection while keeping maintenance manageable and costs reasonable for typical household rainwater systems.
Testing Your Collected Water
Testing your collected rainwater is essential to ensure it’s safe for its intended purpose. The frequency and type of testing depend on how you plan to use the water—irrigation requires minimal testing, while indoor uses demand more thorough analysis.
For basic garden use, an annual pH test is typically sufficient. However, if you’re using rainwater for washing vehicles, filling pools, or indoor non-potable applications, test every six months for bacteria, pH levels, and total dissolved solids (TDS). Look for home testing kits at hardware stores, or send samples to a certified water testing laboratory for comprehensive analysis.
Key contaminants to watch include bacteria from bird droppings, heavy metals from roofing materials, and sediment buildup. If your roof contains asbestos, lead-based paint, or treated wood, avoid collecting rainwater for any use near food crops or direct contact applications.
Results showing high bacteria counts indicate inadequate filtration or contaminated storage. Elevated heavy metals suggest your roofing material may be leaching contaminants—consider installing additional filters or limiting water use to landscaping only. Low pH (acidic water) is common in rainwater but generally safe for most outdoor applications. When results raise concerns, modern filtration innovations like ceramic filters or UV sterilization systems can significantly improve water quality for expanded household uses.
Smart Ways to Use Your Harvested Rainwater
Garden and Landscape Irrigation
Rainwater collected from your gutters offers distinct advantages for garden and landscape irrigation. Unlike treated municipal water, rainwater is naturally soft, free from chlorine and minerals that can build up in soil over time. Plants actually thrive on rainwater because it contains beneficial nitrogen compounds absorbed from the atmosphere, promoting healthier growth and more vibrant foliage.
The simplest distribution method involves filling watering cans directly from your collection barrel—perfect for container gardens and small beds. For larger landscapes, consider connecting a standard garden hose to your barrel’s spigot, or upgrade to a drip irrigation system that delivers water slowly and efficiently to plant roots while minimizing evaporation.
To calculate your irrigation capacity, remember that one inch of rainfall on 1,000 square feet of roof yields approximately 600 gallons. A typical garden needs about one inch of water weekly, meaning 0.6 gallons per square foot. If you collect 300 gallons during a rain event, that water can support roughly 500 square feet of garden for one week. Start by monitoring your collection volumes through several rain cycles, then gradually expand your irrigated area as you understand your system’s reliable capacity throughout different seasons.

Household Non-Potable Uses
Collected rainwater excels at household non-potable uses, significantly reducing your municipal water consumption. Toilet flushing represents the largest opportunity, accounting for nearly 30% of household water use. Basic filtration through a mesh screen removes debris, making rainwater suitable for this purpose with minimal treatment. You’ll need separate plumbing lines to distribute rainwater to toilets—a one-time investment that pays dividends through reduced water bills.
Laundry applications work well with rainwater’s naturally soft quality, requiring less detergent than hard tap water. Install a simple sediment filter to protect your washing machine and prevent fabric staining. The lack of chlorine and minerals actually extends appliance lifespan while delivering cleaner clothes.
Car washing benefits from rainwater’s mineral-free composition, eliminating water spots without extra polishing. A basic filtration system removes leaves and particles, keeping your vehicle’s finish pristine. For these applications, avoid rainwater from roofs with treated wood or asphalt shingles until proper filtration removes potential contaminants. Always maintain dedicated storage tanks separate from potable water systems to prevent cross-contamination.
Maintenance That Keeps Your System Running Smoothly
Seasonal Maintenance Checklist
Maintaining your gutter rainwater collection system throughout the year ensures clean water and optimal performance. Here’s a practical maintenance schedule to keep your system running smoothly.
**Spring (March-May):** After winter, inspect gutters for damage and clear accumulated debris. Check all connections and downspouts for leaks. Replace or clean pre-filters and first-flush diverters, as spring pollen and tree debris can quickly clog these components. Examine your storage tank for cracks or sediment buildup, and test water quality if you’re using it for household purposes.
**Summer (June-August):** Clean gutters mid-season, especially if surrounded by trees. Check that mosquito screens remain intact on all tank openings. Inspect pump systems and hoses for wear. This is an excellent time to assess your water usage patterns and storage capacity during peak growing season.
**Fall (September-November):** Perform thorough gutter cleaning before leaves drop. Install gutter guards if you haven’t already—they significantly reduce maintenance needs. Check roof-to-tank connections and replace worn washers or seals. Clean filters one final time before winter.
**Winter (December-February):** In cold climates, winterization is essential. Drain exposed pipes, downspouts, and pumps to prevent freezing damage. Disconnect and store flexible hoses indoors. If possible, insulate your storage tank or keep it partially full to prevent cracking. In milder climates, continue basic monitoring and debris removal as needed.
Gutter rainwater collection represents one of the most accessible entry points into sustainable living for everyday homeowners. You don’t need extensive expertise or a substantial upfront investment to begin harvesting nature’s free resource. By capturing water that would otherwise run off your roof and disappear into storm drains, you’re simultaneously practicing water conservation and reducing monthly utility expenses—a win-win that benefits both your wallet and the environment.
The beauty of rainwater harvesting lies in its scalability. Start with a single rain barrel connected to one downspout, use the collected water for your garden, and observe the results. As you gain confidence and witness the savings accumulate, you can expand your system with additional storage capacity, filtration options, or more sophisticated distribution methods. There’s no pressure to build the perfect setup immediately.
Modern innovations continue making these systems more efficient and user-friendly, bringing cutting-edge solutions within reach of average households. Whether you’re motivated by reducing your environmental footprint, lowering water bills, or simply becoming more self-sufficient, gutter rainwater collection offers tangible benefits without overwhelming complexity.
Take that first step today. Your journey toward sustainable water management begins with a simple decision to capture what’s already falling on your roof. The planet—and your budget—will thank you.