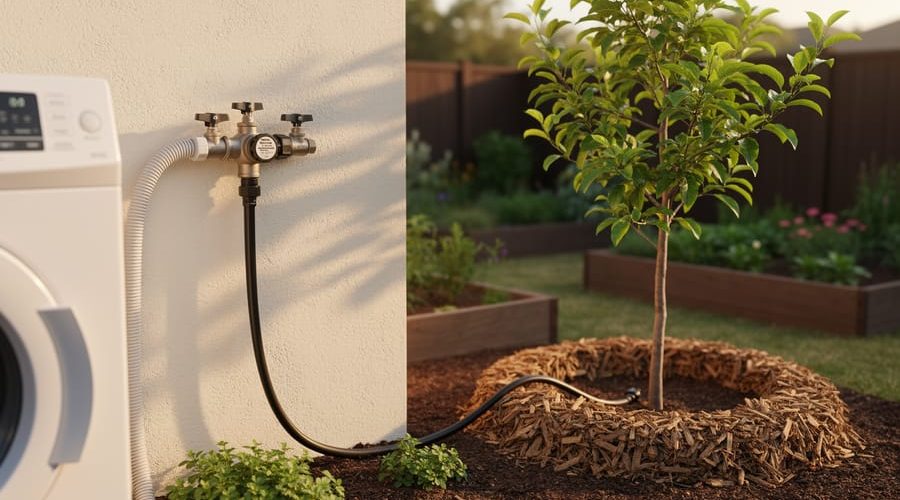
Redirect your washing machine’s drain hose to your yard instead of the sewer, and you’ll save approximately 15,000 gallons of water annually while nourishing your landscape with minimal effort. A laundry-to-landscape greywater system is the simplest greywater setup you can install yourself, requiring no permits in most areas, no modification to your home’s plumbing, and less than $200 in materials from your local hardware store.
This elegant solution captures the relatively clean water from your washer—water that contains trace amounts of soap, lint, and dirt—and channels it directly to your outdoor plants through a network of simple irrigation tubing. Unlike toilet or shower water, laundry greywater contains fewer contaminants, making it ideal for first-time greywater users who want immediate results without complex filtration systems.
The system works through gravity and water pressure alone, using a three-way valve that lets you switch between sending water to the sewer or your garden depending on what you’re washing. Within a single weekend, you can transform your water waste into a sustainable irrigation source that reduces your utility bills, decreases strain on municipal water systems, and keeps your fruit trees, ornamental plants, and vegetable gardens thriving even during drought conditions. The installation requires no special skills beyond basic DIY capabilities, and the ongoing maintenance takes mere minutes each month.
What Makes Laundry-to-Landscape Different from Other Greywater Systems
Laundry-to-landscape systems stand apart from other greywater solutions because of their remarkable simplicity and accessibility. Unlike complex branched drain or pumped greywater systems that often require permits, professional installation, and extensive filtration equipment, L2L systems work with your existing washing machine plumbing to deliver water directly to your landscape with minimal modification.
The biggest advantage is the permitting process, or rather, the lack of one. In most states and municipalities, L2L systems are exempt from greywater permit requirements because they’re considered low-risk and straightforward. This means you can typically start your project without navigating bureaucratic red tape or paying permit fees. However, it’s always wise to verify your local regulations before beginning.
Another distinguishing feature is that laundry water requires no filtration before irrigation. While bathroom greywater from showers and sinks contains soap scum, hair, and various contaminants that need filtering, laundry water is relatively clean, especially when you use biodegradable, plant-safe detergents. This eliminates the need for expensive filter tanks or maintenance-heavy screening systems.
The gravity-fed design also sets L2L systems apart. Your washing machine already pumps water out with enough force to push it through simple 1-inch tubing to multiple outlets in your yard. There’s no need for additional pumps, electricity, or complicated pressure systems like you’d find with rainwater collection systems or other greywater configurations.
Compared to constructed wetland systems or full-house greywater retrofits that can cost thousands of dollars and require significant landscaping changes, L2L systems typically cost under $200 and can be installed in a weekend. This makes it the perfect entry point for homeowners new to water conservation who want immediate results without overwhelming complexity or investment.
How the System Actually Works
The beauty of a laundry-to-landscape greywater system lies in its elegant simplicity. Unlike complex irrigation setups, this system operates entirely by gravity, requiring no pumps, electricity, or complicated controls.
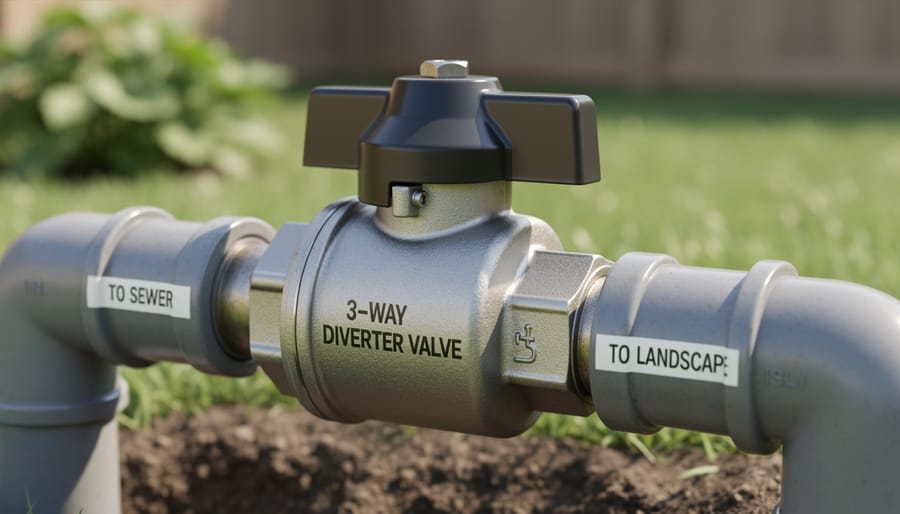
Here’s how water moves through your system: When your washing machine drains, greywater flows through the existing drain hose into a three-way diverter valve mounted on an exterior wall. This valve acts as a traffic controller for your water, giving you complete control over where the greywater goes.
The three-way valve has three positions that you manually switch between. In the first position, water flows directly to the sewer or septic system, just like normal. This setting is useful when you’re washing particularly dirty loads, using bleach, or performing laundry that produces water unsuitable for plants. The second and third positions direct water to different landscape zones in your yard, allowing you to rotate irrigation areas and prevent oversaturation.
From the three-way valve, greywater travels through standard one-inch polyethylene tubing buried shallowly underground. The tubing leads to mulch basins around trees, shrubs, or garden beds. Water emerges directly into these mulched areas, where it soaks into the soil and reaches plant roots.
The entire process happens passively as your washing machine pumps out its drain water. Since the washing machine’s internal pump provides the pressure needed to move water through the system, you don’t need any additional equipment. This makes the system remarkably energy-efficient and virtually maintenance-free. The greywater takes the path you’ve designated with your valve setting, irrigating your landscape while reducing your household water consumption by hundreds of gallons monthly.
What You’ll Need to Get Started
Essential Materials
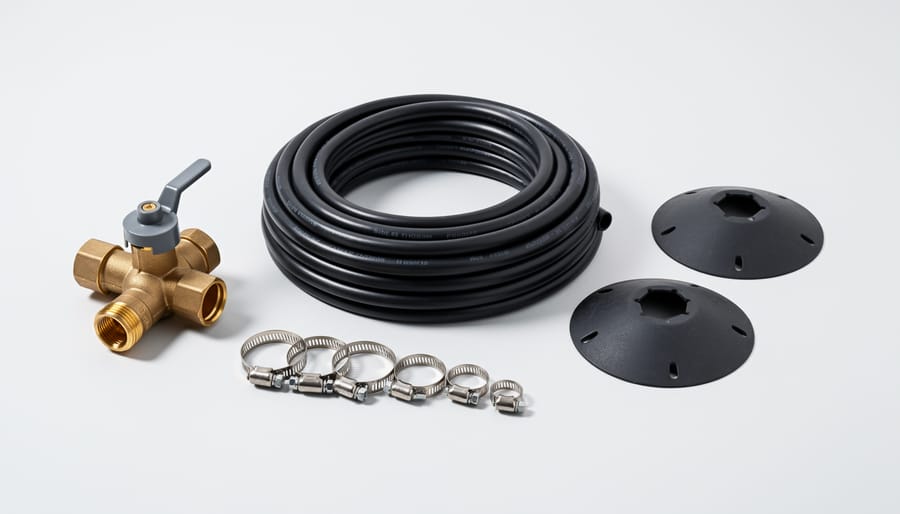
Before starting your laundry-to-landscape greywater system, gather these essential components to ensure a smooth installation. The beauty of this eco-friendly project lies in its simplicity—most materials are available at your local hardware store or plumbing supply shop.
The heart of your system is a three-way diverter valve, which allows you to switch between sending water to the sewer and directing it to your landscape. Look for a valve rated for residential use, typically with a 1-inch connection to match standard washing machine drain hoses.
You’ll need 1-inch polyethylene irrigation tubing, often called poly pipe, which carries greywater from your valve to your plants. Purchase enough to reach your irrigation areas, plus extra for adjustments. This flexible tubing resists corrosion and handles the occasional soap residue without degrading.
Secure all connections with stainless steel hose clamps ranging from 1 to 1.5 inches. These prevent leaks and ensure your system runs reliably for years. Plan for at least two clamps per connection point.
Mulch shields or outlet shields protect the areas where greywater enters your landscape. These simple barriers prevent erosion and help water percolate properly into the soil rather than creating puddles.
Additional supplies include a valve mounting bracket, PVC cement for any permanent connections, Teflon tape for threaded fittings, and landscape fabric to create subsurface irrigation zones. Don’t forget wood mulch to cover outlet areas, which filters water naturally while keeping the system discreet and odor-free.
Tools You’ll Need
Good news—you probably already have most of the tools needed for this eco-friendly project sitting in your garage or toolbox. The laundry-to-landscape greywater system is remarkably simple to install, requiring only basic equipment.
You’ll need a utility knife or PVC pipe cutter to cut irrigation tubing to the correct lengths. A standard tape measure ensures accurate spacing between your plants. Adjustable pliers or a wrench help tighten hose clamps and fittings securely to prevent leaks.
A shovel or garden spade is essential for digging shallow trenches and creating mulch basins around your plants. If you’re installing the three-way valve on your washing machine drain, you’ll want a screwdriver and possibly a drill with bits for creating pilot holes.
For marking your system layout, simple landscape flags or stakes and string work perfectly. A level helps ensure proper drainage slope, though this isn’t critical since the system relies on gravity flow.
Optional but helpful items include work gloves to protect your hands and a small hacksaw if you need to modify any rigid piping. The entire tool list is intentionally minimal—this system’s beauty lies in its straightforward design that makes sustainable water conservation accessible to everyone.
Planning Your System Layout
Choosing the Right Plants for Greywater Irrigation
Not all plants are created equal when it comes to greywater irrigation. Understanding which species thrive and which struggle helps you create a flourishing landscape while making the most of your water-saving efforts.
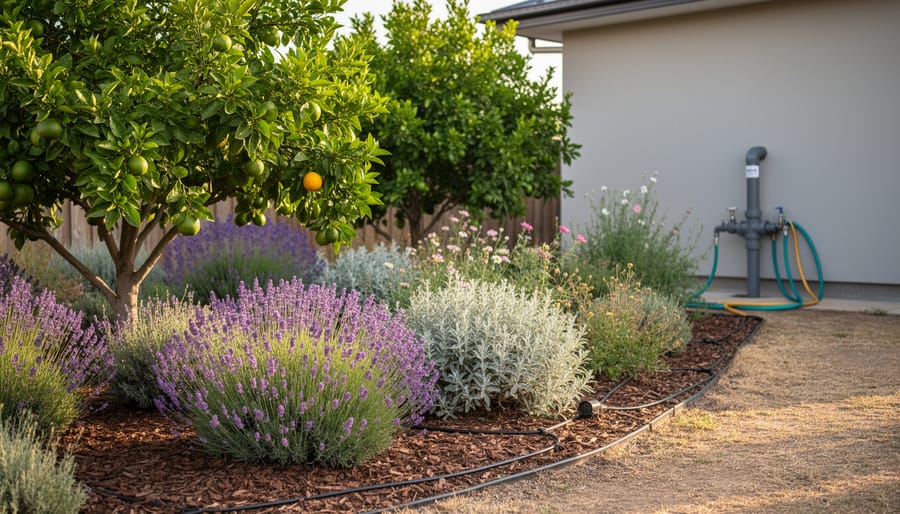
The best candidates for greywater irrigation are established, hardy plants with modest nutrient needs. Fruit trees like citrus, apple, and stone fruits excel with greywater because they’re deep-rooted and tolerate the sodium and residual cleaning products found in laundry water. Ornamental trees such as willows and mulberries also perform wonderfully. For shrubs and perennials, consider rosemary, lavender, California natives, and ornamental grasses, which naturally handle variable water conditions.
Plants to avoid include vegetables you’ll eat raw, like lettuce and tomatoes, due to potential water quality concerns from detergent residues. Acid-loving plants like blueberries, azaleas, and rhododendrons struggle with greywater’s elevated pH levels and sodium content.
Why do certain plants work better? Salt-tolerant species handle the sodium in detergents without developing leaf burn or stunted growth. Deep-rooted plants benefit because greywater disperses underground, keeping foliage dry and reducing disease risks. Established root systems also process nutrients and potential contaminants more effectively than young, shallow-rooted plants.
Start your greywater garden with proven performers like pomegranate trees, Mexican sage, or society garlic. These forgiving plants demonstrate how effective greywater irrigation can be while you gain confidence with the system.
Mapping Your Irrigation Zones
Before installing your system, carefully assess your landscape to create efficient irrigation zones. Start by identifying which plants, shrubs, or trees will benefit from greywater. Group plants with similar water needs together, keeping in mind that a standard washing machine releases 15-40 gallons per load.
Calculate your outlet requirements by dividing the number of gallons your machine uses by 5-10 gallons per outlet. For example, a 30-gallon load might require 3-6 outlets. Position outlets strategically around your landscape, spacing them at least 5 feet apart to prevent oversaturation in any single area.
Consider your property’s slope and soil drainage. Water naturally flows downhill, so place outlets at varying elevations to ensure even distribution. Sandy soils drain quickly and may need more outlets closer together, while clay soils retain water longer and require wider spacing.
Draw a simple map marking your washing machine location, preferred plant zones, and planned outlet positions. This visual guide helps you determine the optimal three-way valve configuration and tubing lengths needed. Remember, shorter runs mean better water pressure and more reliable distribution across all zones.
Step-by-Step Installation Process
Installing the Three-Way Valve
The three-way valve is the heart of your laundry-to-landscape system, giving you control over where your washing machine water flows. This installation process is straightforward and typically takes about 30 minutes to complete.
Begin by turning off your washing machine and unplugging it for safety. Locate the standpipe where your washing machine currently drains. This vertical pipe usually stands about waist-high behind your machine. Pull the existing drain hose out of the standpipe and have a bucket ready to catch any residual water.
Next, insert the three-way diverter valve directly into the standpipe opening. The valve should fit snugly, creating a secure seal. If your standpipe diameter differs from the valve size, use the appropriate rubber adapter or coupling to ensure a watertight connection. Most three-way valves come with universal fittings that accommodate standard 1.5-inch or 2-inch standpipes.
Now reconnect your washing machine’s drain hose to the inlet port on top of the three-way valve. Make sure this connection is tight and secure, as it will handle the full force of your machine’s discharge water.
Attach your new greywater distribution hose to the valve’s secondary outlet. This hose will carry water to your irrigation zones when the valve is switched to the greywater position. The valve handle clearly indicates which direction sends water to the sewer and which diverts it to your landscape.
Test the connections by running a small load of laundry with the valve set to the sewer position first, checking carefully for any leaks before directing water to your plants.
Running the Tubing to Your Landscape
Once your three-way valve is installed, you’ll need to route the 1-inch tubing from the valve to your irrigation zones. This step requires some planning to ensure water flows efficiently to your plants while keeping the installation neat and unobtrusive.
Start by mapping the path from your washing machine to your landscape beds. The tubing should follow the most direct route possible while avoiding high-traffic areas where it might get damaged. If you need to run tubing through an exterior wall, drill a hole slightly larger than 1 inch using a hole saw. Apply silicone caulk around the tubing once it’s in place to seal against pests and weather.
For above-ground installations, secure the tubing every few feet using UV-resistant clips or straps attached to your home’s foundation or fence posts. This prevents sagging and keeps everything tidy. When routing around obstacles like walkways or driveways, you can either bury the tubing 2-4 inches underground or run it along existing structures like deck railings.
Avoid sharp bends that could restrict water flow. If you need to change direction, use gentle curves or elbow fittings designed for 1-inch tubing. Keep the tubing runs as short as possible, ideally under 50 feet, to maintain adequate water pressure.
Consider using colored or camouflaged tubing that blends with your landscaping. Many homeowners paint their tubing to match their home’s exterior or tuck it behind plants for a cleaner appearance while maintaining this eco-friendly water-saving system.
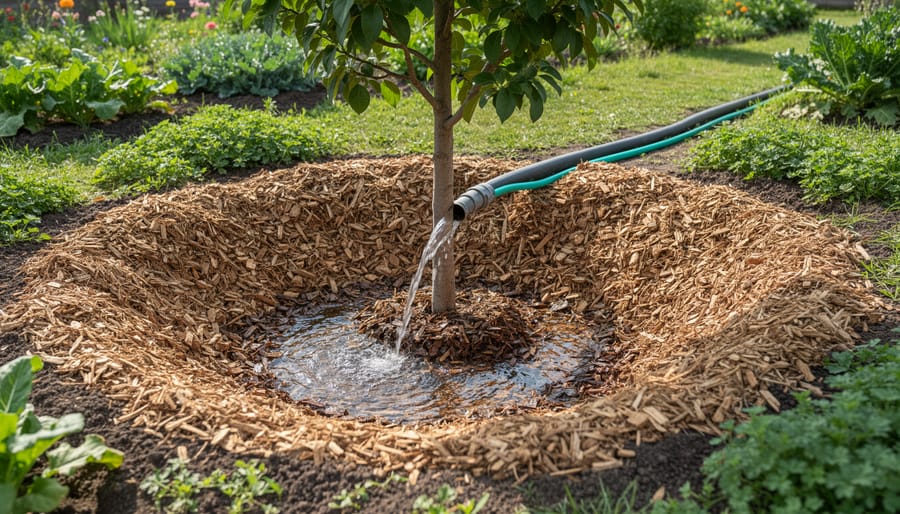
Setting Up Mulch Basins and Outlets
Once your greywater plumbing is installed, the next crucial step is creating proper discharge points where water will irrigate your plants. These mulch basins act as natural filters and prevent erosion while distributing water evenly to your landscape.
Start by digging shallow basins around each plant or tree that will receive greywater. Make each basin approximately 12-18 inches wide and 6-8 inches deep, depending on your plant size. The basin should be at least 6 inches away from the plant’s trunk or stem to prevent root rot. For larger shrubs or trees, create a wider donut-shaped basin around the drip line where feeder roots actively absorb water.
At the end of each outlet pipe, install a mulch shield to prevent erosion and distribute water flow. You can purchase commercial shields or create your own using a small piece of flat rock, paver stone, or rigid plastic placed directly under the pipe opening. This simple barrier breaks up the water stream, preventing it from creating channels or washing away soil.
Fill each basin with 4-6 inches of wood chip mulch. This layer acts as a biological filter, breaking down soap residues and helping beneficial microbes process the greywater. The mulch also reduces evaporation and prevents pooling on the surface.
Test your system by running a load of laundry and observing how water flows into each basin. The water should absorb within a few minutes without pooling or overflowing. If you notice standing water, either dig the basin deeper or add more mulch to improve drainage and filtration.
Choosing the Right Detergents and Soaps
Conventional laundry detergents can wreak havoc on your garden when used in a greywater system. Most commercial products contain ingredients that damage soil structure, harm beneficial microorganisms, and accumulate toxins that plants absorb. The biggest culprits include sodium, boron, chlorine bleach, and synthetic fragrances—all of which can kill plants or stunt their growth over time.
Sodium is particularly problematic because it binds to soil particles, reducing the soil’s ability to absorb water and causing a condition called sodium loading. When selecting detergents for your greywater system, look for products with sodium levels below 45 mg per liter. Check labels carefully, as sodium appears in many forms including sodium chloride, sodium hydroxide, and sodium carbonate.
Safe greywater detergents should be biodegradable, plant-friendly, and free from harmful additives. Look for products labeled as low-sodium or sodium-free, with no boron, chlorine bleach, or phosphates. Reading labels requires attention to detail—terms like “natural” or “eco-friendly” don’t guarantee greywater safety. Focus instead on specific ingredient lists.
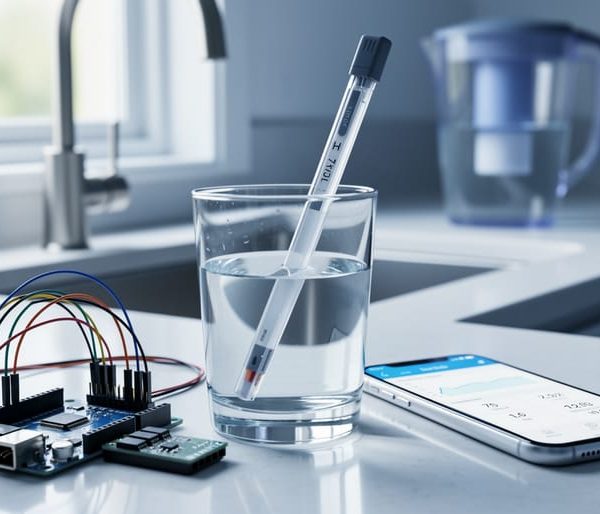
Recommended products include Oasis Biocompatible Laundry Liquid, Bio Pac laundry powder, and Ecos Free and Clear. These options meet strict greywater safety standards while still effectively cleaning clothes. If you’re concerned about your soil health, you can monitor water quality using DIY testing methods to track any buildup of harmful substances.
Remember that even with safe detergents, it’s wise to rotate irrigation areas and avoid watering the same plants continuously. This practice prevents any potential accumulation of salts or other compounds, ensuring your garden thrives while you conserve water.
Operating Your System Safely and Effectively
Zone Rotation and Water Management
Proper zone rotation is essential for preventing waterlogged soil and maintaining healthy plants in your laundry-to-landscape system. The basic principle is simple: never send greywater to the same irrigation zone two days in a row. Most households should rotate between at least three zones, spending 2-3 days per zone before switching to the next.
To prevent overwatering, observe your landscape carefully. Signs include standing water, soggy soil, yellowing leaves, or fungal growth. During rainy periods, consider directing greywater to a less frequently used zone or allowing your soil to dry out completely. Remember that different plants have varying water needs – drought-tolerant natives require less frequent watering than thirsty vegetable gardens.
Create a simple rotation schedule based on your household’s laundry habits. For example, if you wash three loads weekly, direct them to different zones. Mark your three-way valve clearly (Zone A, B, C) and keep a calendar near your washing machine as a reminder. During summer months, you might water each zone twice weekly, while winter may require only once-weekly watering. Balance distribution by measuring the mulch basins’ moisture levels regularly, adjusting your rotation pattern to ensure all landscape areas receive adequate but not excessive water.
Common Problems and Quick Fixes
Even the best-designed laundry-to-landscape system may encounter occasional hiccups. If you notice slow drainage, check your outlet pipes for clogs caused by lint or debris. Installing a simple lint filter on your washing machine’s discharge hose prevents most blockages. Clean or replace these filters monthly to maintain smooth water flow.
Valve problems rank among the most common issues. If your three-way valve becomes stiff or leaks, it likely needs cleaning or replacement. These valves are inexpensive and easy to swap out—just ensure you match the size to your existing plumbing.
Uneven water distribution across your mulch basins often indicates improper grading or insufficient basin depth. Dig your basins deeper (at least 12 inches) and ensure the surrounding soil slopes away from your home’s foundation.
If plants show signs of stress despite regular irrigation, your greywater might contain high soap concentrations. Switch to plant-friendly, low-sodium detergents and avoid products with boron or bleach. Consider testing water safety periodically to monitor chemical levels.
Finally, winterize your system in freezing climates by redirecting water to the sewer and draining all outdoor pipes to prevent damage.
Legal Considerations and Local Regulations
One of the biggest advantages of laundry-to-landscape systems is that they’re typically permit-exempt in many jurisdictions, making them an accessible entry point into greywater reuse. This exemption exists because L2L systems are considered simple and low-risk when properly installed, since the water flows directly from your washing machine to irrigation without storage or complex treatment.
However, regulations vary significantly by location. Some states and municipalities have embraced greywater systems with clear guidelines, while others maintain stricter requirements or outdated codes that haven’t caught up with modern eco-friendly practices. Before starting your project, contact your local building or health department to verify whether L2L systems are permitted in your area and if any registration is required.
Most permit-exempt L2L systems follow common-sense rules: the greywater must stay on your property, cannot create standing water or runoff, should only irrigate non-edible plants (like ornamentals and fruit trees), and must not come into contact with food crops that touch the soil. Additionally, greywater cannot be stored for more than 24 hours to prevent bacterial growth.
If your area doesn’t explicitly allow greywater systems, consider advocating for updated regulations or exploring whether a simple permit application might work. Many homeowners have successfully navigated local codes by presenting their plans clearly and demonstrating their commitment to safe, responsible water reuse. Remember, you’re not just saving water—you’re pioneering sustainable practices that benefit your entire community while reducing strain on municipal water systems.
The Real-World Impact: Water and Money Saved
Let’s talk real numbers. A typical laundry-to-landscape greywater system can save an average household between 15,000 to 40,000 gallons of fresh water annually. To put that in perspective, that’s enough water to fill a standard backyard swimming pool halfway, redirected from the sewer system straight to your garden where it actually benefits your property.
The financial impact is equally impressive. Depending on your local water rates and household size, you could see savings of $200 to $500 per year on combined water and sewer bills. Since the basic DIY laundry-to-landscape system costs between $75 and $200 in materials, most homeowners recover their investment within the first year of operation.
Your landscape benefits extend beyond the numbers. Plants watered with greywater receive a continuous supply of moisture along with trace nutrients from biodegradable detergents, often resulting in healthier growth without additional fertilizers. Homeowners typically report reducing their outdoor irrigation needs by 30 to 50 percent during growing seasons, with some eliminating supplemental watering entirely for established plants.
The environmental ripple effects matter too. Every gallon of greywater you reuse means one less gallon pulled from rivers, lakes, or underground aquifers. It also means less wastewater entering treatment facilities, reducing the energy and chemicals needed for municipal water processing. In drought-prone regions, this conservation becomes particularly critical, helping communities stretch limited water resources further.
For a family of four doing 300 loads of laundry annually, that translates to roughly 15,000 gallons kept out of the sewer system and put to productive use. That’s conservation you can see growing in your yard every single day.
You’ve just discovered one of the most accessible entry points into water conservation. A laundry-to-landscape greywater system proves that sustainable living doesn’t require complicated installations or expensive equipment. With basic plumbing skills and a weekend afternoon, you can redirect hundreds of gallons monthly from the sewer to your yard, reducing both your water bill and environmental footprint.
This system represents more than just water savings. It’s a tangible step toward self-sufficiency and environmental stewardship. Every load of laundry becomes an opportunity to nourish your landscape naturally, demonstrating how small household changes create meaningful impact. As you expand your knowledge of sustainable water systems, you’ll discover even more ways to optimize your home’s resource use.
Ready to get started? Gather your materials, review local regulations one final time, and take that first step. Your plants will thank you, your wallet will benefit, and you’ll join a growing community of homeowners making conscious choices about water use. The simplest solutions often create the biggest transformations. Start building your system today and watch your garden thrive while your water consumption drops.