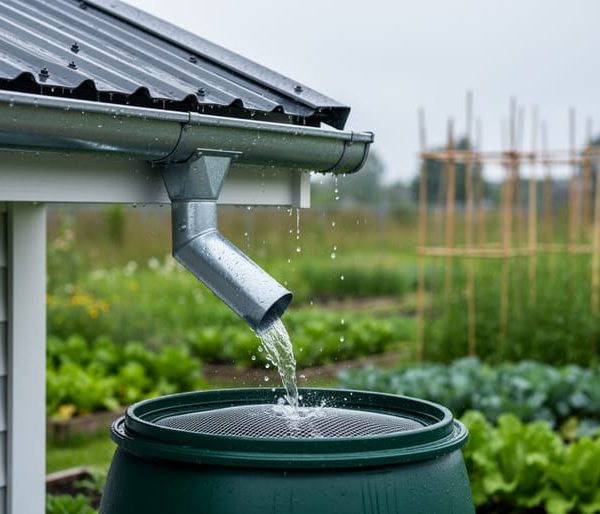
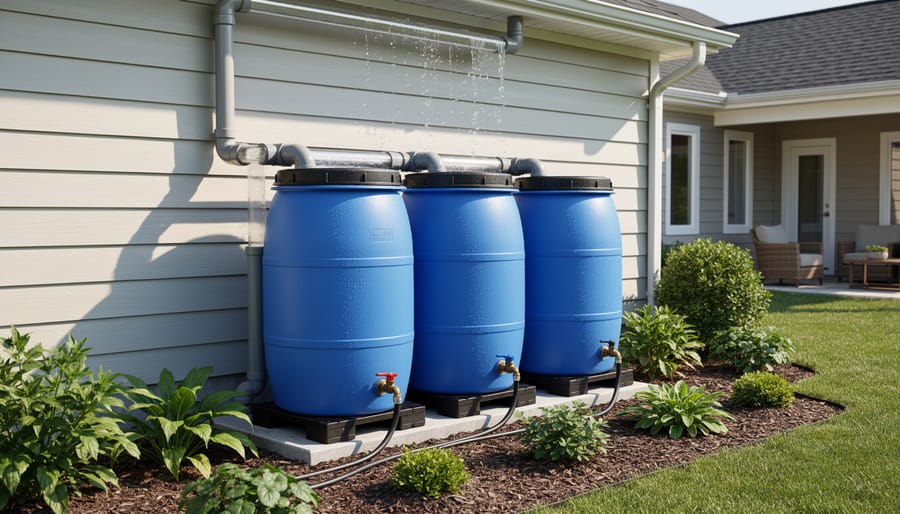
Connect three 55-gallon rain barrels in series using overflow hoses to create a 165-gallon collection system that captures enough water for a small garden or lawn throughout dry seasons. Position your first barrel directly beneath a downspout with a diverter kit, then link additional barrels at slightly lower elevations to ensure gravity-fed flow between containers.
Install spigots near the base of each barrel for easy watering access, and drill overflow holes three inches from the top to connect food-grade vinyl tubing between units. This configuration prevents water waste and maximizes storage capacity while maintaining steady water pressure for garden hoses or drip irrigation systems.
Screen all inlet points with fine mesh to block debris, leaves, and mosquitoes from contaminating your water supply. Elevate barrels on cinder blocks or wooden platforms to increase water pressure and make bucket-filling easier, while ensuring your foundation remains level to prevent tipping.
A three-barrel setup transforms 1,000 square feet of roof space into approximately 600 gallons of harvestable water during a one-inch rainfall event. This mid-sized system bridges the gap between single-barrel experiments and whole-house cisterns, offering serious water conservation without complex plumbing or expensive infrastructure. Understanding rainwater harvesting basics helps you maximize collection efficiency while maintaining water quality for outdoor use. The modular design allows you to start with one barrel and expand as your needs grow, making it an ideal entry point for homeowners committed to reducing municipal water consumption and building resilience against drought conditions.
Why Three Barrels Work Better Than One
A three-barrel rainwater collection system offers significant practical advantages over a single-barrel setup, making it an ideal entry point for homeowners ready to embrace sustainable water practices without overwhelming complexity or cost.
The most obvious benefit is storage capacity. While a standard rain barrel holds about 55 gallons, three barrels connected together provide 165 gallons or more of harvested water. This expanded capacity means you’ll have adequate water reserves during dry periods when your garden needs it most. A single barrel can empty quickly during a week without rain, but a three-barrel system maintains a meaningful supply that bridges those gaps between storms.
System redundancy is another key advantage. If one barrel develops a leak or requires maintenance, the other two continue functioning, ensuring you don’t lose your entire water supply. This built-in backup gives you peace of mind and flexibility for repairs or upgrades over time.
The three-barrel configuration also strikes an excellent balance between affordability and effectiveness. While larger rainwater harvesting systems involving underground cisterns or massive tanks can cost thousands of dollars, a three-barrel setup typically runs between 150 and 400 dollars depending on whether you use new or repurposed barrels. This price point makes it accessible for most homeowners while still delivering substantial water savings.
The system’s footprint remains manageable too. Three barrels can be arranged in a compact line along your home’s foundation or cleverly tucked into a corner of your yard. You get meaningful water harvesting capacity without sacrificing significant outdoor space, making it practical even for smaller properties where every square foot matters.
What You’ll Need to Build Your 3-Barrel System
Choosing the Right Barrels
Selecting the right barrels is the foundation of your rainwater collection system. Food-grade barrels are essential since the water you collect will be used for gardening or potentially household purposes. These barrels previously held safe food products like olives, pickles, or juice, ensuring no harmful chemicals leach into your harvested water.
The standard 55-gallon barrel is ideal for most homeowners, providing substantial storage without taking up excessive space. Three barrels give you 165 gallons of capacity, enough to support a decent-sized garden through dry spells. If space allows, consider 75-gallon drums for increased storage.
You’ll find barrels through several sources. Recycled food-grade barrels are the most affordable option, typically costing between $15-40 each. Check local beverage distributors, car washes, or food processing plants that often sell used containers. Online marketplaces and farm supply stores are reliable options too.
New barrels cost $50-100 each but come ready to use with pre-drilled holes and spigots. While pricier, they eliminate concerns about previous contents and cleaning requirements.
Before purchasing, inspect barrels for cracks, ensure lids seal tightly, and verify they’re truly food-grade by checking for the recycling symbol with numbers 1, 2, or 5. Avoid barrels that held petroleum products, chemicals, or non-food substances, as these can contaminate your water supply and harm plants.
Connectors, Spigots, and Overflow Components
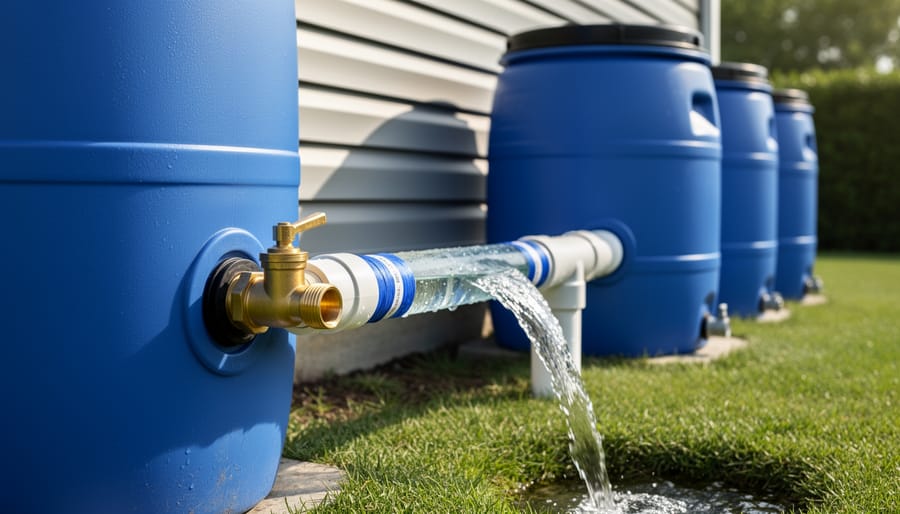
Connecting three barrels properly requires the right hardware to ensure smooth water flow and prevent leaks. At the heart of your system, you’ll need bulkhead fittings or barrel connectors—these threaded fittings create watertight connections between barrels. Most homeowners opt for 3/4-inch or 1-inch connectors, which balance adequate flow with manageable installation.
Position your spigots near the bottom of the first barrel for easy bucket filling, but leave about 2-3 inches clearance from the absolute base to avoid sediment contamination. Standard garden hose spigots work perfectly and cost just a few dollars each. Install them using rubber washers on both sides to prevent dripping.
Overflow management is essential for three-barrel systems since they fill quickly during heavy rainfall. Install overflow valves or pipes at the top of your final barrel, directing excess water away from your home’s foundation. A simple solution involves attaching a short length of garden hose or PVC pipe at the barrel’s upper section, angled downward toward your lawn or garden beds.
Don’t overlook filtration screens, which are critical for system longevity. Install mesh screening (1/16-inch or smaller) at your downspout connection point to block leaves, debris, and insects. This simple addition prevents clogs and keeps your collected water cleaner, reducing maintenance headaches down the road. Many innovative filtration systems now incorporate first-flush diverters, which automatically redirect the initial dirty runoff away from your barrels, capturing only the cleaner rainfall that follows.
Setting Up Your Three-Barrel Collection System
Site Selection and Preparation
Choosing the right location for your three-barrel rainwater collection system sets the foundation for long-term success. Start by examining your roof’s drainage patterns during a rainfall to identify where water flows most consistently. Position your barrels directly beneath or very close to downspouts to maximize collection efficiency and minimize the need for additional piping.
Level ground is essential for system stability and proper function. Use a carpenter’s level to ensure your chosen spot is flat, as uneven surfaces can cause barrels to tip when full, each holding approximately 55 gallons and weighing over 400 pounds. If your ground slopes, create a level platform using concrete pavers or a wooden base.
Keep your system at least 10 feet away from your home’s foundation to prevent water overflow from compromising structural integrity. This distance also allows for safe maintenance access around all sides of your barrel setup. Consider sun exposure too—partial shade helps reduce algae growth inside barrels while still allowing easy access for monitoring and use.
Finally, verify that your selected location doesn’t interfere with foot traffic, lawn maintenance, or underground utilities. A well-chosen site makes your rainwater harvesting system both effective and convenient for years to come.
Connecting Your Barrels for Maximum Efficiency
Once you’ve positioned your three barrels, you’ll need to connect them properly to ensure smooth water flow throughout your system. There are two main configuration options: series and parallel, each with distinct advantages.
In a series configuration, water flows from one barrel to the next in a chain. You’ll connect the first barrel (attached to your downspout) to the second barrel using a linking kit or overflow hose positioned near the top of each barrel. When the first barrel fills, water automatically flows to the second, then to the third. This setup is simple and cost-effective, requiring minimal materials. The downside is that if you need water from the third barrel, you’ll have to wait for the first two to fill, which can be slower during light rainfall.
A parallel configuration connects all three barrels to a central manifold or distribution system, allowing them to fill simultaneously. This method provides faster access to your total water capacity and puts equal pressure on all spigots. However, it requires more components and careful leveling to ensure even distribution. You’ll need a manifold setup with multiple outlets or a network of connecting hoses at the base of each barrel.
For most homeowners, a modified approach works best: connect two barrels in series for simplicity, then add the third barrel as either another series extension or as a parallel backup. This hybrid system balances efficiency with practicality.
Regardless of your choice, always install overflow valves on each barrel to prevent flooding during heavy storms. Position connections at least two inches from the top to maintain adequate overflow capacity, and use food-grade hoses to keep your collected water safe for garden use.
Diverter Installation and First Flush Systems
Installing the right diverter system ensures your rainwater collection setup works efficiently while keeping your water clean. A downspout diverter is the crucial connection point between your existing gutter collection systems and your three-barrel array.
Start by choosing a diverter kit designed for multiple barrels. These kits typically include a Y-connector or manifold system that splits water flow evenly among your three containers. Install the diverter about 12 inches above ground level on your downspout, cutting the downspout pipe cleanly with a hacksaw. The diverter redirects water horizontally through pipes or hoses to each barrel’s inlet.
However, before water reaches your barrels, installing a first-flush diverter protects your harvested water from contamination. This simple but essential device captures the initial runoff from your roof, which carries accumulated dirt, bird droppings, leaves, and other debris. Think of it as a screening process that sacrifices the first gallon or two of dirty water to keep the rest clean.
First-flush diverters work automatically. The initial contaminated water fills a small vertical chamber with a slow-release valve at the bottom. Once this chamber fills, cleaner water flows past it into your barrels. After each rain event, the chamber slowly drains, resetting itself for the next rainfall.
Most DIY systems use a simple PVC pipe chamber installed inline before the barrel diverter. A basic first-flush system costs under fifty dollars but dramatically improves water quality, making your three-barrel setup more practical for gardening and household uses.
Making Your Collected Water Safe and Usable
Simple Filtration Methods for Rainwater
Keeping your collected rainwater clean doesn’t require expensive equipment. Start with basic screening by installing a mesh filter or screen at your gutter downspout entry point. This first line of defense catches leaves, twigs, and debris before they enter your barrels, preventing clogs and reducing maintenance headaches.
Next, consider adding a sediment filter between your first and second barrel. These simple filters trap dirt particles and fine sediment that slip past your initial screen. You can purchase affordable inline sediment filters at most hardware stores, or create a DIY version using layers of gravel, sand, and charcoal in a food-grade bucket with drilled holes.
For gardeners wanting extra-clean water, optional carbon filters offer another level of purification. Carbon filtration removes organic compounds, odors, and some chemicals that may wash off your roof. While not necessary for watering plants, these filters are worth considering if you’re particular about water quality or plan to use rainwater for washing outdoor equipment.
Remember, these filtration methods make your rainwater suitable for gardens and outdoor use, not for drinking. Regular filter cleaning every few months ensures your system continues working efficiently throughout the collection season.
When and How to Test Your Rainwater
Testing your rainwater ensures it’s safe for its intended purpose. For outdoor use like watering gardens, testing is optional but helpful. However, if you’re considering using collected water indoors for laundry, toilet flushing, or bathing, testing becomes essential.
Start with a basic pH test kit, available at most hardware stores for under $15. Rainwater naturally sits between 5.0 and 6.0 pH, which is slightly acidic but perfectly safe for most applications. If your pH drops below 4.5, check your barrel materials and surrounding environment for contamination sources.
Test your water initially when setting up your system, then seasonally or after significant weather events. Watch for visible changes like discoloration, unusual odors, or sediment buildup, which signal the need for immediate testing.
For indoor use, invest in a comprehensive water testing kit that checks for bacteria, heavy metals, and chemical contaminants. These typically cost $50 to $150 and provide lab analysis. Local cooperative extension offices often offer affordable testing services specifically designed for rainwater systems.
Remember that proper filtration and first-flush diverters significantly improve water quality, reducing contaminants before they enter your barrels. Regular maintenance and monitoring create a safe, sustainable water source for your home.
Maintenance That Keeps Your System Running Year-Round
Winter Preparation and Freeze Protection
Before winter arrives, properly winterizing your three-barrel system prevents costly freeze damage and extends equipment life. In climates where temperatures drop below freezing, draining your barrels completely is essential since expanding ice can crack plastic and burst connections.
Start by disconnecting all hoses and spigots in late fall. Open drain valves at the lowest point of each barrel and tilt them slightly if needed to remove all standing water. Don’t forget to drain connecting pipes between barrels, as trapped water here commonly causes problems. Remove and store rubber washers and flexible connectors indoors to prevent brittleness.
For barrel protection, you have two options: empty them entirely and store them upside-down in a shed or garage, or leave them in place with lids slightly ajar to prevent water accumulation from precipitation. If your barrels must stay outside, ensure they’re bone-dry inside.
Disconnect your downspout diverter and redirect roof runoff away from your foundation using downspout extensions. Mark this location so you remember to reconnect it in spring. This simple preparation routine takes about thirty minutes but protects your sustainable water system investment for years to come.
Cleaning and Algae Prevention
Keeping your three-barrel rainwater collection system clean ensures safe, usable water and extends the life of your setup. Establish a routine maintenance schedule that includes checking your system monthly and performing deep cleaning twice yearly, ideally in spring and fall.
Algae prevention starts with choosing opaque barrels that block sunlight, since algae needs light to thrive. Dark-colored barrels work best for this purpose. Always use tight-fitting, sealed lids to prevent both light penetration and debris entry. This simple step dramatically reduces algae growth and keeps mosquitoes from breeding in your stored water.
Your screens and filters require regular attention to maintain proper water flow. Inspect gutter screens weekly during heavy rainfall seasons and monthly during drier periods. Remove leaves, twigs, and accumulated debris by hand or with a soft brush. Clean first-flush diverters and inlet filters every few weeks to prevent clogs.
When deep cleaning barrels, drain them completely and scrub interior surfaces with a mixture of water and white vinegar. This natural solution removes biofilm and mineral deposits without introducing harmful chemicals into your water supply. Rinse thoroughly before returning the barrel to service. Regular maintenance prevents contamination and keeps your eco-friendly water system running efficiently year-round.
The Real Impact: Water Savings and Environmental Benefits
A three-barrel rainwater collection system can make a significant difference in both your household budget and environmental footprint. With a combined capacity of approximately 165 gallons (assuming standard 55-gallon barrels), this setup captures substantial rainfall that would otherwise flow into storm drains.
To put this in perspective, a typical residential roof measuring 1,000 square feet can collect about 600 gallons of water from just one inch of rainfall. With average annual rainfall varying by region—around 38 inches nationally—homeowners can potentially harvest thousands of gallons yearly. Even accounting for dry periods and system overflow, a 3-barrel system realistically saves between 3,000 to 6,000 gallons annually for most households.
This translates to tangible savings on your water bill. At average municipal rates of $1.50 per 1,000 gallons, you could save $15 to $30 per year on outdoor watering alone. While modest, these savings accumulate over the system’s lifespan while providing chemical-free water that plants actually prefer over treated municipal supply.
The broader environmental benefits of rainwater collection extend beyond personal savings. Every gallon you collect reduces strain on municipal water treatment facilities and delivery infrastructure. During heavy rainstorms, your system captures runoff that might otherwise contribute to local flooding and erosion, carrying pollutants into waterways.
When combined with other sustainable practices like greywater recycling, a 3-barrel system becomes part of a comprehensive approach to water conservation. You’re not just saving water—you’re participating in a solution to reduce stormwater pollution, decrease energy consumption from water treatment, and build resilience against drought conditions. For environmentally-conscious homeowners, these collective impacts represent the true value of rainwater harvesting.

A 3-barrel rainwater collection system offers an accessible entry point into sustainable water management that fits comfortably within most homeowners’ budgets and skill levels. This mid-sized setup strikes the perfect balance between meaningful water conservation and manageable installation, making it an ideal first step toward reducing your environmental footprint while lowering utility costs.
Starting with three barrels allows you to experience the benefits of rainwater harvesting without overwhelming your space or finances. As you become familiar with maintaining your system and witness the impact on your water bills, you can confidently expand your collection capacity. Many homeowners find that their initial setup pays for itself within the first year through reduced water consumption alone.
The beauty of this system lies in its simplicity. With basic tools and a weekend’s work, you’ll transform rainfall into a valuable resource for your garden, lawn, and outdoor cleaning needs. This practical innovation represents more than just cost savings—it’s a meaningful contribution to water conservation in your community.
Ready to take the next step? Begin by assessing your roof area and calculating your potential collection volume. Gather your materials, review local regulations, and set aside time for installation. Your journey toward sustainable living starts with that first barrel.