Installing a water softener yourself is entirely possible if you have basic plumbing skills and the right tools. Most homeowners with moderate DIY experience can complete the installation in 2-4 hours, potentially saving $200-500 in professional labor costs. However, success depends on three critical factors: your existing plumbing setup, local building codes, and your comfort level working with water lines.
Assess your plumbing configuration first. If you have accessible main water lines, a nearby drain, and an electrical outlet within three feet of the installation site, you’re already halfway there. Homes with modern copper or PEX piping make DIY installation more straightforward than those with older galvanized steel pipes that may require additional fittings or even pipe replacement.
Understand the technical requirements before purchasing equipment. You’ll need to install the softener on your main water line before it splits to your water heater, bypass outdoor spigots to avoid wasting soft water on landscaping, and ensure proper drainage for the brine discharge. Most modern systems use push-fit or compression fittings that eliminate the need for soldering, making installation considerably easier than traditional methods.
Know when professional help is necessary. If your home requires significant plumbing modifications, lacks proper drainage access, or if local codes mandate licensed plumber installation for water treatment systems, hiring a professional protects both your investment and your home’s integrity. This honest assessment will guide you toward the right decision for your specific situation.
What Installing a Water Softener Actually Involves
Installing a water softener is more straightforward than many homeowners imagine, though it does require some basic plumbing knowledge and careful attention to detail. Understanding the core workflow can help you decide whether this project matches your skill level.
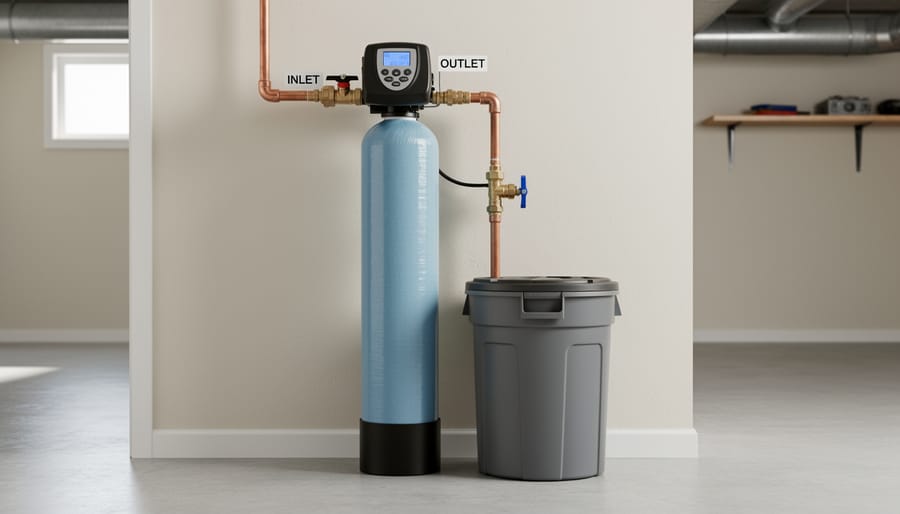
The process begins with shutting off your main water supply and draining the pipes to prevent flooding. You’ll then identify the ideal location for your softener, typically where the main water line enters your home and before it branches to your water heater. This positioning ensures all household water gets treated while protecting your heater from scale buildup.
Next comes cutting into your existing plumbing to create the loop where your softener will connect. This step involves measuring precisely, cutting pipes cleanly, and installing bypass valves that allow water to flow around the unit during maintenance. Modern compression fittings have simplified this process significantly compared to older soldering methods, making it more accessible for DIY enthusiasts.
You’ll then mount the control valve, connect the inlet and outlet pipes, and attach the drain line for the regeneration cycle. The brine tank requires connection and proper salt addition. An electrical outlet nearby powers the timer that controls the regeneration schedule.
After all connections are secure, you’ll slowly restore water pressure while checking every joint for leaks. The final testing phase involves programming the control head based on your water hardness level and household size, then running a manual regeneration cycle to ensure everything functions correctly.
The entire installation typically takes four to six hours for someone with moderate DIY experience. If you’re comfortable working with basic plumbing and following detailed instructions, our step-by-step installation guide can walk you through each phase. However, homes with complex plumbing configurations or local codes requiring licensed plumbers may warrant professional assistance.
Plumbing Requirements You Need to Check First
Water Supply Line Access and Compatibility
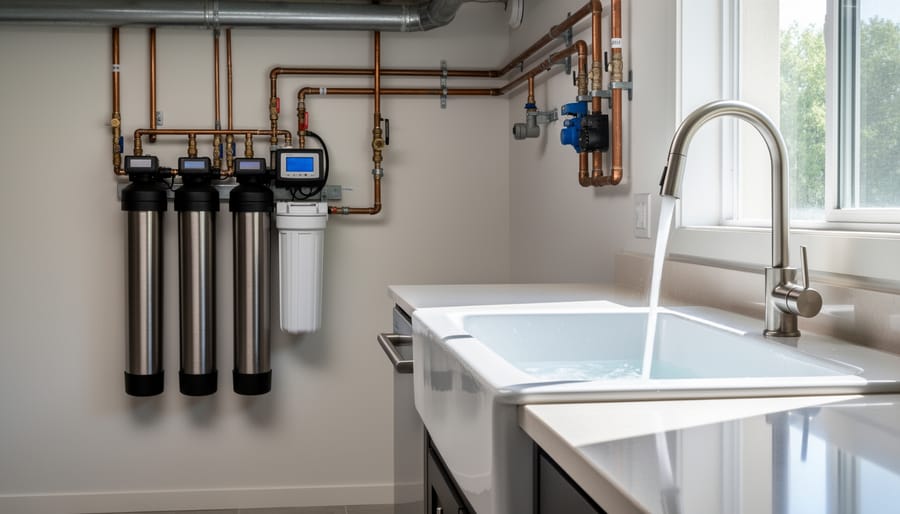
Your water softener needs to connect to your home’s main water supply line, typically where water first enters your house after the meter. This location allows the system to treat all water flowing throughout your home, ensuring comprehensive softening benefits.
The type of pipes in your home significantly impacts installation complexity. Copper pipes are the most straightforward to work with, allowing for clean cuts and secure soldering or compression fittings. PEX tubing offers flexible, DIY-friendly installation using clamp or crimp connections that don’t require specialized welding skills. Galvanized steel pipes, common in older homes, present more challenges since they’re prone to corrosion and require threading tools for proper connections.
Before starting your project, inspect your existing plumbing setup. Ideal conditions include easily accessible pipes with adequate space for the softener unit, a nearby electrical outlet, and proper drainage access. You’ll need approximately 3-4 feet of clearance for most residential systems. If your pipes are brittle, heavily corroded, or located in cramped spaces like finished walls, installation becomes considerably more difficult and may warrant professional assistance. Modern water-efficient softener systems also require specific flow rates, so checking your home’s water pressure beforehand ensures compatibility with today’s eco-conscious technology.
Drainage and Drain Line Requirements
Your water softener needs reliable access to a drain for the regeneration cycle, when the system flushes out accumulated minerals from the resin tank. This brine discharge must go somewhere, typically into a floor drain, laundry sink, or standpipe within your utility area.
The drain connection relies on gravity flow, meaning water naturally flows downward without requiring a pump. Your softener’s discharge line should have a continuous downward slope toward the drain to prevent backups. Most manufacturers recommend keeping the drain within 10-20 feet of the unit, though some systems allow up to 30 feet with proper slope maintenance.
Position matters significantly here. The discharge line must maintain an air gap above the drain opening to prevent contaminated water from back-siphoning into your softener. This eco-friendly safety feature protects your water system while ensuring efficient wastewater disposal during regeneration cycles.
Check your local plumbing codes before installation, as some municipalities have specific requirements about where softener discharge can drain. Certain areas restrict discharge into septic systems due to the salt content potentially affecting bacterial action. Understanding these drainage requirements upfront helps you determine if your current plumbing layout supports DIY installation or needs professional modifications to meet code requirements.
Electrical Outlet Proximity
Most modern water softeners require a standard 110-120 volt electrical outlet to power the control valve’s timer and regeneration system. You’ll need this outlet within 3-6 feet of your installation location, and it must be a GFCI (Ground Fault Circuit Interrupter) protected outlet since it’s near water sources. This safety feature prevents electrical shocks in damp environments.
The good news? If you already have a properly grounded, GFCI-protected outlet nearby, you won’t need an electrician. Many homes have these in utility rooms or basements where water softeners typically go. However, if you need to install a new outlet or upgrade an existing one to GFCI, hiring a licensed electrician is the safest choice. This typically costs $100-200 but ensures code compliance and protects your home.
Some eco-conscious homeowners appreciate that salt-free water conditioning systems often require no electricity at all, reducing energy consumption. Before purchasing your softener, verify your electrical setup matches the manufacturer’s specifications to avoid installation delays.
Space and Clearance Considerations
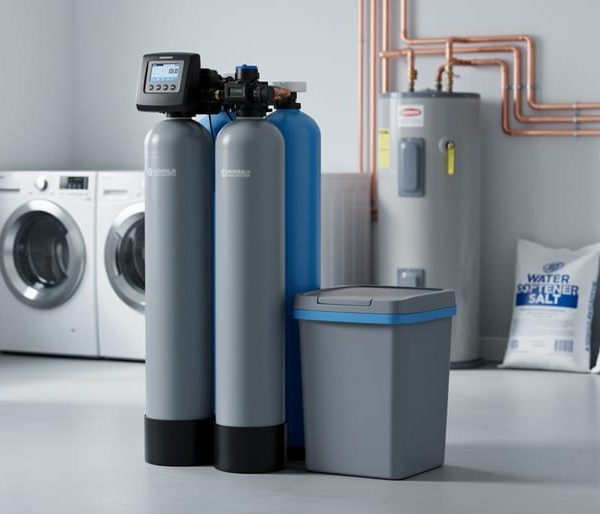
Before purchasing your water softener, carefully measure your installation area. Most units need 10-20 square feet of floor space, depending on their capacity. Check that your chosen location can accommodate the softener’s height, typically 4-5 feet, and verify you’ve selected the proper sizing for your household needs.
Leave at least 12 inches of clearance around the unit for maintenance access. The top must be fully accessible since you’ll regularly add 40-pound salt bags. Consider proximity to a drain for regeneration discharge and an electrical outlet within three feet. Basement installations are ideal, but utility rooms or garages work too. Avoid extreme temperature locations, as freezing can damage components.
Plan a clear pathway from your entrance to the softener for hauling salt. This practical consideration often gets overlooked but becomes important during routine upkeep. Adequate space planning now prevents frustration later and ensures your eco-friendly water treatment system operates efficiently for years.
Skills and Tools Needed for DIY Installation
Basic Plumbing Skills Required
Before tackling a water softener installation, you’ll need to evaluate your plumbing skills honestly. This project requires several fundamental competencies that go beyond basic home repairs.
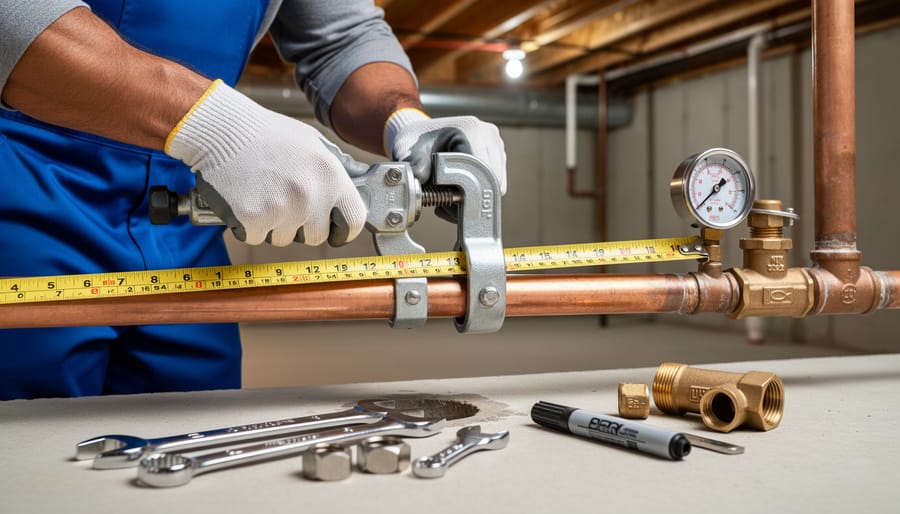
First, you’ll need to be comfortable cutting pipes. Whether you’re working with copper, PVC, or PEX piping, you’ll need the right tools and confidence to make clean, straight cuts in your existing plumbing system. A pipe cutter or hacksaw will be your primary tools, and precision matters here since uneven cuts can lead to connection problems.
Next, you should understand joining methods. For copper pipes, this typically means soldering, which requires a propane torch, solder, flux, and steady hands. If soldering feels intimidating, compression fittings offer a flame-free alternative that uses threaded connections and rubber gaskets. PEX systems use crimp rings or push-fit connectors, which are generally more forgiving for beginners.
Understanding water pressure is equally important. You’ll need to know how to shut off your main water supply completely and drain the system before starting work. You should also be able to identify the proper location for installation, usually near where water enters your home, and understand how the softener will affect overall household pressure.
Finally, leak prevention skills are non-negotiable. After installation, you must test all connections thoroughly and know how to tighten fittings properly without over-tightening, which can crack components. If water drips appear, you should feel confident troubleshooting and fixing them promptly to prevent water damage that could cost significantly more than hiring a professional from the start.
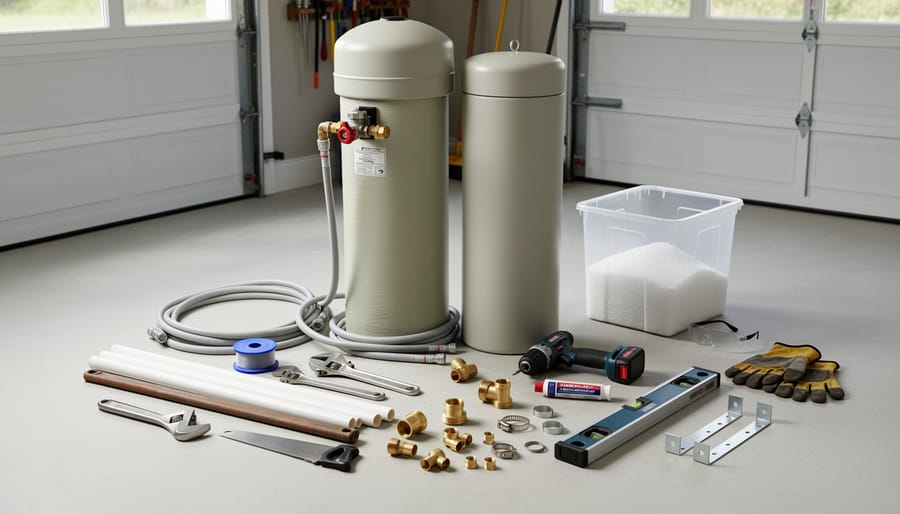
Essential Tools and Materials Checklist
Before beginning your water softener installation, gather these essential tools and materials to ensure a smooth DIY experience. Having everything ready saves time and prevents mid-project trips to the hardware store.
Required Tools:
Start with a pipe cutter or hacksaw for cutting existing plumbing lines (approximately $15-30). You’ll need adjustable wrenches in multiple sizes, typically 10-inch and 12-inch varieties ($20-40 for a set). A measuring tape ensures precise spacing, while a bucket catches any residual water during installation. Keep Teflon tape or pipe thread sealant on hand for creating watertight connections ($3-5). A drill with various bits may be necessary for mounting brackets or drilling drain line holes ($50-100 if you don’t own one). Include a level to ensure proper positioning and a flashlight for working in darker spaces.
Essential Materials:
The bypass valve represents a critical component, allowing you to isolate the softener for maintenance without disrupting your home’s water supply ($25-60). Purchase compression fittings, shut-off valves, and flexible supply lines compatible with your existing plumbing ($30-70 total). You’ll need a drain line kit with proper air gap fittings to prevent backflow contamination ($15-25). Don’t forget discharge tubing that routes brine water to your drain, following local plumbing codes for environmental protection. Additional materials include mounting brackets, appropriate piping (copper, PEX, or PVC depending on your system), and potentially a grounding clamp for electrical safety ($20-40).
Total estimated cost for tools and materials ranges from $200-400, depending on what you already own. This represents significant savings compared to professional installation fees while supporting a sustainable, hands-on approach to home improvement. Remember that quality tools serve you beyond this single project, making them worthwhile investments for eco-conscious homeowners.
Step-by-Step DIY Installation Process
Preparing Your Water System
Before beginning installation, proper preparation ensures a safe and smooth process. Start by locating your main water shutoff valve, typically found near your water meter or where the main line enters your home. Turn it clockwise to completely stop water flow throughout your house. Next, open several faucets at different levels of your home to relieve pressure and drain water from the pipes. This step prevents spills and makes working with plumbing connections much easier.
Choose an installation location near your water main with access to electricity and a drain for the discharge line. The area should provide enough clearance for salt bag loading and routine maintenance. Clear the space of any obstacles and lay down protective coverings to catch potential drips. If working in a basement or crawl space, ensure adequate lighting and ventilation. Having a bucket and towels nearby helps manage residual water in the pipes. This preparation protects your home while creating an efficient workspace for the installation ahead.
Cutting Into Your Main Water Line
This is the most nerve-wracking step, but proper planning makes it straightforward. First, turn off your main water supply and open faucets throughout your home to drain the lines completely. This prevents water from gushing out when you cut.
Measure twice, cut once applies here perfectly. Your water softener needs to sit on the main line after the water enters your home but before it branches to fixtures. Most systems require about 10 inches of pipe space, though check your specific model’s requirements. Mark your cut points with a permanent marker on both sides of where the softener will go.
For copper pipes, use a pipe cutter rather than a hacksaw for cleaner, straighter cuts that seal better. Rotate the cutter gradually around the pipe, tightening slightly with each rotation. For PEX piping, specialized PEX cutters create the clean, perpendicular cuts necessary for proper fittings.
Here’s a confidence-building tip: practice your cutting technique on a scrap piece of similar pipe first. This helps you understand how much pressure to apply and what a good cut looks like. Keep a bucket and towels handy to catch residual water in the lines. Most importantly, take your time with measurements and cuts because rushing this step causes the majority of DIY installation problems.
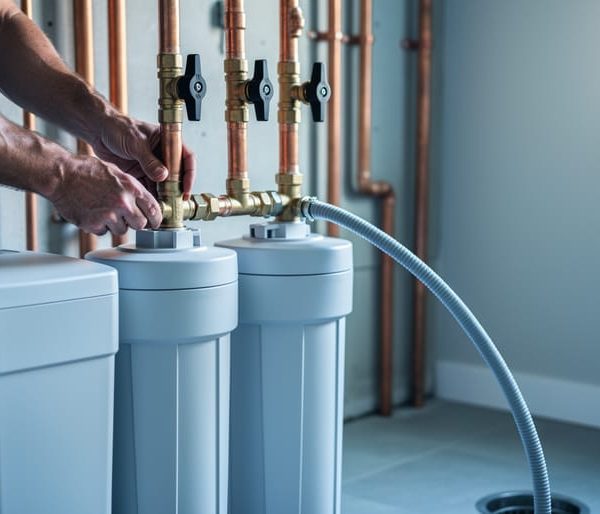
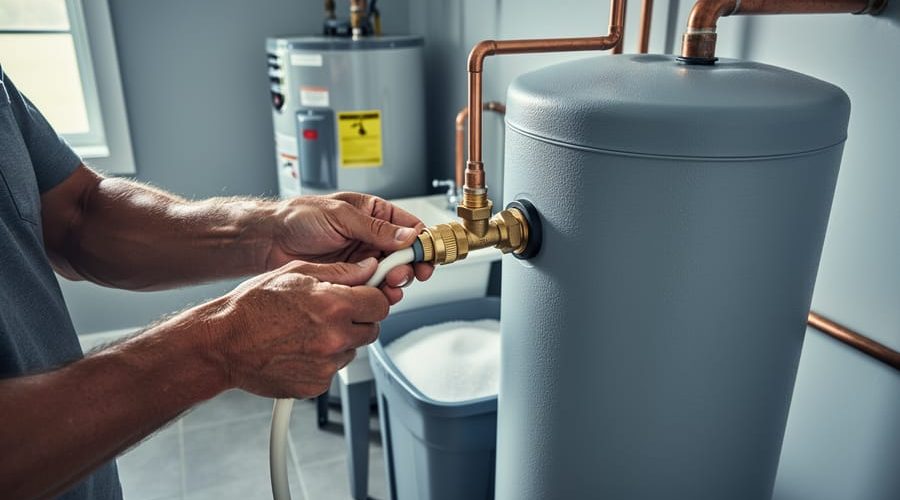
Installing the Bypass Valve and Connections
The bypass valve is your safety net for future maintenance and emergencies, allowing you to temporarily redirect water flow around the softener without shutting off your entire home’s water supply. This three-valve system typically includes inlet, outlet, and bypass connections that work together seamlessly.
Start by positioning the bypass valve assembly according to your manufacturer’s instructions, ensuring the directional arrows point toward the correct water flow direction. Connect the valve to your softener’s control head using the provided clips or threaded fittings, making sure each connection is finger-tight before using a wrench for the final quarter-turn.
Next, attach flexible connector lines or rigid piping from your home’s main water line to the inlet valve, and from the outlet valve back into your household plumbing system. Use thread sealant tape on all threaded connections to prevent leaks. Consider installing shut-off valves on both the inlet and outlet sides for added convenience during future filter changes or repairs.
This thoughtful installation approach not only makes maintenance easier but also reduces water waste over your softener’s lifespan, supporting more sustainable household practices. Test the bypass function before finalizing connections to ensure smooth operation when you need it.
Setting Up Drainage and Overflow Protection
Your water softener’s drainage system is crucial for preventing water damage in your home. The drain line should discharge brine waste into a utility sink, floor drain, or standpipe—never directly into sewer pipes without an air gap.
An air gap is a physical space between the drain hose outlet and the drain opening, typically two inches minimum. This prevents contaminated water from back-siphoning into your softener during drain backups, protecting both your unit and your home’s water supply. Position the drain hose so it empties freely into the drain without touching standing water.
Ensure the drain line has a gradual downward slope and no kinks that could cause backflow. The hose should be secured but not tightly clamped, allowing proper drainage flow. Install the overflow drain line to a separate location if your system includes one—this provides backup protection if the primary drain clogs.
Test both drain lines by running a manual regeneration cycle and checking for leaks or slow drainage. This simple step prevents future flooding and protects your investment while maintaining efficient, eco-friendly water treatment.
Testing for Leaks and Programming Your System
Once your connections are secure, turn the water supply back on gradually and check every joint, valve, and connection for leaks. Watch for any dripping or moisture during this pressure test—even small leaks can waste water and damage your system over time. If you spot any leaks, turn off the water, tighten the connection, and test again.
Next, program your system based on your household’s water hardness level and daily usage. Most modern softeners feature user-friendly digital displays that walk you through the setup process. You’ll typically enter your water hardness number (from your water test), household size, and time for regeneration cycles—usually scheduled for overnight when water demand is lowest. This eco-conscious timing reduces water waste and ensures soft water is ready when you need it.
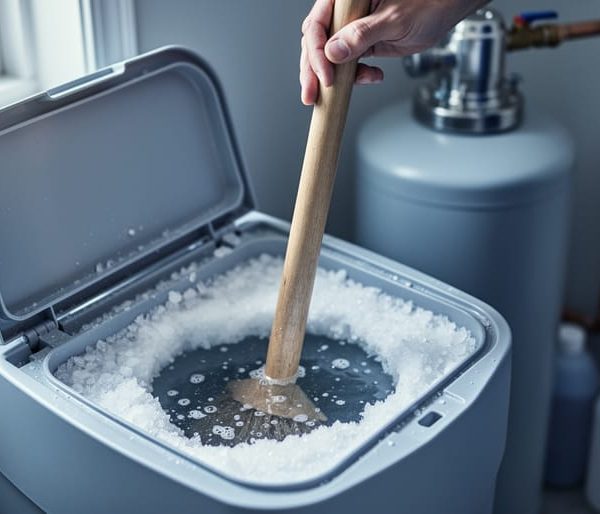
After programming, manually initiate a regeneration cycle to confirm everything operates correctly. This also prepares your system for immediate use. Make sure you’ve added salt to the brine tank, following manufacturer guidelines for choosing the right salt. Keep your owner’s manual handy for reference and bookmark resources on troubleshooting common issues to maintain your investment long-term.
When You Should Hire a Professional Instead
Complex Plumbing Situations
Some plumbing situations warrant calling a professional rather than tackling installation yourself. Homes with galvanized pipes present a major red flag, as these aging pipes may not withstand the water pressure changes that occur during water softener installation. The corrosion inside galvanized pipes can also break loose when new equipment is added, potentially causing serious problems downstream.
Local building codes add another layer of complexity. Many municipalities require permits for water softener installations, and some mandate specific backflow prevention devices or drainage configurations. Installing without proper permits could result in fines or complications when selling your home.
Watch for unusual plumbing configurations like shared water lines between units, wells with existing treatment systems, or homes with multiple water heaters. These scenarios often require custom solutions beyond standard DIY installations. If your main water line enters in a difficult-to-access location or lacks adequate space for the softener and bypass valve, professional expertise becomes invaluable for creating a code-compliant, functional setup.
Permit and Code Requirements
Before you begin your DIY water softener installation, check with your local building department about permit requirements. Many municipalities require permits for plumbing modifications, especially when connecting to your main water line. Requirements vary significantly by location, with some areas mandating licensed plumber involvement for certain connections.
Installing without proper permits can create serious complications. You may face fines, encounter issues when selling your home, or experience problems with insurance claims if water damage occurs. Additionally, unpermitted work might need removal or costly corrections during home inspections.
Consider warranty implications carefully. Many manufacturers void warranties if installation isn’t performed by certified professionals or doesn’t meet their specifications. Some eco-friendly water softener models with advanced features require professional setup to maintain warranty coverage.
Contact your local building department early in the planning process. They’ll outline specific requirements, inspection schedules, and whether your project needs professional involvement. This proactive approach ensures your installation remains compliant, protects your investment, and maintains your home’s value while achieving better water quality sustainably.
Cost Comparison: DIY vs Professional Installation
Understanding the true financial picture of DIY versus professional installation requires looking beyond the obvious numbers. Professional installation typically costs between $300 to $600 for labor alone, with complex setups pushing toward $1,000. That upfront difference can seem substantial, making DIY appear like the clear money-saver.
However, the DIY route comes with hidden expenses that often surprise first-timers. Basic tools like pipe cutters, wrenches, and Teflon tape might run $50 to $100 if you don’t already own them. More importantly, mistakes can become costly. A single miscalculated drain line could waste $30 in materials, while an improperly installed bypass valve might damage your new system. First-time installers should budget an extra $100 to $200 for potential do-overs and learning curves.
From an eco-living perspective, professional installers bring efficiency that reduces waste. They know exact measurements, minimizing excess materials that end up in landfills. They also ensure optimal water flow settings from day one, preventing the resource waste that comes from trial-and-error adjustments.
The financial break-even point typically favors DIY if you’re handy and have basic plumbing experience. You’ll likely save $200 to $400 on a straightforward installation. However, professionals add value through warranties, guaranteed code compliance, and time savings. Consider that your weekend spent wrestling with copper pipes has an opportunity cost too.
For environmentally-conscious homeowners, professional installation often means accessing cutting-edge water innovations and settings optimized for efficiency from the start. Professionals can also advise on eco-friendly salt alternatives and regeneration schedules that minimize environmental impact while maximizing your system’s lifespan, potentially saving more money long-term than the initial installation discount.
Environmental Benefits of Proper Installation
When you’re considering whether to install a water softener yourself, it’s worth understanding how proper installation directly impacts the environment. A correctly installed system isn’t just about preventing leaks or ensuring your appliance works—it’s about maximizing efficiency and minimizing your ecological footprint.
Water softeners go through regeneration cycles where they flush out accumulated minerals using salt and water. When installed incorrectly, these cycles can waste significantly more water than necessary. Proper installation ensures the regeneration frequency is calibrated correctly, meaning your system only uses water when truly needed rather than running excessive cycles. This seemingly small detail can save thousands of gallons annually.
The positioning and connection of your water softener also affects its long-term efficiency. When installed with correct water pressure and flow rates, the system requires less energy to operate and experiences reduced wear on components. This translates to fewer repairs, longer equipment life, and less waste ending up in landfills.
Additionally, proper installation prevents salt bridging and mushing—common issues that cause your softener to use more salt than necessary while delivering poor results. When your system operates at peak efficiency, you’re using optimal amounts of regenerant salt rather than wasting excess minerals that eventually enter wastewater systems.
For environmentally-conscious homeowners, the question isn’t just whether you can install it yourself, but whether you can install it correctly to achieve these sustainability benefits. If you lack plumbing experience, professional installation may be the more eco-friendly choice, ensuring your water softener operates efficiently from day one.
So, can you install a water softener yourself? The answer is yes, if you have basic plumbing skills, the right tools, and your home setup meets the necessary requirements. Throughout this guide, we’ve walked through what’s involved, from understanding your plumbing system to making the final connections. For many homeowners, this is an achievable weekend project that can save hundreds of dollars in installation costs.
That said, honest self-assessment is key. If you’re uncertain about working with plumbing, lack the proper tools, or face complications like tight spaces or outdated pipes, there’s absolutely no shame in calling a professional. The peace of mind that comes with expert installation is valuable, and you’ll still enjoy all the benefits of softened water without the stress.
Whichever path you choose, you’re making a positive step toward better water quality in your home. Soft water means cleaner dishes, softer laundry, and more efficient appliances that last longer and use less energy. That’s a win for your household comfort and your commitment to more sustainable living. The important thing is taking action, whether with wrench in hand or phone in hand to schedule a pro.