To change a whole house water filter you need a new water filter cartridge, a wrench, and a bucket in your entire house water filter. It is a process that shouldn’t take up much of your time if you have all the necessary tools.
Replacing whole house water filters is necessary to improve the quality of your water supply.
Let’s begin with the replacement process itself and the accessories required.
Tools Needed for Whole House Water Filter Replacement
- A new water filter cartridge (compulsory)
- A heavy-duty strap wrench (compulsory)
- A bucket (compulsory)
- Plumber’s Tape or Teflon tape
- Food-silicone grease (compulsory)
- Bleach for household use (optional)
- Bucket with soapy water (optional)
Steps to Change Whole House Water Filters
Below are the steps on how to change a whole house water filter:
1. Cut off Your Water Supply
Turn off the control valve of your main water supply line or the inlet valve that’s positioned before your water filter. It’s also highly likely that your whole house water filter system has an inlet valve that you can shut off. So these are three options.
Shutting off one of them is enough to cut off the water supply. If you haven’t done this before, you should get familiar with your plumbing. Know where the valve is and practice shutting it off and seeing if it worked. If you live in a condominium, ask your building owner or superintendent where the one for your housing unit is.
2. Turn on Faucet or Water Outlet
Turn on every faucet and water outlet valve to ensure any water still left in the pipes is drained out. You’ll notice that the water flow will slowly trickle to a stop once the water left in your pipes is gone. Also, ensure that you switch off every appliance in the house that uses water. For example, you should turn off appliances such as the laundry machine, ice cube maker, dishwashers, and sprinklers. These release pressure on the filter.
3. Turn off Outlets
Ensure that you turn off any outlet to prevent water from draining back into the house.
4. Apply Pressure on the Pressure Release Button
Briefly apply pressure on the pressure release button on every water filter housing. This is to make sure that there’s no excessive pressure. Skipping this step can cause water pressure issues.
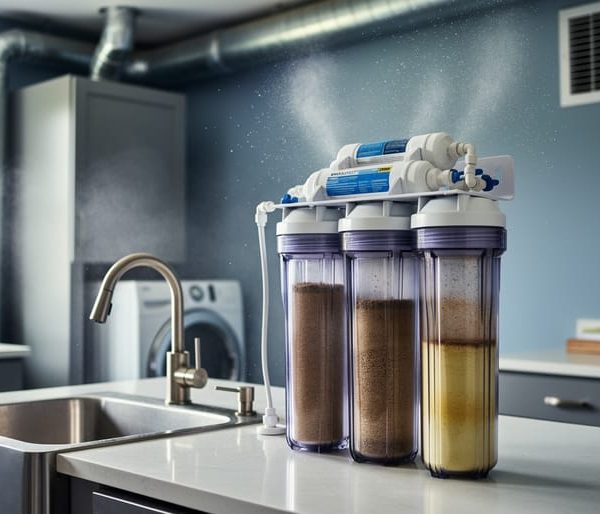
5. Remove the Old Filter Cartridge or Housing
Slowly unscrew the cartridge with your filter wrench. Ensure a bucket is on standby to receive the water that will spill out. Also, make sure your replacement filter or housing is the correct one by cross-checking the filter housing model number.
The majority of these sediment filters have a common measurement of 10 inches (height) by 4.5 inches (diameter). Bigger households will require a filter twice as tall (20 inches) but the same 4.5 inches in diameter.
6. Extract the Filter Cartridge
Extract the old whole house water filter cartridge from its housing and discard it into the bucket beside you. Properly dispose of the old filter when you’re done with the replacement process.
7. Wash the Inside of Your Housing
Though you can skip this step, we recommend that you wash the inside of the housing using bleach or soap and water. Once you have thoroughly cleaned the inside of the housing, rinse it with clear water. Rinse till every trace of soap or bleach is gone.
8. Lubricate the O Ring
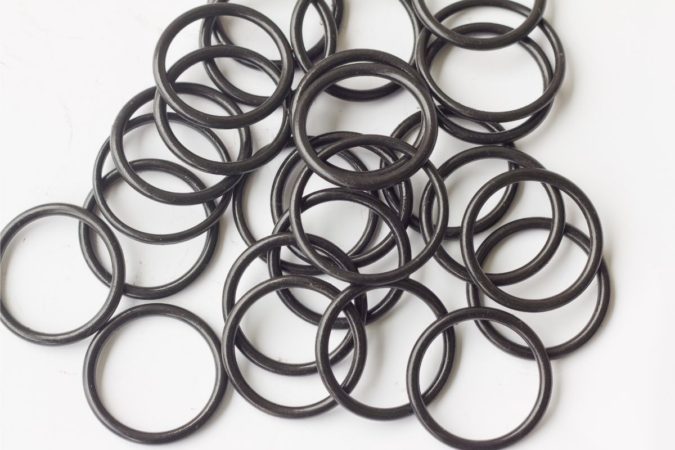
Use food-silicone grease to lubricate the o ring of the housing and ensure that it’s positioned correctly. Ensure that the food-silicone grease you’re using to lubricate is food-grade approved because it is inevitable that your water supply will get mixed up with it. If the o ring is not in good shape, get the ring replaced.
9. Insert New Cartridge
Insert a new cartridge into the housing and use your wrench to screw it in place. You can even use your fingers to wind and tighten the screws. Ensure that the O ring is properly positioned to avoid water leakages.
10. Turn on the Control Valve
Go back to the control valve you shut off and gradually turn it back on to activate the water supply.
11. Check for Leaks
Check all the filter housings for leaks, especially those you just extracted from your water line. If there are leaks, shut off your valve to cut off your main water supply line again. Then, tighten the connections to stop the leakage. Finally, re-open the valve to re-activate your water supply.
12. Turn on Faucets or Water Outlets
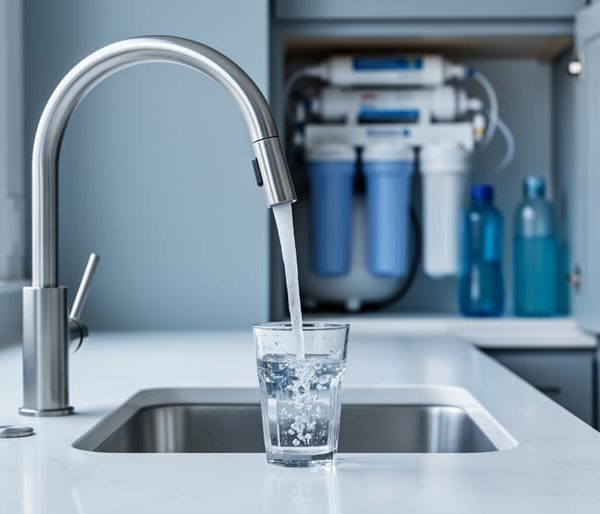
Turn on faucets or water outlets to flush the new water filter cartridge for a few minutes. This process will also eradicate any air in your pipes. If you notice that the water pressure and the speed of the water flow are back to normal, close the open faucets. The process for filter replacement has been completed.
FAQs
What to Do If the Housing of Your Whole House Water Filter Is Stuck?
This usually happens after turning on several faucets for pressure release and using the pressure release button at the top. But, fret not; there are still some things you can do to rectify the issue.
Firstly, try tapping on the head of the filter outside the thread. Sometimes, this is enough to rectify the issue. Get a hairdryer and turn it on to emit hot air on the top of the filter head.
Using your wrench, push the filter head up as much as you can. Then, use your other hand to lend support to the filter bracket at the same time. Finally, rotate the wrench in a clockwise motion so that it faces downwards on the filter.
If that doesn’t work, use a tube for extra leverage. A metal wrench is recommended for this process because a plastic wrench is bound to bend. An alternative is to use two plastic wrenches at the same time.
If all the above processes don’t work, take out the entire water unit from your water line and hold it carefully in a vice. At this stage, you can force open the filter housing/cartridge.
To prevent your housing from getting stuck, you need to check that the o ring is securely positioned and not clustered with any sediment or dirt.
If the o ring is not in proper shape, replace it and lubricate it with food-silicone grease, as stated earlier in the steps. Also, please ensure that it’s properly positioned and the surface area on the filter head is free of either dirt or sediment.
How Often Should you Replace your Whole House Water Filter?
How often you should change a whole house water filter or replace the cartridge should be replaced depends on numerous factors such as:
- The type of filter cartridge
- The size and capacity of the filter cartridge (quantified in gallons)
- The source water quality (the more the contaminants contained in the water, the shorter the filter lifespan. Consequently, the frequency of replacing the filter cartridge will be higher.)
- If the water is city water or well water
- The volume of iron or sediment content in the water
- The degree of water hardness
- The quantity of minor contaminants in the water
- The level of daily water usage
Generally, water filters can last for up to six months before requiring change, especially sediment filters. Carbon filters usually have a longer life cycle (nine months to a year). They deteriorate more slowly.
When your whole house water unit starts to exhibit certain signs, it indicates your filter cartridge is due for a change. These signs include:
- Water discoloration
- Unpleasant smell
- Bad-tasting water
- Lesser water pressure and flow
All these signs mean your filter has been worked beyond its capacity and is clustered with sediments, reducing water flow.
You can also observe whether your filter cartridge requires a change or not by taking a look at it. If the filter cartridge is still looking good, then it’s okay to keep using it. However, if your filter cartridge is looking overused and messy, that means it’s time to replace it.

Also, check your filter manual. The manufacturer often specifies the period for using the filter before getting a new filter unit to replace it.
What Will Happen If You Don’t Change Your Water Filters?
When you keep using your water filter even after your water unit shows signs of deteriorating filtration potency, it will stop being efficient altogether. If your sediment filter is old and worn, it won’t contain particles that contaminate the water.
So these particles will be able to flow through and enter your home easily. This means when you turn on your faucet to get water, unclean and contaminated water will come out.
It doesn’t end there. It will also affect the operations/functions of those appliances in your home that use water. In severe cases where the level of water contamination is very high, it can lead to a shorter lifespan of your water-using household appliances.
Another thing to note is that it’s recommended to replace cartridges or housings at least annually to avoid the growth of certain microbes and mold inside these cartridges. Again, the occurrence of this can have adverse effects on your health.
The Cost to Install a Whole House Water Filtration System
The installation cost depends on the type of whole house water filtration unit. Still, the average cost should be about $2,000 to install in your home if you want to add the cost of materials needed for the installation and the cost of labor.
The cost to install also depends on the level of sophistication of the filtration system you decide to use in your home. For example, a simple filtration unit can cost you below 1,000 USD, while more complex filtration units can cost as high as 5,000 USD.
Types of Whole House Water Filtration Systems
Your needs and objectives will determine the type of filtration system you will consider, but below are the commonly-used ones:
Reverse Osmosis
A reverse osmosis filtration system utilizes the water pressure in your home to push the feed water through its membrane to purify it. This system can eliminate contaminants in the form of sediments, microbes, heavy metals, and certain minerals.
The treated water is then reserved in a tank for use later on. The major downside of this system is that it uses too much water in its filtration process. It will take reverse osmosis up to 50 gallons of feed water to produce 2 gallons of treated water. As a result, their price range falls between $1,400-$1,500.
Activated Carbon Filtration
This is arguably the most commonly used method of treating water. The filtration elements in these systems can trap or contain sediments or minerals as the water flows through.
Activated carbons are of two kinds- granular and block. They both have cartridges/housing that requires yearly substitution. The difference between them is that granular carbon consists of natural materials. Therefore, they both fall within the price range of $50-$500 to install.