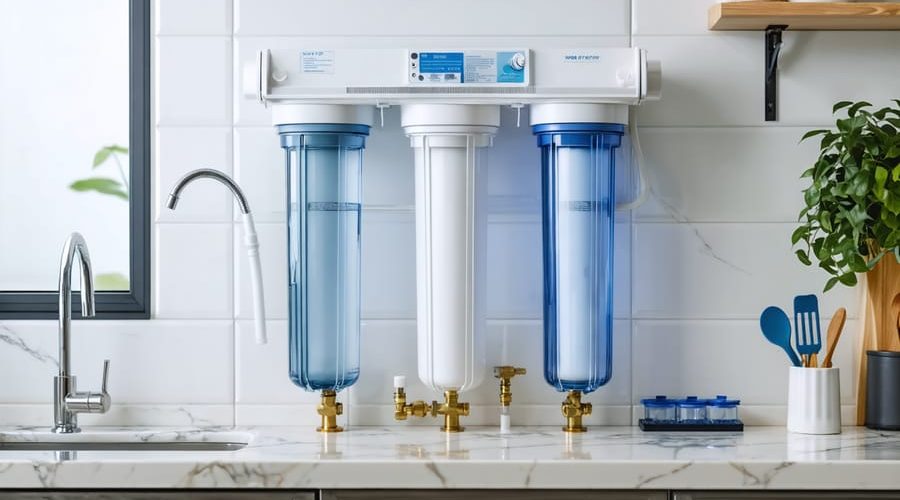
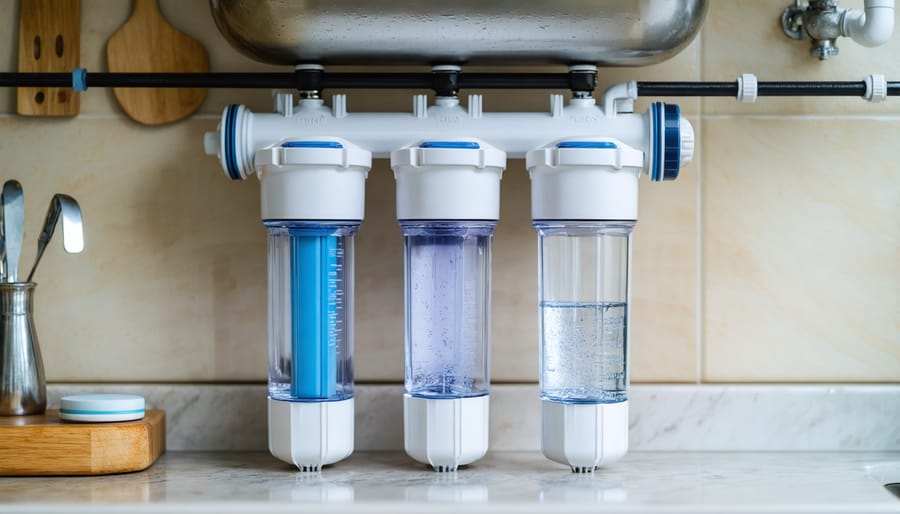
Build a professional-grade water filtration system at home for a fraction of the cost with a DIY 3-stage setup that rivals commercial types of water filters. Transform tap water into crystal-clear, great-tasting drinking water using readily available components: a sediment filter to remove particles, an activated carbon stage to eliminate chlorine and organic compounds, and a final carbon block filter for microscopic contaminants.
This efficient system typically costs under $200 to construct, requires minimal maintenance, and provides up to 10,000 gallons of filtered water before needing cartridge replacement. Installing your own multi-stage filter not only saves money but also gives you complete control over water quality and filter replacement schedules. Perfect for homeowners seeking reliable, cost-effective water filtration without the markup of pre-built systems or expensive installation services.
Choose medical-grade filter housings and NSF-certified cartridges to ensure your DIY system meets or exceeds industry standards for safe drinking water. With basic plumbing skills and common household tools, you can assemble this system in under two hours and enjoy clean, filtered water directly from your tap.
Essential Materials and Tools
Filter Housing Components
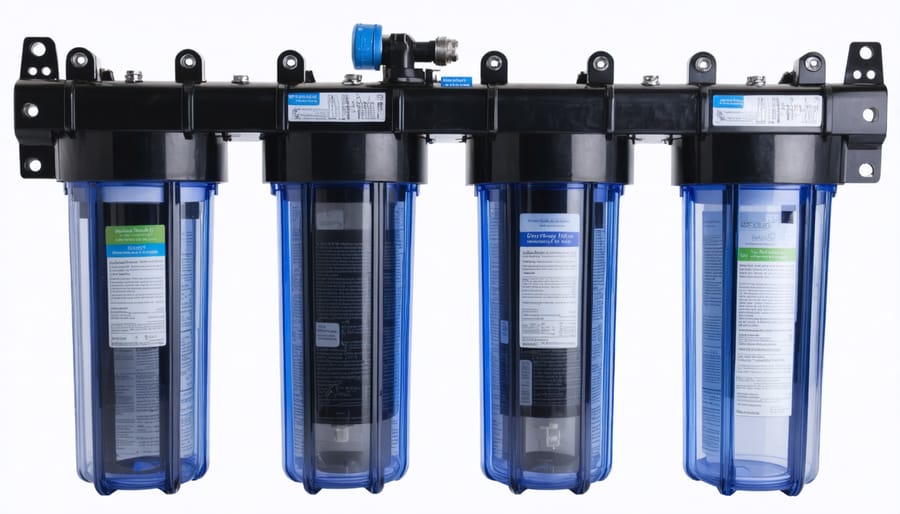
The core components of your DIY 3-stage water filter system include three standard 10-inch filter housings, typically made from durable polypropylene. These housings consist of a clear or opaque sump (bottom section) and a cap with inlet/outlet ports. Each housing requires two O-rings: one for the cap-to-sump seal and another for the filter cartridge seal.
For connecting the housings, you’ll need 3/4-inch brass or food-grade plastic fittings, including nipples to join the housings and adapters for incoming and outgoing water lines. A pressure relief button on each housing cap helps release air during filter changes.
The mounting bracket system includes a sturdy metal or plastic mounting board and housing brackets with screws. Single brackets support individual housings, while unified bracket systems hold all three housings together. Include shut-off valves before and after the system for maintenance convenience.
Consider adding pressure gauges at the inlet and outlet to monitor filter performance. Optional accessories include a housing wrench for easier cartridge changes and brass drain valves for simplified maintenance.
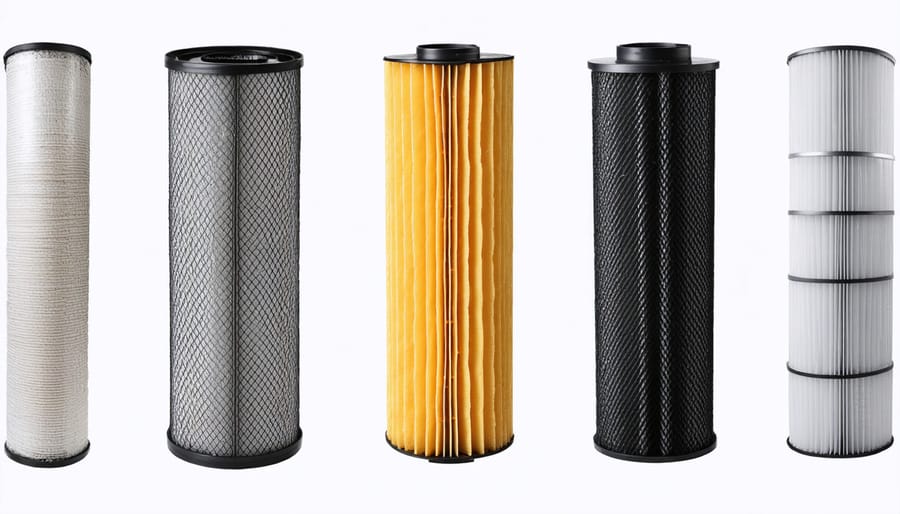
Filter Media Selection
Each stage in a three-stage filtration system serves a unique purpose, utilizing specific filter media to effectively reduce TDS in tap water and remove various contaminants. The first stage typically uses sediment filters, consisting of polypropylene or wound string materials, which trap larger particles like rust, sand, and debris. This preliminary filtration protects subsequent stages and extends their lifespan.
The second stage incorporates activated carbon, available as either granular (GAC) or carbon block. This media excels at removing chlorine, volatile organic compounds (VOCs), and unwanted tastes and odors. Carbon block filters generally perform better than GAC due to their compressed nature and increased contact time with water.
For the final stage, choose between KDF-55 media for heavy metal removal, ion exchange resin for water softening, or a ceramic filter for bacteria removal. Your selection should depend on your specific water quality concerns. Consider using a combination of coconut shell carbon and KDF media in the second stage for enhanced chemical removal and antimicrobial properties.
Assembly Instructions
Stage 1: Sediment Filtration
The first stage of your DIY water filtration system focuses on removing larger particles and sediment from your water supply. This crucial step prevents larger contaminants from clogging subsequent filter stages while removing sand, rust, dirt, and other visible particles.
Begin by selecting a 10-inch filter housing and a sediment filter cartridge rated at 5 microns. The housing should include both inlet and outlet ports, typically 3/4 inch in size, and a mounting bracket. Install the mounting bracket securely to your chosen location, ensuring it’s level and can support the weight of the filled housing.
Before assembly, wrap plumber’s tape clockwise around the threaded ports to prevent leaks. Connect the inlet side to your main water supply using appropriate fittings and flexible tubing. The outlet will later connect to your second stage filter.
Insert the sediment filter cartridge into the housing, making sure the rubber gasket is properly seated. Hand-tighten the housing onto the cap – avoid using tools as this could crack the housing. Some housings include a wrench specifically designed for this purpose.
For optimal performance, position the first stage filter vertically, with the housing pointing downward. This orientation allows trapped sediment to collect at the bottom, preventing premature clogging. Mark your installation date on the housing with a permanent marker for maintenance tracking.
Monitor the water pressure and flow rate through your system. A noticeable decrease in water pressure typically indicates it’s time to replace the sediment filter, usually every 3-6 months depending on your water quality and usage.
Stage 2: Carbon Filtration
The second stage of your DIY water filter introduces activated carbon filtration, a crucial component that removes chlorine, organic compounds, and unpleasant tastes and odors from your water. Start by selecting a high-quality activated carbon filter cartridge rated for drinking water use. These typically come in standard 10-inch sizes and should fit snugly inside your filter housing.
Before installation, flush your carbon filter with clean water for about 5 minutes to remove any loose carbon particles. This prevents black specks from appearing in your filtered water later. Insert the carbon filter cartridge into its designated housing, ensuring the rubber gaskets are properly seated to prevent water from bypassing the filter.
Connect this stage between your sediment filter and final filtration stage using appropriate fittings and food-grade tubing. The water should flow from top to bottom through the carbon filter for optimal contact time and filtration efficiency. Mark the installation date on the housing or in your maintenance log, as carbon filters typically need replacement every 6-12 months depending on your water usage and quality.
For best results, use granular activated carbon (GAC) or carbon block filters rather than basic carbon wraps. These provide better contaminant removal and longer service life. Monitor your filtered water regularly – if you notice returning tastes or odors, it’s time to replace the carbon filter. Remember that carbon filtration works through adsorption, so the filter’s effectiveness gradually decreases over time as its surface area becomes saturated with contaminants.
Stage 3: Fine Filtration
The final stage of your DIY water filter system employs fine filtration to remove the smallest contaminants, ensuring your water reaches its highest quality. This stage typically uses activated carbon in a fine granular or block form, combined with a sub-micron filter membrane to catch particles as small as 0.5 microns.
To implement this stage, you’ll need a filter housing unit similar to the previous stages, but with slightly different specifications. Choose a clear housing to easily monitor the filter’s condition. Install a high-grade activated carbon filter cartridge, which excels at removing chlorine, volatile organic compounds (VOCs), and any remaining unpleasant tastes or odors.
For optimal results, consider using a carbon block filter rather than loose granular carbon. Carbon blocks provide better contact time with the water and prevent channeling, where water finds paths of least resistance through the filtering medium. These blocks typically last 6-12 months, depending on your water usage and quality.
Installation requires careful attention to flow direction – look for arrows on your filter housing and ensure proper alignment. Create a tight seal using food-grade silicone lubricant on the O-rings to prevent leaks. Connect this final stage to your second stage using appropriate fittings and food-grade tubing.
Maintenance for this stage is crucial as fine filters can become clogged more quickly than coarser stages. Monitor water pressure and flow rate – a significant decrease indicates it’s time for replacement. Keep spare cartridges on hand to avoid interruption in filtered water supply.
When replacing filters in this stage, sanitize the housing with a mild bleach solution (1 tablespoon per gallon of water) and rinse thoroughly. This prevents bacterial growth and ensures optimal performance. After installation, run water through the system for 5-10 minutes to flush out any carbon fines before use.
Maintenance and Upkeep
Filter Replacement Schedule
Regular maintenance of your DIY 3-stage water filter is crucial for optimal performance. Following a proper filter replacement schedule ensures clean, safe drinking water throughout the year.
For the first stage (sediment filter), plan to replace the filter cartridge every 3-6 months, depending on your water’s turbidity and usage. Watch for decreased water pressure or visible discoloration of the filter, which indicates it’s time for replacement.
The second stage (activated carbon filter) typically needs replacement every 6-9 months. If you notice changes in water taste or odor, it’s time to change this filter, even if the recommended period hasn’t elapsed.
The third stage (carbon block or specialty filter) usually lasts 9-12 months. However, homes with higher water consumption or particularly challenging water conditions may need more frequent replacements.
Keep a maintenance log to track replacement dates and monitor filter performance. Set calendar reminders for each stage, and always keep spare filter cartridges on hand. Remember that these are general guidelines – your specific replacement needs may vary based on water quality, household size, and daily usage patterns.
System Performance Monitoring
To effectively monitor system performance, regularly check water flow rates and pressure readings across all three stages. Install pressure gauges before and after each filter to track pressure drops, which indicate when filters need replacement. A significant decrease in water pressure or flow rate usually means it’s time to change the filter cartridges.
Watch for changes in water quality by performing monthly taste and clarity tests. Keep a maintenance log to track filter changes, pressure readings, and any unusual observations. This data helps establish optimal replacement schedules and identify potential issues early.
Look for signs of leaks around connections and filter housings during weekly visual inspections. Check that all components are properly sealed and secured. If you notice any discoloration, unusual odors, or sediment in filtered water, investigate immediately as these could indicate filter bypass or failure.
Test water quality every six months using home testing kits to ensure your system continues to remove contaminants effectively. Compare results with your baseline readings taken when the system was first installed. Consider professional water testing annually to verify system performance and identify any emerging water quality issues.
Set calendar reminders for routine maintenance tasks and filter replacements based on manufacturer recommendations and your household’s water usage patterns. This proactive approach helps maintain optimal filtration efficiency and extends system life.
Building your own three-stage water filtration system is a rewarding endeavor that offers numerous benefits for your household and the environment. By taking control of your water quality, you’ll enjoy cleaner, better-tasting water while reducing plastic waste from bottled water consumption. This DIY approach not only saves money in the long run but also provides the flexibility to customize your filtration system based on your specific water quality needs.
The beauty of a three-stage filtration system lies in its comprehensive approach to water purification, removing sediments, chemicals, and harmful contaminants through multiple barriers. Regular maintenance and filter replacements ensure consistent performance and peace of mind knowing exactly what’s in your drinking water.
By implementing this DIY solution, you’re making a positive impact on both your family’s health and the environment. The initial investment in materials and time pays off through years of reliable service, making this project a smart choice for environmentally conscious homeowners. Remember, clean water is essential for healthy living, and your DIY three-stage water filter puts that power directly in your hands.