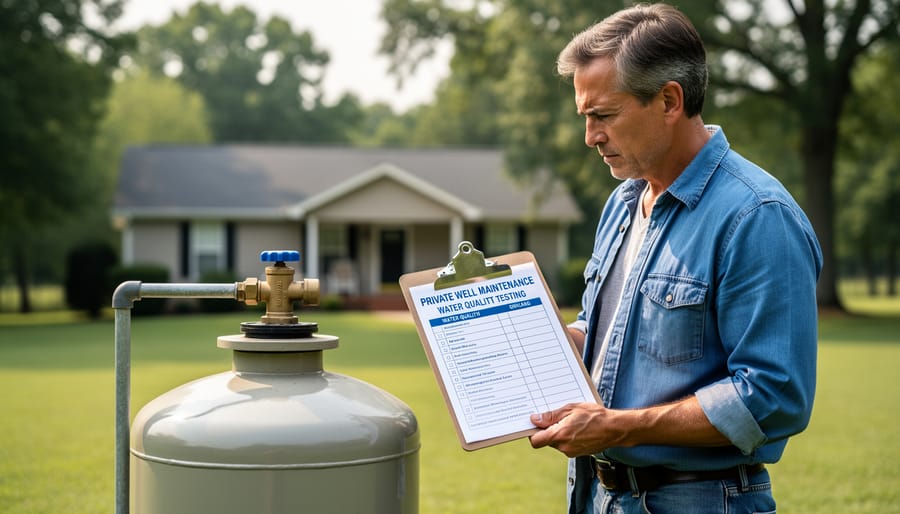
Test your well water at least once annually for bacteria and every 3-5 years for comprehensive chemical analysis including nitrates, heavy metals, and pH levels. Mark your calendar each spring as your non-negotiable testing date, since seasonal changes and snowmelt often introduce the highest contamination risks into groundwater systems.
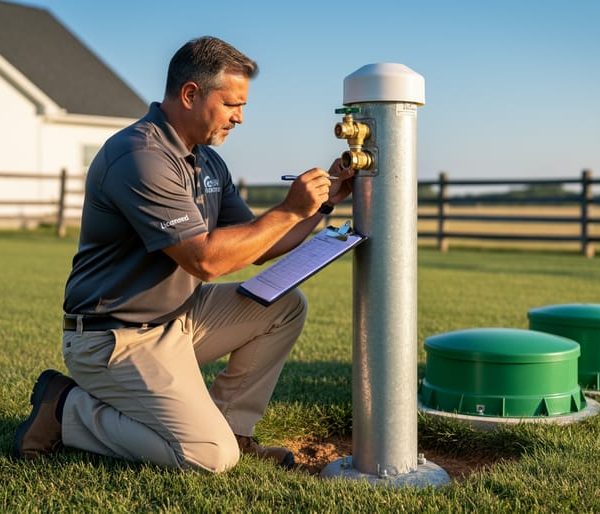
Schedule septic inspections every three years minimum, but increase frequency to annual checks if your household exceeds four people or if you notice slow drains, unusual odors, or soggy patches in your drain field. These warning signs indicate system stress that requires immediate professional assessment before costly failures occur.
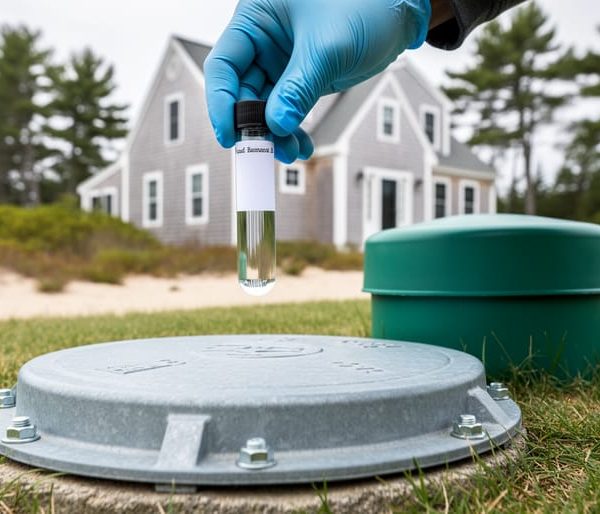
Collect water samples yourself using sterile bottles from certified labs to save on service fees, following their precise instructions for tap flushing times and container handling. Most state health departments provide free or low-cost bacteria testing, while private labs charge $150-300 for comprehensive panels that reveal concerning contaminants like arsenic, lead, or volatile organic compounds.
Document all test results in a household water quality log to track trends over time, since gradual changes often signal developing problems with your well casing, nearby septic systems, or agricultural runoff. This historical data proves invaluable when diagnosing issues and demonstrates responsible stewardship if you eventually sell your property.
Understanding what lurks in your water supply isn’t optional when your family’s health depends on an unregulated private system. Municipal water users enjoy EPA-mandated testing and treatment, but well owners carry sole responsibility for monitoring approximately 15 million American households that rely on groundwater as their primary drinking source.
Why Private Well and Septic Systems Need Regular Testing
The Hidden Risks Lurking in Untested Well Water
Your well water might look crystal clear and taste refreshing, but appearances can be deceiving. Unlike municipal water systems that undergo continuous monitoring, private wells can harbor invisible contaminants that pose serious health risks to you and your family.
Bacterial contamination tops the list of concerns. Coliform bacteria and E. coli can enter your well through surface runoff, cracked well casings, or nearby septic systems. These microorganisms cause gastrointestinal illness, but you won’t know they’re present without testing—they don’t change water’s appearance, taste, or smell.
Nitrates present another silent threat, particularly in agricultural areas. These compounds seep into groundwater from fertilizers, animal waste, and failing septic systems. High nitrate levels are especially dangerous for infants, potentially causing a condition called “blue baby syndrome” that affects oxygen transport in the bloodstream. Adults face long-term health concerns including increased cancer risk.
Heavy metals like arsenic, lead, and manganese naturally occur in certain geological formations or leach from aging plumbing systems. Arsenic exposure has been linked to various cancers, while lead affects neurological development in children. These contaminants have no taste or odor warnings.
Agricultural runoff introduces pesticides and herbicides that can persist in groundwater for years. Industrial chemicals, petroleum products, and even naturally occurring radon can compromise your water quality without any detectable signs.
The bottom line? Regular testing is your only defense against these hidden dangers. What you can’t see, smell, or taste can still harm your family’s health.
How Your Septic System Affects Your Water Quality
Your septic system and well water share an intimate relationship that directly impacts your family’s health. When septic systems malfunction, they release harmful bacteria, viruses, nitrates, and household chemicals into the surrounding soil. These contaminants don’t stay put—they migrate through the ground toward your water source.
The risk intensifies based on several factors. If your well sits within 100 feet of your septic system, you’re in a high-vulnerability zone. Septic system failures can introduce E. coli, coliform bacteria, and dangerous nitrates into groundwater surprisingly quickly, sometimes within days of a malfunction.
Soil composition plays a crucial role too. Sandy or gravelly soils allow contaminants to travel faster than clay-rich soils, which naturally filter some pollutants. However, no soil type offers complete protection. Older septic systems, those improperly maintained, or systems overwhelmed by household demands pose the greatest contamination threats.
Regular testing creates an early warning system, catching problems before they escalate into health emergencies. Understanding this connection empowers you to protect your water quality through proactive monitoring and maintenance.
What You Should Test For (And How Often)
Annual Well Water Testing Essentials
Protecting your household water begins with knowing what’s flowing from your tap. Annual well water testing provides essential peace of mind and helps you catch potential problems before they impact your family’s health. Here are the four baseline tests every well owner should prioritize each year.
Coliform bacteria testing is your first line of defense against waterborne illness. These microscopic organisms indicate the presence of surface contamination and potential pathogens in your water supply. While most coliform bacteria aren’t harmful themselves, their presence signals that disease-causing microorganisms could have entered your well through cracks, flooding, or inadequate sealing.
Nitrate testing reveals agricultural runoff, septic system leakage, or fertilizer contamination near your well. High nitrate levels pose serious risks, especially for infants and pregnant women, as they can interfere with oxygen transport in the bloodstream. If your property is located in farming areas or near livestock operations, this test becomes even more critical.
pH level testing measures your water’s acidity or alkalinity on a scale from 0 to 14. Ideal drinking water falls between 6.5 and 8.5. Water outside this range can corrode your pipes, affect appliance longevity, and alter how effectively disinfection works. It also impacts how your water tastes and whether it leaves stains on fixtures.
Total dissolved solids (TDS) testing quantifies minerals, salts, and metals dissolved in your water. While some minerals benefit health, excessive TDS can indicate contamination, create unpleasant tastes, and reduce the effectiveness of water treatment systems you may install.
When to Test for Additional Contaminants
Your well’s location and surrounding environment often determine whether you need to test beyond the basics. If you live near agricultural areas, test for pesticides, nitrates, and herbicides that can seep into groundwater from fertilizers and crop treatments. Properties located within a mile of industrial sites or manufacturing facilities should check for volatile organic compounds (VOCs), heavy metals like lead and arsenic, and industrial solvents that may have contaminated soil over time.
Homes with older plumbing systems built before 1986 warrant testing for lead and copper, especially if you notice blue-green staining on fixtures or have young children at home. If hydraulic fracturing (fracking) operations exist within two miles of your property, consider testing for methane, benzene, and elevated levels of total dissolved solids.
Living near gas stations, dry cleaners, or former landfills increases your risk of petroleum product contamination and requires testing for MTBE and other fuel additives. Recent construction or land disturbance in your area may also justify expanded testing, as ground disruption can mobilize previously stable contaminants. When in doubt, consult with a certified water testing laboratory about your specific situation—they can recommend a customized testing panel based on your property’s unique risk factors and history.
Septic System Testing and Inspection Timeline
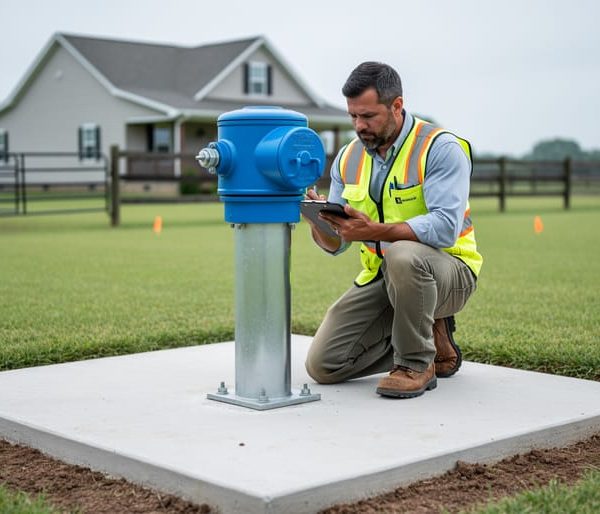
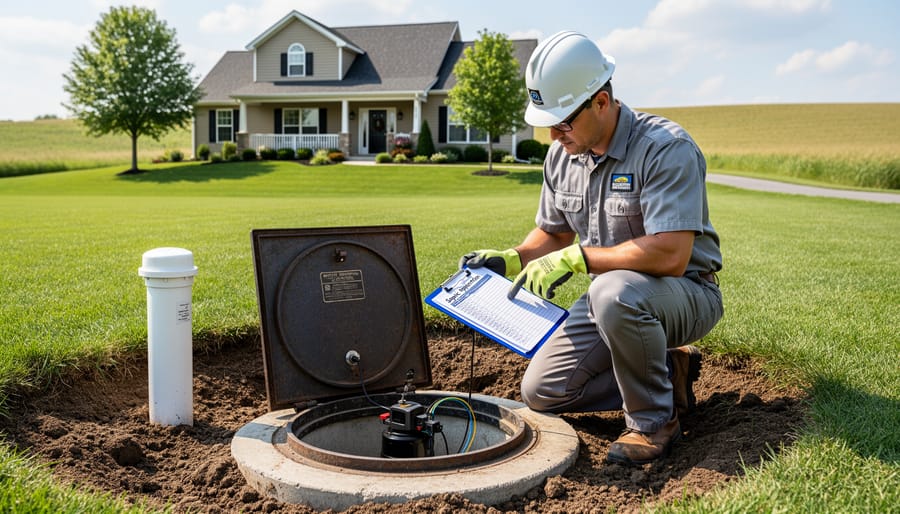
Regular septic system inspections are essential for protecting your home investment and the environment. Most experts recommend having your system professionally inspected every three years, though households with garbage disposals or heavy water usage may need more frequent checkups.
During a typical inspection, a qualified technician will evaluate several key components. They’ll measure sludge and scum levels inside your tank—when solids accumulate to more than one-third of the tank’s capacity, pumping becomes necessary. The inspector will also assess your drain field’s condition, looking for soggy spots, unusual odors, or overly lush vegetation that might indicate wastewater surfacing.
Beyond physical measurements, professionals check for signs of septic system stress, including slow drains, gurgling sounds, or sewage backups. They’ll examine baffles and filters for damage and verify that distribution boxes are level and functioning properly.
Between professional inspections, stay alert to warning signs like pooling water near the drain field or persistent sewage odors. These symptoms often indicate problems requiring immediate attention. Maintaining detailed records of inspections, pumping schedules, and any repairs helps you track your system’s health over time and can prove valuable if issues arise or when selling your home.
How to Test Your Well Water at Home
Choosing the Right Water Test Kit
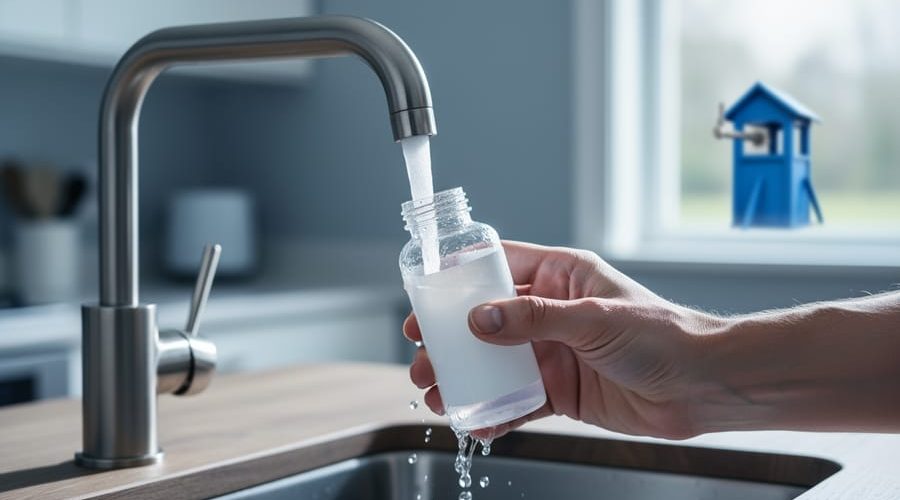
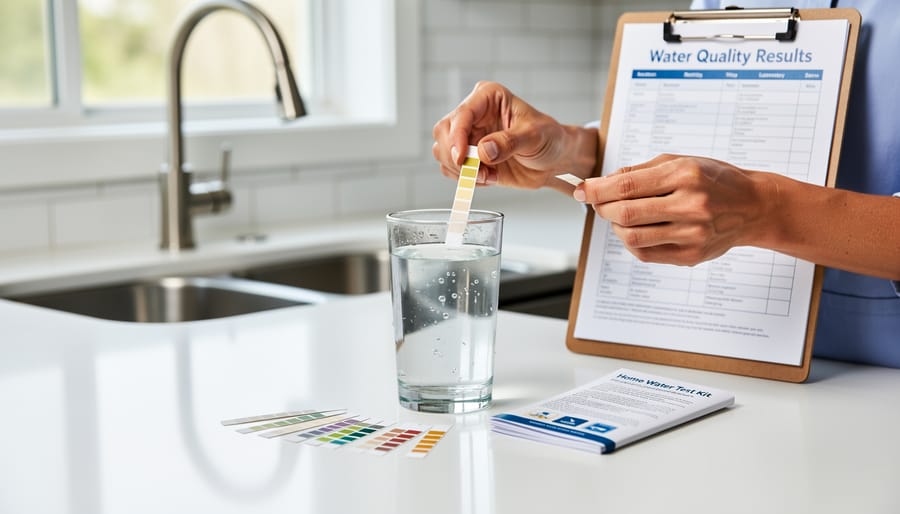
Selecting the right water test kit depends on your specific concerns, budget, and comfort level with DIY testing. Basic bacteria test strips offer an affordable entry point, typically ranging from $15-30, and can detect coliform bacteria presence within 24-48 hours. These are ideal for routine quarterly checks between professional tests.
For homeowners wanting broader insights, multi-parameter kits test for common contaminants like nitrates, lead, chlorine, pH, and hardness simultaneously. These comprehensive options cost between $50-150 and provide valuable snapshots of overall water quality, perfect for annual home assessments or when you notice taste, odor, or appearance changes.
Consider your property’s history when choosing. If you live near agricultural areas, prioritize kits testing for nitrates and pesticides. Homes with older plumbing benefit from lead-testing capabilities. Those with septic systems should focus on bacteria and nitrate detection to catch potential system failures early.
While home kits excel at identifying problems requiring professional attention, they’re not substitutes for certified laboratory analysis. Think of them as eco-friendly monitoring tools that empower you to stay proactive about water quality between comprehensive professional tests. Match your kit selection to your primary concerns, and remember that investing in regular testing protects both your family’s health and our precious groundwater resources.
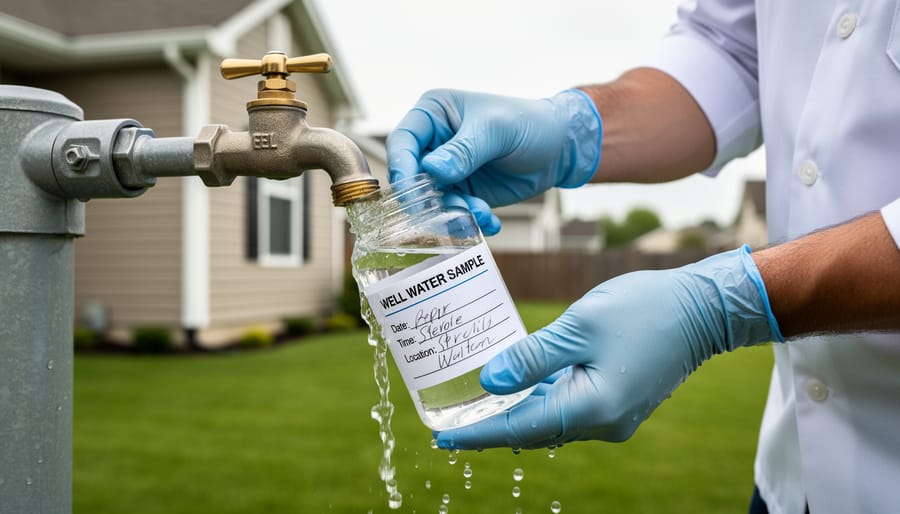
Proper Sample Collection Techniques
Collecting an uncontaminated water sample is crucial for accurate testing results. Start by selecting the right tap—choose a cold water faucet closest to your well or pressure tank, typically in your basement or utility room. Avoid outdoor spigots, refrigerator dispensers, or taps with aerators or filters, as these can affect results.
Before collecting your sample, let the water run for at least three to five minutes. This flushes out any stagnant water sitting in your pipes and ensures you’re testing water directly from your well. You’ll know it’s ready when the water temperature stabilizes.
When handling the sterile sample container provided by your testing lab, keep the cap facing down and avoid touching the inside of the bottle or cap with your fingers. This prevents introducing outside contaminants that could skew your results. Hold the bottle near the bottom and fill it according to lab instructions, typically leaving a small air space at the top.
Once filled, immediately seal the container tightly and label it with the date, time, and sample location. Keep the sample refrigerated and deliver it to the lab within the timeframe specified—usually 24 to 48 hours. Proper sample collection protects your investment in testing and gives you confidence in the results that guide your water quality decisions.
Understanding Your Test Results
When your test results arrive, focus first on bacteria levels—coliform bacteria should be zero, and any detection means immediate action is needed. Boil water or use bottled water until professional disinfection resolves the issue. For nitrates, levels above 10 mg/L pose serious health risks, especially for infants and pregnant women, requiring alternative water sources immediately.
pH readings between 6.5 and 8.5 are generally safe, though readings outside this range can corrode pipes and affect water quality. Total dissolved solids below 500 mg/L indicate good quality, while levels exceeding 1,000 mg/L may cause taste issues and appliance damage. Heavy metals like arsenic and lead should be undetectable; any presence warrants immediate consultation with water treatment professionals.
For septic systems, elevated nitrate levels in nearby wells may signal system failure. Consider eco-friendly solutions like advanced treatment systems that reduce environmental impact while protecting your water supply and supporting sustainable living practices.
Professional Testing vs. DIY: Making the Right Choice
When deciding between DIY test kits and professional laboratory analysis, understanding the trade-offs helps you make informed choices for your well and septic system. Both approaches have their place in a comprehensive water quality management strategy.
Home test kits offer convenience and affordability, typically ranging from $20 to $100 depending on what you’re testing. These kits work well for routine monitoring of basic parameters like pH, hardness, iron, and nitrates. They provide quick results—often within minutes—making them ideal for frequent spot-checks between professional tests. However, their accuracy limitations mean they’re best suited for general screening rather than definitive assessments.
Professional laboratory testing costs more, usually between $150 and $500 for comprehensive panels, but delivers certified results with superior accuracy. Certified labs use advanced equipment and quality-controlled procedures that detect contaminants at much lower concentrations than home kits can measure. Think of it this way: home kits tell you if something might be wrong, while lab tests confirm what’s actually happening.
Certain situations make professional testing non-negotiable. If you’re buying or selling a home, lenders and buyers typically require certified lab results. When family members experience unexplained health symptoms—especially gastrointestinal issues—professional analysis is essential for identifying bacterial contamination or chemical pollutants. Similarly, if you live near agricultural operations, industrial sites, or known contamination sources, only certified testing can provide the detailed analysis needed to protect your family’s health.
A practical approach combines both methods: use affordable home kits for monthly monitoring, and schedule professional laboratory testing annually or when home tests indicate potential problems. This balanced strategy gives you regular oversight without breaking the budget, while ensuring accurate results when they matter most. Remember, your family’s health and your property value both depend on reliable water quality information.
Essential Septic Maintenance Between Inspections
Signs Your Septic System Needs Immediate Attention
Your septic system works quietly behind the scenes, but when problems arise, they demand immediate action to protect both your home and your well water. Recognizing the signs of septic problems early can prevent costly repairs and dangerous contamination.
Watch for slow-draining sinks, tubs, and toilets throughout your home, as this often indicates a system reaching capacity or experiencing blockages. Foul sewage odors inside your house or around the drain field signal that wastewater isn’t being properly processed. A soggy, unusually green drain field, especially during dry weather, suggests your system is overloaded and releasing untreated wastewater into the soil where it can migrate toward your well.
Perhaps most alarming are backup events where sewage enters your home through drains or toilets. This health hazard requires immediate professional intervention. Gurgling sounds in your plumbing system also warrant attention, as they may indicate venting problems or system failure.
If you notice any of these warning signs, contact a septic professional promptly and test your well water for bacterial contamination. Quick action protects your family’s health and prevents environmental damage.
Simple Habits That Extend Septic System Life
Your daily habits significantly impact how long your septic system operates efficiently. By adopting a few simple practices, you can prevent costly repairs and extend your system’s lifespan by years.
Start with water conservation—your septic tank needs time to separate solids from liquids, and excessive water flow disrupts this process. Fix leaky faucets promptly, install low-flow showerheads, and spread laundry loads throughout the week rather than doing them all in one day. These small changes reduce strain on your system and help it function optimally.
What goes down your drains matters tremendously. Flush only human waste and toilet paper—never dispose of feminine hygiene products, dental floss, cat litter, medications, or paper towels through your plumbing. In the kitchen, avoid pouring grease, oils, or coffee grounds down the sink, as these substances clog pipes and interfere with bacterial breakdown in your tank.
Chemical choices make a difference too. Harsh household cleaners, antibacterial soaps, and drain openers can kill the beneficial bacteria that break down waste in your septic tank. Opt for biodegradable, eco-friendly cleaning products that work with your system rather than against it.
Finally, protect your drain field. Never park vehicles or heavy equipment over it, as compaction prevents proper drainage and oxygen flow. Avoid planting trees nearby—their roots can infiltrate and damage pipes. Keep the area clear of structures and maintain grass cover to prevent erosion. These protective measures ensure your drain field continues absorbing wastewater effectively for decades to come.
When Test Results Show Contamination: Your Action Plan
Discovering contamination in your well water can be alarming, but taking swift, informed action protects your household’s health. Here’s your step-by-step response plan.
Stop using the water immediately for drinking, cooking, or brushing teeth. Switch to bottled water as your primary short-term solution. If contamination is bacterial rather than chemical, boiling water for at least one minute kills most pathogens, making it safe for consumption. However, boiling doesn’t remove chemicals, heavy metals, or nitrates, so confirm your contamination type before relying on this method.
Contact your local health department within 24 hours of receiving positive contamination results. They’ll provide specific guidance based on your test findings and may conduct follow-up testing. This notification isn’t just good practice; in many areas, it’s required if you share your water source or if contamination could affect neighbors. Health officials can also identify whether nearby wells face similar issues, pointing to a broader environmental concern.
For immediate treatment, point-of-use filters certified for your specific contaminant offer temporary relief. Look for NSF-certified systems that address your exact problem, whether that’s bacteria, lead, or agricultural chemicals. These range from countertop units to under-sink installations.
Long-term solutions depend on contamination sources. Bacterial issues often require well disinfection, sometimes called shock chlorination, followed by retesting. Chemical contamination may necessitate advanced filtration systems, reverse osmosis units, or drilling a new well if the aquifer itself is compromised. Similar to addressing a septic system backup, professional assessment determines the most effective remediation approach.
Work with certified well contractors who understand local geology and regulations. They’ll identify whether contamination stems from surface infiltration, nearby pollution sources, or natural geological conditions. This investigation guides sustainable solutions that protect both your water quality and the broader environment.
Remember, retesting after treatment confirms your water’s safety and helps you establish appropriate ongoing monitoring schedules.
Eco-Friendly Solutions for Well and Septic Protection
Protecting your well and septic system doesn’t mean relying on harsh chemicals or expensive interventions. Natural, sustainable solutions often work better while safeguarding your groundwater and the environment.
Start with your septic system by choosing biological additives instead of chemical treatments. These eco-friendly products introduce beneficial bacteria that naturally break down waste, maintaining the delicate microbial balance your septic tank needs to function properly. Unlike harsh chemicals that can kill helpful bacteria and contaminate groundwater, natural enzymes and bacteria work with your system’s existing ecosystem. Just remember that a healthy septic system typically doesn’t need additives if you’re following proper maintenance practices.
Water conservation plays a crucial role in system protection. Installing low-flow fixtures, high-efficiency toilets, and energy-efficient appliances reduces the volume of water entering your septic system, preventing overload and extending its lifespan. Smart water management also protects your well by reducing the demand on groundwater resources, which is especially important during drought conditions.
Your landscaping choices directly impact groundwater quality. Plant native, deep-rooted vegetation around your well and drain field to naturally filter contaminants and prevent erosion. Avoid chemical fertilizers and pesticides within 100 feet of your well, opting instead for organic alternatives like compost and natural pest deterrents. Create rain gardens or bioswales to manage stormwater runoff, which can carry pollutants toward your water sources.
Consider innovative filtration systems that harness natural processes. Constructed wetlands and sand filtration systems provide effective treatment using nature’s own purification methods. These cutting-edge solutions remove contaminants while supporting local ecosystems, proving that the most advanced water protection technology often mimics what nature has perfected over millennia.
Creating Your Personal Testing and Maintenance Schedule
Creating a customized testing schedule ensures your well and septic system stay healthy while fitting your lifestyle and budget. Start by evaluating your unique circumstances: household size, the age of your systems, and any recent water quality changes.
For most homes, establish a baseline with annual testing for bacteria, nitrates, and pH levels. If you have more than four people in your household, pregnant family members, infants, or elderly residents, consider testing every six months. Properties near agricultural areas, gas stations, or industrial sites benefit from quarterly testing for specific contaminants relevant to nearby activities.
Mark testing dates on your calendar at the same time each year to track seasonal variations. Spring testing often reveals issues from snowmelt and runoff, while fall testing captures summer usage impacts. This consistency helps you identify patterns and catch problems early.
Maintain a dedicated water quality logbook—either digital or physical—recording test dates, results, weather conditions, and any household changes like new appliances or plumbing work. Include septic pumping dates, unusual odors, and slow drains. This historical record becomes invaluable when troubleshooting issues or demonstrating proper maintenance to potential home buyers.
Set reminders three weeks before testing dates to arrange laboratory kits or schedule professional services. Budget approximately 150 to 300 dollars annually for basic testing, adjusting based on your property’s specific needs.
Consider linking your testing schedule to routine home maintenance tasks you already perform, like furnace inspections or gutter cleaning, making it easier to remember and maintain long-term consistency in protecting your water quality.
Proactive testing and maintenance of your well and septic systems aren’t just routine chores—they’re smart investments in your family’s health and your property’s long-term value. The cost of annual testing pales in comparison to treating waterborne illnesses, replacing a failed septic system, or dealing with contaminated groundwater that affects your entire neighborhood. By establishing a regular testing schedule now, you’re taking control of your water quality before problems develop, rather than reacting to crises that could have been prevented.
Starting with basic annual testing creates the foundation of responsible well and septic ownership. Even if you’ve never tested your systems before, there’s no better time than today to begin this essential practice. A simple bacteria test and basic water quality panel give you immediate peace of mind and establish baseline data for future comparisons. As an environmentally-conscious homeowner, you’re already invested in sustainable living—protecting your groundwater through regular testing naturally extends that commitment to your local ecosystem.
Don’t wait for warning signs like unusual odors, discolored water, or slow drains. Take action now to schedule your first round of testing and join the growing community of homeowners who prioritize water safety and environmental stewardship.